
Installing OpenShift Container Platform with the Assisted Installer
User Guide
Abstract
Preface
Making open source more inclusive
Red Hat is committed to replacing problematic language in our code, documentation, and web properties. Because of the enormity of this endeavor, these changes are being updated gradually and where possible. For more details, see our CTO Chris Wright’s message.
Providing feedback on Red Hat documentation
You can provide feedback or report an error by submitting the Create Issue form in Jira. The Jira issue will be created in the Red Hat Hybrid Cloud Infrastructure Jira project, where you can track the progress of your feedback.
- Ensure that you are logged in to Jira. If you do not have a Jira account, create an account to submit feedback.
Click Create Issue
- Complete the Summary and Description fields. In the Description field, include the documentation URL, chapter or section number, and a detailed description of the issue. Do not modify any other fields in the form.
- Click Create.
We appreciate your feedback on our documentation.
Chapter 1. About the Assisted Installer
The Assisted Installer for Red Hat OpenShift Container Platform is a user-friendly installation solution offered on the Red Hat Hybrid Cloud Console. The Assisted Installer supports various deployment platforms with a focus on bare metal, Nutanix, vSphere, and Oracle Cloud Infrastructure.
You can install OpenShift Container Platform on premises in a connected environment, with an optional HTTP/S proxy, for the following platforms:
- Highly available OpenShift Container Platform or single-node OpenShift cluster
- OpenShift Container Platform on bare metal or vSphere with full platform integration, or other virtualization platforms without integration
- Optionally, OpenShift Virtualization and Red Hat OpenShift Data Foundation
1.1. Features
The Assisted Installer provides installation functionality as a service. This software-as-a-service (SaaS) approach has the following features:
- Web interface
- You can install your cluster by using the Hybrid Cloud Console instead of creating installation configuration files manually.
- No bootstrap node
- You do not need a bootstrap node because the bootstrapping process runs on a node within the cluster.
- Streamlined installation workflow
- You do not need in-depth knowledge of OpenShift Container Platform to deploy a cluster. The Assisted Installer provides reasonable default configurations.
- You do not need to run the OpenShift Container Platform installer locally.
- You have access to the latest Assisted Installer for the latest tested z-stream releases.
- Advanced networking options
- The Assisted Installer supports IPv4 networking with SDN and OVN, IPv6 and dual stack networking with OVN only, NMState-based static IP addressing, and an HTTP/S proxy.
- OVN is the default Container Network Interface (CNI) for OpenShift Container Platform 4.12 and later.
- SDN is supported up to OpenShift Container Platform 4.14 and deprecated in OpenShift Container Platform 4.15.
- Preinstallation validation
Before installing, the Assisted Installer checks the following configurations:
- Network connectivity
- Network bandwidth
- Connectivity to the registry
- Upstream DNS resolution of the domain name
- Time synchronization between cluster nodes
- Cluster node hardware
- Installation configuration parameters
- REST API
- You can automate the installation process by using the Assisted Installer REST API.
1.2. API support policy
Assisted Installer APIs are supported for a minimum of three months from the announcement of deprecation.
Chapter 2. Preparing to install with the Assisted Installer
Before installing a cluster, you must ensure the cluster nodes and network meet the requirements.
2.1. Prerequisites
- You reviewed details about the OpenShift Container Platform installation and update processes.
- You read the documentation on selecting a cluster installation method and preparing it for users.
- If you use a firewall, you must configure it so that Assisted Installer can access the resources it requires to function.
2.2. Assisted Installer prerequisites
The Assisted Installer validates the following prerequisites to ensure successful installation.
2.2.1. CPU architectures
The Assisted Installer is supported on the following CPU architectures:
- x86_64
- arm64
- ppc64le
- s390x
2.2.2. Hardware
For single-node OpenShift, the Assisted Installer requires one host with at least 8 CPU cores, 16 GiB RAM, and 100 GB disk size.
For multi-node clusters, control plane hosts must have at least the following resources:
- 4 CPU cores
- 16.00 GiB RAM
- 100 GB storage
-
10ms write speed or less for etcd
wal_fsync_duration_seconds
For multi-node clusters, worker hosts must have at least the following resources:
- 2 CPU cores
- 8.00 GiB RAM
- 100 GB storage
For hosts of type VMware, set clusterSet disk.enableUUID to true, even when the platform is not vSphere.
2.2.3. Networking
The network must meet the following requirements:
- A DHCP server unless using static IP addressing.
A base domain name. You must ensure that the following requirements are met:
-
There is no wildcard, such as
*.<cluster_name>.<base_domain>, or the installation will not proceed. -
A DNS A/AAAA record for
api.<cluster_name>.<base_domain>. -
A DNS A/AAAA record with a wildcard for
*.apps.<cluster_name>.<base_domain>.
-
There is no wildcard, such as
-
Port
6443is open for the API URL if you intend to allow users outside the firewall to access the cluster via theocCLI tool. -
Port
443is open for the console if you intend to allow users outside the firewall to access the console. - A DNS A/AAAA record for each node in the cluster when using User Managed Networking, or the installation will not proceed. DNS A/AAAA records are required for each node in the cluster when using Cluster Managed Networking after installation is complete in order to connect to the cluster, but installation can proceed without the A/AAAA records when using Cluster Managed Networking.
- A DNS PTR record for each node in the cluster if you want to boot with the preset hostname when using static IP addressing. Otherwise, the Assisted Installer has an automatic node renaming feature when using static IP addressing that will rename the nodes to their network interface MAC address.
- DNS A/AAAA record settings at top-level domain registrars can take significant time to update. Ensure the A/AAAA record DNS settings are working before installation to prevent installation delays.
- For DNS record examples, see Example DNS configuration in this chapter.
The OpenShift Container Platform cluster’s network must also meet the following requirements:
- Connectivity between all cluster nodes
- Connectivity for each node to the internet
- Access to an NTP server for time synchronization between the cluster nodes
2.2.4. Example DNS configuration
This section provides A and PTR record configuration examples that meet the DNS requirements for deploying OpenShift Container Platform using the Assisted Installer. The examples are not meant to provide advice for choosing one DNS solution over another.
In the examples, the cluster name is ocp4 and the base domain is example.com.
2.2.4.1. Example DNS A record configuration
The following example is a BIND zone file that shows sample A records for name resolution in a cluster installed using the Assisted Installer.
Example DNS zone database
$TTL 1W
@	IN	SOA	ns1.example.com.	root (
			2019070700	; serial
			3H		; refresh (3 hours)
			30M		; retry (30 minutes)
			2W		; expiry (2 weeks)
			1W )		; minimum (1 week)
	IN	NS	ns1.example.com.
	IN	MX 10	smtp.example.com.
;
;
ns1.example.com.		IN	A	192.168.1.1
smtp.example.com.		IN	A	192.168.1.5
;
helper.example.com.		IN	A	192.168.1.5
;
api.ocp4.example.com.		IN	A	192.168.1.5 1
api-int.ocp4.example.com.	IN	A	192.168.1.5 2
;
*.apps.ocp4.example.com.	IN	A	192.168.1.5 3
;
control-plane0.ocp4.example.com.	IN	A	192.168.1.97 4
control-plane1.ocp4.example.com.	IN	A	192.168.1.98
control-plane2.ocp4.example.com.	IN	A	192.168.1.99
;
worker0.ocp4.example.com.	IN	A	192.168.1.11 5
worker1.ocp4.example.com.	IN	A	192.168.1.7
;
;EOF
- 1
- Provides name resolution for the Kubernetes API. The record refers to the IP address of the API load balancer.
- 2
- Provides name resolution for the Kubernetes API. The record refers to the IP address of the API load balancer and is used for internal cluster communications.
- 3
- Provides name resolution for the wildcard routes. The record refers to the IP address of the application ingress load balancer. The application ingress load balancer targets the machines that run the Ingress Controller pods. The Ingress Controller pods run on the worker machines by default.Note
In the example, the same load balancer is used for the Kubernetes API and application ingress traffic. In production scenarios, you can deploy the API and application ingress load balancers separately so that you can scale the load balancer infrastructure for each in isolation.
- 4
- Provides name resolution for the control plane machines.
- 5
- Provides name resolution for the worker machines.
2.2.4.2. Example DNS PTR record configuration
The following example is a BIND zone file that shows sample PTR records for reverse name resolution in a cluster installed using the Assisted Installer.
Example DNS zone database for reverse records
$$TTL 1W
@	IN	SOA	ns1.example.com.	root (
			2019070700	; serial
			3H		; refresh (3 hours)
			30M		; retry (30 minutes)
			2W		; expiry (2 weeks)
			1W )		; minimum (1 week)
	IN	NS	ns1.example.com.
;
5.1.168.192.in-addr.arpa.	IN	PTR	api.ocp4.example.com. 1
5.1.168.192.in-addr.arpa.	IN	PTR	api-int.ocp4.example.com. 2
;
97.1.168.192.in-addr.arpa.	IN	PTR	control-plane0.ocp4.example.com. 3
98.1.168.192.in-addr.arpa.	IN	PTR	control-plane1.ocp4.example.com.
99.1.168.192.in-addr.arpa.	IN	PTR	control-plane2.ocp4.example.com.
;
11.1.168.192.in-addr.arpa.	IN	PTR	worker0.ocp4.example.com. 4
7.1.168.192.in-addr.arpa.	IN	PTR	worker1.ocp4.example.com.
;
;EOF
- 1
- Provides reverse DNS resolution for the Kubernetes API. The PTR record refers to the record name of the API load balancer.
- 2
- Provides reverse DNS resolution for the Kubernetes API. The PTR record refers to the record name of the API load balancer and is used for internal cluster communications.
- 3
- Provides reverse DNS resolution for the control plane machines.
- 4
- Provides reverse DNS resolution for the worker machines.Note
A PTR record is not required for the OpenShift Container Platform application wildcard.
2.2.5. Preflight validations
The Assisted Installer ensures the cluster meets the prerequisites before installation, because it eliminates complex postinstallation troubleshooting, thereby saving significant amounts of time and effort. Before installing software on the nodes, the Assisted Installer conducts the following validations:
- Ensures network connectivity
- Ensures sufficient network bandwidth
- Ensures connectivity to the registry
- Ensures that any upstream DNS can resolve the required domain name
- Ensures time synchronization between cluster nodes
- Verifies that the cluster nodes meet the minimum hardware requirements
- Validates the installation configuration parameters
If the Assisted Installer does not successfully validate the foregoing requirements, installation will not proceed.
Chapter 3. Installing with the Assisted Installer UI
After you ensure the cluster nodes and network requirements are met, you can begin installing the cluster.
3.1. Preinstallation considerations
Before installing OpenShift Container Platform with the Assisted Installer, you must consider the following configuration choices:
- Which base domain to use
- Which OpenShift Container Platform product version to install
- Whether to install a full cluster or single-node OpenShift
- Whether to use a DHCP server or a static network configuration
- Whether to use IPv4 or dual-stack networking
- Whether to install OpenShift Virtualization
- Whether to install Red Hat OpenShift Data Foundation
- Whether to install multicluster engine (MCE)
- Whether to integrate with the platform when installing on vSphere or Nutanix
- Whether to install a mixed-cluster architecture
3.2. Setting the cluster details
To create a cluster with the Assisted Installer web user interface, use the following procedure.
Procedure
- Log in to the Red Hat Hybrid Cloud Console.
- In the Red Hat OpenShift tile, click Scale your applications.
- In the menu, click Clusters.
- Click Create cluster.
- Click the Datacenter tab.
- Under Assisted Installer, click Create cluster.
- Enter a name for the cluster in the Cluster name field.
Enter a base domain for the cluster in the Base domain field. All subdomains for the cluster will use this base domain.
NoteThe base domain must be a valid DNS name. You must not have a wild card domain set up for the base domain.
Select the version of OpenShift Container Platform to install.
Important- For IBM Power and IBM zSystems platforms, only OpenShift Container Platform 4.13 and later is supported.
-
For a mixed-architecture cluster installation, select OpenShift Container Platform 4.12 or later, and use the
-multioption. For instructions on installing a mixed-architecture cluster, see Additional resources.
Optional: Select Install single node Openshift (SNO) if you want to install OpenShift Container Platform on a single node.
NoteCurrently, SNO is not supported on IBM zSystems and IBM Power platforms.
- Optional: The Assisted Installer already has the pull secret associated to your account. If you want to use a different pull secret, select Edit pull secret.
Optional: If you are installing OpenShift Container Platform on a third-party platform, select the platform from the Integrate with external parter platforms list. Valid values are
Nutanix,vSphereorOracle Cloud Infrastructure. Assisted Installer defaults to having no platform integration.NoteFor details on each of the external partner integrations, see Additional Resources.
ImportantAssisted Installer supports Oracle Cloud Infrastructure (OCI) integration from OpenShift Container Platform 4.14 and later. For OpenShift Container Platform 4.14, the OCI integration is a Technology Preview feature only. Technology Preview features are not supported with Red Hat production service level agreements (SLAs) and might not be functionally complete. Red Hat does not recommend using them in production. These features provide early access to upcoming product features, enabling customers to test functionality and provide feedback during the development process.
For more information about the support scope of Red Hat Technology Preview features, see Technology Preview Features - Scope of Support.
Optional: Assisted Installer defaults to using
x86_64CPU architecture. If you are installing OpenShift Container Platform on a different architecture select the respective architecture to use. Valid values arearm64,ppc64le, ands390x. Keep in mind, some features are not available witharm64,ppc64le, ands390xCPU architectures.ImportantFor a mixed-architecture cluster installation, use the default
x86_64architecture. For instructions on installing a mixed-architecture cluster, see Additional resources.Optional: Select Include custom manifests if you have at least one custom manifest to include in the installation. A custom manifest contains additional configurations not currently supported in the Assisted Installer. Selecting the checkbox adds the Custom manifests page to the wizard, where you upload the manifests.
Important- If you are installing OpenShift Container Platform on the Oracle Cloud Infrastructure (OCI) third-party platform, it is mandatory to add the custom manifests provided by Oracle.
- If you have already added custom manifests, unchecking the Include custom manifests box automatically deletes them all. You will be asked to confirm the deletion.
Optional: The Assisted Installer defaults to DHCP networking. If you are using a static IP configuration, bridges or bonds for the cluster nodes instead of DHCP reservations, select Static IP, bridges, and bonds.
NoteA static IP configuration is not supported for OpenShift Container Platform installations on Oracle Cloud Infrastructure.
- Optional: If you want to enable encryption of the installation disks, under Enable encryption of installation disks you can select Control plane node, worker for single-node OpenShift. For multi-node clusters, you can select Control plane nodes to encrypt the control plane node installation disks and select Workers to encrypt worker node installation disks.
You cannot change the base domain, the SNO checkbox, the CPU architecture, the host’s network configuration, or the disk-encryption after installation begins.
3.3. Optional: Configuring static networks
The Assisted Installer supports IPv4 networking with SDN up to OpenShift Container Platform 4.14 and OVN, and supports IPv6 and dual stack networking with OVN only. The Assisted Installer supports configuring the network with static network interfaces with IP address/MAC address mapping. The Assisted Installer also supports configuring host network interfaces with the NMState library, a declarative network manager API for hosts. You can use NMState to deploy hosts with static IP addressing, bonds, VLANs and other advanced networking features. First, you must set network-wide configurations. Then, you must create a host-specific configuration for each host.
For installations on IBM Z with z/VM, ensure that the z/VM nodes and vSwitches are properly configured for static networks and NMState. Also, the z/VM nodes must have a fixed MAC address assigned as the pool MAC addresses might cause issues with NMState.
Procedure
- Select the internet protocol version. Valid options are IPv4 and Dual stack.
- If the cluster hosts are on a shared VLAN, enter the VLAN ID.
Enter the network-wide IP addresses. If you selected Dual stack networking, you must enter both IPv4 and IPv6 addresses.
- Enter the cluster network’s IP address range in CIDR notation.
- Enter the default gateway IP address.
- Enter the DNS server IP address.
Enter the host-specific configuration.
- If you are only setting a static IP address that uses a single network interface, use the form view to enter the IP address and the MAC address for each host.
- If you use multiple interfaces, bonding, or other advanced networking features, use the YAML view and enter the desired network state for each host that uses NMState syntax. Then, add the MAC address and interface name for each host interface used in your network configuration.
Additional resources
3.4. Optional: Installing Operators
This step is optional.
See the product documentation for prerequisites and configuration options:
If you require advanced options, install the Operators after you have installed the cluster.
Procedure
Select one or more from the following options:
- Install OpenShift Virtualization
- Install multicluster engine
- Install OpenShift Data Foundation
- Install Logical Volume Manager
- Click Next.
3.5. Adding hosts to the cluster
You must add one or more hosts to the cluster. Adding a host to the cluster involves generating a discovery ISO. The discovery ISO runs Red Hat Enterprise Linux CoreOS (RHCOS) in-memory with an agent.
Perform the following procedure for each host on the cluster.
Procedure
Click the Add hosts button and select the provisioning type.
-
Select Minimal image file: Provision with virtual media to download a smaller image that will fetch the data needed to boot. The nodes must have virtual media capability. This is the recommended method for
x86_64andarm64architectures. -
Select Full image file: Provision with physical media to download the larger full image. This is the recommended method for the
ppc64learchitecture and for thes390xarchitecture when installing with RHEL KVM. Select iPXE: Provision from your network server to boot the hosts using iPXE. This is the recommended method for IBM Z with z/VM nodes. ISO boot is the recommended method on the RHEL KVM installation.
Note- If you install on RHEL KVM, in some circumstances, the VMs on the KVM host are not rebooted on first boot and need to be restarted manually.
- If you install OpenShift Container Platform on Oracle Cloud Infrastructure, select Minimal image file: Provision with virtual media only.
-
Select Minimal image file: Provision with virtual media to download a smaller image that will fetch the data needed to boot. The nodes must have virtual media capability. This is the recommended method for
- Optional: If the cluster hosts are behind a firewall that requires the use of a proxy, select Configure cluster-wide proxy settings. Enter the username, password, IP address and port for the HTTP and HTTPS URLs of the proxy server.
Optional: Add an SSH public key so that you can connect to the cluster nodes as the
coreuser. Having a login to the cluster nodes can provide you with debugging information during the installation.ImportantDo not skip this procedure in production environments, where disaster recovery and debugging is required.
- If you do not have an existing SSH key pair on your local machine, follow the steps in Generating a key pair for cluster node SSH access.
-
In the SSH public key field, click Browse to upload the
id_rsa.pubfile containing the SSH public key. Alternatively, drag and drop the file into the field from the file manager. To see the file in the file manager, select Show hidden files in the menu.
- Optional: If the cluster hosts are in a network with a re-encrypting man-in-the-middle (MITM) proxy, or if the cluster needs to trust certificates for other purposes such as container image registries, select Configure cluster-wide trusted certificates. Add additional certificates in X.509 format.
- Configure the discovery image if needed.
- Optional: If you are installing on a platform and want to integrate with the platform, select Integrate with your virtualization platform. You must boot all hosts and ensure they appear in the host inventory. All the hosts must be on the same platform.
- Click Generate Discovery ISO or Generate Script File.
- Download the discovery ISO or iPXE script.
- Boot the host(s) with the discovery image or iPXE script.
Additional resources
- Configuring the discovery image for additional details.
- Booting hosts with the discovery image for additional details.
- Red Hat Enterprise Linux 9 - Configuring and managing virtualization for additional details.
- How to configure a VIOS Media Repository/Virtual Media Library for additional details.
- Adding hosts on Nutanix with the UI
- Adding hosts on vSphere
3.6. Configuring hosts
After booting the hosts with the discovery ISO, the hosts will appear in the table at the bottom of the page. You can optionally configure the hostname and role for each host. You can also delete a host if necessary.
Procedure
From the Options (⋮) menu for a host, select Change hostname. If necessary, enter a new name for the host and click Change. You must ensure that each host has a valid and unique hostname.
Alternatively, from the Actions list, select Change hostname to rename multiple selected hosts. In the Change Hostname dialog, type the new name and include
{{n}}to make each hostname unique. Then click Change.NoteYou can see the new names appearing in the Preview pane as you type. The name will be identical for all selected hosts, with the exception of a single-digit increment per host.
From the Options (⋮) menu, you can select Delete host to delete a host. Click Delete to confirm the deletion.
Alternatively, from the Actions list, select Delete to delete multiple selected hosts at the same time. Then click Delete hosts.
NoteIn a regular deployment, a cluster can have three or more hosts, and three of these must be control plane hosts. If you delete a host that is also a control plane, or if you are left with only two hosts, you will get a message saying that the system is not ready. To restore a host, you will need to reboot it from the discovery ISO.
- From the Options (⋮) menu for the host, optionally select View host events. The events in the list are presented chronologically.
For multi-host clusters, in the Role column next to the host name, you can click on the menu to change the role of the host.
If you do not select a role, the Assisted Installer will assign the role automatically. The minimum hardware requirements for control plane nodes exceed that of worker nodes. If you assign a role to a host, ensure that you assign the control plane role to hosts that meet the minimum hardware requirements.
- Click the Status link to view hardware, network and operator validations for the host.
- Click the arrow to the left of a host name to expand the host details.
Once all cluster hosts appear with a status of Ready, proceed to the next step.
3.7. Configuring storage disks
Each of the hosts retrieved during host discovery can have multiple storage disks. The storage disks are listed for the host on the Storage page of the Assisted Installer wizard.
You can optionally modify the default configurations for each disk.
Changing the installation disk
The Assisted Installer randomly assigns an installation disk by default. If there are multiple storage disks for a host, you can select a different disk to be the installation disk. This automatically unassigns the previous disk.
Procedure
- Navigate to the Storage page of the wizard.
- Expand a host to display the associated storage disks.
- Select Installation disk from the Role list.
- When all storage disks return to Ready status, proceed to the next step.
Disabling disk formatting
The Assisted Installer marks all bootable disks for formatting during the installation process by default, regardless of whether or not they have been defined as the installation disk. Formatting causes data loss.
You can choose to disable the formatting of a specific disk. This should be performed with caution, as bootable disks may interfere with the installation process, mainly in terms of boot order.
You cannot disable formatting for the installation disk.
Procedure
- Navigate to the Storage page of the wizard.
- Expand a host to display the associated storage disks.
- Clear Format for a disk.
- When all storage disks return to Ready status, proceed to the next step.
Additional resources
3.8. Configuring networking
Before installing OpenShift Container Platform, you must configure the cluster network.
Procedure
In the Networking page, select one of the following if it is not already selected for you:
Cluster-Managed Networking: Selecting cluster-managed networking means that the Assisted Installer will configure a standard network topology, including
keepalivedand Virtual Router Redundancy Protocol (VRRP) for managing the API and Ingress VIP addresses.Note- Currently, Cluster-Managed Networking is not supported on IBM zSystems and IBM Power in OpenShift Container Platform version 4.13.
- Oracle Cloud Infrastructure (OCI) is available for OpenShift Container Platform 4.14 with a user-managed networking configuration only.
-
User-Managed Networking: Selecting user-managed networking allows you to deploy OpenShift Container Platform with a non-standard network topology. For example, if you want to deploy with an external load balancer instead of
keepalivedand VRRP, or if you intend to deploy the cluster nodes across many distinct L2 network segments.
For cluster-managed networking, configure the following settings:
- Define the Machine network. You can use the default network or select a subnet.
- Define an API virtual IP. An API virtual IP provides an endpoint for all users to interact with, and configure the platform.
- Define an Ingress virtual IP. An Ingress virtual IP provides an endpoint for application traffic flowing from outside the cluster.
For user-managed networking, configure the following settings:
Select your Networking stack type:
- IPv4: Select this type when your hosts are only using IPv4.
- Dual-stack: You can select dual-stack when your hosts are using IPv4 together with IPv6.
- Define the Machine network. You can use the default network or select a subnet.
- Define an API virtual IP. An API virtual IP provides an endpoint for all users to interact with, and configure the platform.
- Define an Ingress virtual IP. An Ingress virtual IP provides an endpoint for application traffic flowing from outside the cluster.
- Optional: You can select Allocate IPs via DHCP server to automatically allocate the API IP and Ingress IP using the DHCP server.
Optional: Select Use advanced networking to configure the following advanced networking properties:
- Cluster network CIDR: Define an IP address block from which Pod IP addresses are allocated.
- Cluster network host prefix: Define a subnet prefix length to assign to each node.
- Service network CIDR: Define an IP address to use for service IP addresses.
- Network type: Select either Software-Defined Networking (SDN) for standard networking or Open Virtual Networking (OVN) for IPv6, dual-stack networking, and telco features. In OpenShift Container Platform 4.12 and later releases, OVN is the default Container Network Interface (CNI). In OpenShift Container Platform 4.15 and later releases, Software-Defined Networking (SDN) is not supported.
Additional resources
3.9. Adding custom manifests
A custom manifest is a JSON or YAML file that contains advanced configurations not currently supported in the Assisted Installer user interface. You can create a custom manifest or use one provided by a third party.
You can upload a custom manifest from your file system to either the openshift folder or the manifests folder. There is no limit to the number of custom manifest files permitted.
Only one file can be uploaded at a time. However, each uploaded YAML file can contain multiple custom manifests. Uploading a multi-document YAML manifest is faster than adding the YAML files individually.
For a file containing a single custom manifest, accepted file extensions include .yaml, .yml, or .json.
Single custom manifest example
apiVersion: machineconfiguration.openshift.io/v1
kind: MachineConfig
metadata:
  labels:
    machineconfiguration.openshift.io/role: master
  name: 99-openshift-machineconfig-master-kargs
spec:
  kernelArguments:
    - loglevel=7
For a file containing multiple custom manifests, accepted file types include .yaml or .yml.
Multiple custom manifest example
apiVersion: machineconfiguration.openshift.io/v1
kind: MachineConfig
metadata:
  labels:
    machineconfiguration.openshift.io/role: master
  name: 99-openshift-machineconfig-master-kargs
spec:
  kernelArguments:
    - loglevel=7
---
apiVersion: machineconfiguration.openshift.io/v2
kind: MachineConfig
metadata:
  labels:
    machineconfiguration.openshift.io/role: worker
  name: 98-openshift-machineconfig-worker-kargs
spec:
  kernelArguments:
    - loglevel=5
- When you install OpenShift Container Platform on the Oracle Cloud Infrastructure (OCI) external platform, you must add the custom manifests provided by Oracle. For additional external partner integrations such as vSphere or Nutanix, this step is optional.
- For more information about custom manifests, see Additional Resources.
Uploading a custom manifest in the Assisted Installer user interface
When uploading a custom manifest, enter the manifest filename and select a destination folder.
Prerequisites
- You have at least one custom manifest file saved in your file system.
Procedure
- On the Cluster details page of the wizard, select the Include custom manifests checkbox.
- On the Custom manifest page, in the folder field, select the Assisted Installer folder where you want to save the custom manifest file. Options include openshift or manifest.
- In the Filename field, enter a name for the manifest file, including the extension. For example, manifest1.json or multiple1.yaml.
- Under Content, click the Upload icon or Browse button to upload a file. Alternatively, drag the file into the Content field from your file system.
- To upload another manifest, click Add another manifest and repeat the process. This saves the previously uploaded manifest.
- Click Next to save all manifests and proceed to the Review and create page. The uploaded custom manifests are listed under Custom manifests.
Modifying a custom manifest in the Assisted Installer user interface
You can change the folder and file name of an uploaded custom manifest. You can also copy the content of an existing manifest, or download it to the folder defined in the Chrome download settings.
It is not possible to modify the content of an uploaded manifest. However, you can overwrite the file.
Prerequisites
- You have uploaded at least one custom manifest file.
Procedure
- To change the folder, select a different folder for the manifest from the Folder list.
- To modify the file name, type the new name for the manifest in the File name field.
- To overwrite a manifest, save the new manifest in the same folder with the same file name.
- To save a manifest as a file in your file system, click the Download icon.
- To copy the manifest, click the Copy to clipboard icon.
- To apply the changes, click either Add another manifest or Next.
Removing custom manifests in the Assisted Installer user interface
You can remove uploaded custom manifests before installation in one of two ways:
- Removing one or more manifests individually.
- Removing all manifests at once.
Once you have removed a manifest you cannot undo the action. The workaround is to upload the manifest again.
Removing a single manifest
You can delete one manifest at a time. This option does not allow you to delete the last remaining manifest.
Prerequisites
- You have uploaded at least two custom manifest files.
Procedure
- Navigate to the Custom manifests page.
- Hover over the manifest name to display the Delete (minus) icon.
- Click the icon and then click Delete in the dialog box.
Removing all manifests
You can remove all custom manifests at once. This also hides the Custom manifest page.
Prerequisites
- You have uploaded at least one custom manifest file.
Procedure
- Navigate to the Cluster details page of the wizard.
- Clear the Include custom manifests checkbox.
- In the Remove custom manifests dialog box, click Remove.
Additional resources
3.10. Preinstallation validations
The Assisted Installer ensures the cluster meets the prerequisites before installation, because it eliminates complex postinstallation troubleshooting, thereby saving significant amounts of time and effort. Before installing the cluster, ensure the cluster and each host pass preinstallation validation.
Additional resources
3.11. Installing the cluster
After you have completed the configuration and all the nodes are Ready, you can begin installation. The installation process takes a considerable amount of time, and you can monitor the installation from the Assisted Installer web console. Nodes will reboot during the installation, and they will initialize after installation.
Procedure
- Press Begin installation.
- Click the link in the Status column of the Host Inventory list to see the installation status of a particular host.
3.12. Completing the installation
After the cluster is installed and initialized, the Assisted Installer indicates that the installation is finished. The Assisted Installer provides the console URL, the kubeadmin username and password, and the kubeconfig file. Additionally, the Assisted Installer provides cluster details including the OpenShift Container Platform version, base domain, CPU architecture, API and Ingress IP addresses, and the cluster and service network IP addresses.
Prerequisites
-
You have installed the
ocCLI tool.
Procedure
-
Make a copy of the
kubeadminusername and password. Download the
kubeconfigfile and copy it to theauthdirectory under your working directory:$ mkdir -p <working_directory>/auth
$ cp kubeadmin <working_directory>/auth
NoteThe
kubeconfigfile is available for download for 24 hours after completing the installation.Add the
kubeconfigfile to your environment:$ export KUBECONFIG=<your working directory>/auth/kubeconfig
Login with the
ocCLI tool:$ oc login -u kubeadmin -p <password>
Replace
<password>with the password of thekubeadminuser.- Click the web console URL or click Launch OpenShift Console to open the console.
-
Enter the
kubeadminusername and password. Follow the instructions in the OpenShift Container Platform console to configure an identity provider and configure alert receivers. - Add a bookmark of the OpenShift Container Platform console.
- Complete any postinstallation platform integration steps.
Additional resources
Chapter 4. Installing with the Assisted Installer API
After you ensure the cluster nodes and network requirements are met, you can begin installing the cluster using the Assisted Installer API. To use the API, you must perform the following procedures:
- Set up the API authentication.
- Configure the pull secret.
- Register a new cluster definition.
- Create an infrastructure environment for the cluster.
Once you perform these steps, you can modify the cluster definition, create discovery ISOs, add hosts to the cluster, and install the cluster. This document does not cover every endpoint of the Assisted Installer API, but you can review all of the endpoints in the API viewer or the swagger.yaml file.
4.1. Generating the offline token
Download the offline token from the Assisted Installer UI. You will use the offline token to set the API token.
Prerequisites
-
Install
jq. - Log in to the OpenShift Cluster Manager as a user with cluster creation privileges.
Procedure
- In the menu, click Downloads.
- In the Tokens section under OpenShift Cluster Manager API Token, click View API Token.
Click Load Token.
ImportantDisable pop-up blockers.
- In the Your API token section, copy the offline token.
In your terminal, set the offline token to the
OFFLINE_TOKENvariable:$ export OFFLINE_TOKEN=<copied_token>
TipTo make the offline token permanent, add it to your profile.
(Optional) Confirm the
OFFLINE_TOKENvariable definition.$ echo ${OFFLINE_TOKEN}
4.2. Authenticating with the REST API
API calls require authentication with the API token. Assuming you use API_TOKEN as a variable name, add -H "Authorization: Bearer ${API_TOKEN}" to API calls to authenticate with the REST API.
The API token expires after 15 minutes.
Prerequisites
-
You have generated the
OFFLINE_TOKENvariable.
Procedure
On the command line terminal, set the
API_TOKENvariable using theOFFLINE_TOKENto validate the user.$ export API_TOKEN=$( \ curl \ --silent \ --header "Accept: application/json" \ --header "Content-Type: application/x-www-form-urlencoded" \ --data-urlencode "grant_type=refresh_token" \ --data-urlencode "client_id=cloud-services" \ --data-urlencode "refresh_token=${OFFLINE_TOKEN}" \ "https://sso.redhat.com/auth/realms/redhat-external/protocol/openid-connect/token" \ | jq --raw-output ".access_token" \ )
Confirm the
API_TOKENvariable definition:$ echo ${API_TOKEN}Create a script in your path for one of the token generating methods. For example:
$ vim ~/.local/bin/refresh-token
export API_TOKEN=$( \
  curl \
  --silent \
  --header "Accept: application/json" \
  --header "Content-Type: application/x-www-form-urlencoded" \
  --data-urlencode "grant_type=refresh_token" \
  --data-urlencode "client_id=cloud-services" \
  --data-urlencode "refresh_token=${OFFLINE_TOKEN}" \
  "https://sso.redhat.com/auth/realms/redhat-external/protocol/openid-connect/token" \
  | jq --raw-output ".access_token" \
)
Then, save the file.
Change the file mode to make it executable:
$ chmod +x ~/.local/bin/refresh-token
Refresh the API token:
$ source refresh-token
Verify that you can access the API by running the following command:
$ curl -s https://api.openshift.com/api/assisted-install/v2/component-versions -H "Authorization: Bearer ${API_TOKEN}" | jqExample output
{
  "release_tag": "v2.11.3",
  "versions": {
    "assisted-installer": "registry.redhat.io/rhai-tech-preview/assisted-installer-rhel8:v1.0.0-211",
    "assisted-installer-controller": "registry.redhat.io/rhai-tech-preview/assisted-installer-reporter-rhel8:v1.0.0-266",
    "assisted-installer-service": "quay.io/app-sre/assisted-service:78d113a",
    "discovery-agent": "registry.redhat.io/rhai-tech-preview/assisted-installer-agent-rhel8:v1.0.0-195"
  }
}
4.3. Configuring the pull secret
Many of the Assisted Installer API calls require the pull secret. Download the pull secret to a file so that you can reference it in API calls. The pull secret is a JSON object that will be included as a value within the request’s JSON object. The pull secret JSON must be formatted to escape the quotes. For example:
Before
{"auths":{"cloud.openshift.com": ...
After
{\"auths\":{\"cloud.openshift.com\": ...
Procedure
- In the menu, click OpenShift.
- In the submenu, click Downloads.
- In the Tokens section under Pull secret, click Download.
To use the pull secret from a shell variable, execute the following command:
$ export PULL_SECRET=$(cat ~/Downloads/pull-secret.txt | jq -R .)
To slurp the pull secret file using
jq, reference it in thepull_secretvariable, piping the value totojsonto ensure that it is properly formatted as escaped JSON. For example:$ curl https://api.openshift.com/api/assisted-install/v2/clusters \ -H "Authorization: Bearer ${API_TOKEN}" \ -H "Content-Type: application/json" \ -d "$(jq --null-input \ --slurpfile pull_secret ~/Downloads/pull-secret.txt ' 1 { "name": "testcluster", "high_availability_mode": "None", "openshift_version": "4.11", "pull_secret": $pull_secret[0] | tojson, 2 "base_dns_domain": "example.com" } ')"Confirm the
PULL_SECRETvariable definition:$ echo ${PULL_SECRET}
4.4. Optional: Generating the SSH public key
During the installation of OpenShift Container Platform, you can optionally provide an SSH public key to the installation program. This is useful for initiating an SSH connection to a remote node when troubeshooting an installation error.
If you do not have an existing SSH key pair on your local machine to use for the authentication, create one now.
Prerequisites
-
Generate the
OFFLINE_TOKENandAPI_TOKENvariables.
Procedure
From the root user in your terminal, get the SSH public key:
$ cat /root/.ssh/id_rsa.pub
Set the SSH public key to the
CLUSTER_SSHKEYvariable:$ CLUSTER_SSHKEY=<downloaded_ssh_key>
Confirm the
CLUSTER_SSHKEYvariable definition:$ echo ${CLUSTER_SSHKEY}
4.5. Registering a new cluster
To register a new cluster definition with the API, use the /v2/clusters endpoint. Registering a new cluster requires the following settings:
-
name -
openshift-version -
pull_secret -
cpu_architecture
See the cluster-create-params model in the API viewer for details on the fields you can set when registering a new cluster. When setting the olm_operators field, see Additional Resources for details on installing Operators.
After you create the cluster definition, you can modify the cluster definition and provide values for additional settings.
- For certain installation platforms and OpenShift Container Platform versions, you can also create a mixed-architecture cluster by combining two different architectures on the same cluster. For details, see Additional Resources.
- If you are installing OpenShift Container Platform on a third-party platform, see Additional Resources for the relevant instructions.
Prerequisites
-
You have generated a valid
API_TOKEN. Tokens expire every 15 minutes. - You have downloaded the pull secret.
-
Optional: You have assigned the pull secret to the
$PULL_SECRETvariable.
Procedure
Refresh the API token:
$ source refresh-token
Register a new cluster.
Optional: You can register a new cluster by slurping the pull secret file in the request:
$ curl -s -X POST https://api.openshift.com/api/assisted-install/v2/clusters \ -H "Authorization: Bearer ${API_TOKEN}" \ -H "Content-Type: application/json" \ -d "$(jq --null-input \ --slurpfile pull_secret ~/Downloads/pull-secret.txt ' { "name": "testcluster", "openshift_version": "4.11", "cpu_architecture" : "<architecture_name>", 1 "high_availability_mode": "<cluster_type>", 2 "base_dns_domain": "example.com", "pull_secret": $pull_secret[0] | tojson } ')" | jq '.id'Note- 1
- Use any of the following values:
x86_64,arm64,ppc64le,s390x,multi. For a mixed-architecture cluster, only usemulti. - 2
- Use the default value
Fullto represent a multi-node OpenShift Container Platform cluster, orNoneto represent a single-node OpenShift cluster.Fullinstalls ahighly-availablecluster over multiple master nodes, and guarantees the availability of the installed cluster.Noneinstalls a full cluster over one node.
Optional: You can register a new cluster by writing the configuration to a JSON file and then referencing it in the request:
cat << EOF > cluster.json { "name": "testcluster", "openshift_version": "4.11", "high_availability_mode": "<cluster_type>", 1 "base_dns_domain": "example.com", "network_type": "examplenetwork", "cluster_network_cidr":"11.111.1.0/14" "cluster_network_host_prefix": 11, "service_network_cidr": "111.11.1.0/16", "api_vips":[{"ip": ""}], "ingress_vips": [{"ip": ""}], "vip_dhcp_allocation": false, "additional_ntp_source": "clock.redhat.com,clock2.redhat.com", "ssh_public_key": "$CLUSTER_SSHKEY", "pull_secret": $PULL_SECRET } EOFNote- 1
- Use the default value
Fullto represent a multi-node OpenShift Container Platform cluster, orNoneto represent a single-node OpenShift cluster.Fullinstalls ahighly-availablecluster over multiple master nodes, and guarantees the availability of the installed cluster.Noneinstalls a full cluster over one node.
$ curl -s -X POST "https://api.openshift.com/api/assisted-install/v2/clusters" \
  -d @./cluster.json \
  -H "Content-Type: application/json" \
  -H "Authorization: Bearer $API_TOKEN" \
  | jq '.id'
Assign the returned
cluster_idto theCLUSTER_IDvariable and export it:$ export CLUSTER_ID=<cluster_id>
NoteIf you close your terminal session, you need to export the
CLUSTER_IDvariable again in a new terminal session.Check the status of the new cluster:
$ curl -s -X GET "https://api.openshift.com/api/assisted-install/v2/clusters/$CLUSTER_ID" \
  -H "Content-Type: application/json" \
  -H "Authorization: Bearer $API_TOKEN" \
  | jq
Once you register a new cluster definition, create the infrastructure environment for the cluster.
You cannot see the cluster configuration settings in the Assisted Installer user interface until you create the infrastructure environment.
Additional resources
4.5.1. Optional: Installing Operators
You can install the following Operators when you register a new cluster:
OpenShift Virtualization Operator
NoteCurrently, OpenShift Virtualization is not supported on IBM zSystems and IBM Power.
- Multicluster engine Operator
- OpenShift Data Foundation Operator
- LVM Storage Operator
If you require advanced options, install the Operators after you have installed the cluster.
Procedure
Run the following command:
$ curl -s -X POST https://api.openshift.com/api/assisted-install/v2/clusters \ -H "Authorization: Bearer ${API_TOKEN}" \ -H "Content-Type: application/json" \ -d "$(jq --null-input \ --slurpfile pull_secret ~/Downloads/pull-secret.txt ' { "name": "testcluster", "openshift_version": "4.15", "cpu_architecture" : "x86_64", "base_dns_domain": "example.com", "olm_operators": [ { "name": "mce" } 1 , { "name": "odf" } 2 ] "pull_secret": $pull_secret[0] | tojson } ')" | jq '.id'- 1
- Specify
cnvfor OpenShift Virtualization,mcefor multicluster engine,odffor Red Hat OpenShift Data Foundation, orlvmfor Logical Volume Manager Storage. - 2
- This example installs multicluster engine and OpenShift Data Foundation on a multi-node cluster. Specify
mceandlvmfor a single-node OpenShift cluster.
4.6. Modifying a cluster
To modify a cluster definition with the API, use the /v2/clusters/{cluster_id} endpoint. Modifying a cluster resource is a common operation for adding settings such as changing the network type or enabling user-managed networking. See the v2-cluster-update-params model in the API viewer for details on the fields you can set when modifying a cluster definition.
You can add or remove Operators from a cluster resource that has already been registered.
To create partitions on nodes, see Configuring storage on nodes in the OpenShift Container Platform documentation.
Prerequisites
- You have created a new cluster resource.
Procedure
Refresh the API token:
$ source refresh-token
Modify the cluster. For example, change the SSH key:
$ curl https://api.openshift.com/api/assisted-install/v2/clusters/${CLUSTER_ID} \
-X PATCH \
-H "Authorization: Bearer ${API_TOKEN}" \
-H "Content-Type: application/json" \
-d '
{
    "ssh_public_key": "ssh-rsa AAAAB3NzaC1yc2EAAAADAQABAAABgQDZrD4LMkAEeoU2vShhF8VM+cCZtVRgB7tqtsMxms2q3TOJZAgfuqReKYWm+OLOZTD+DO3Hn1pah/mU3u7uJfTUg4wEX0Le8zBu9xJVym0BVmSFkzHfIJVTn6SfZ81NqcalisGWkpmkKXVCdnVAX6RsbHfpGKk9YPQarmRCn5KzkelJK4hrSWpBPjdzkFXaIpf64JBZtew9XVYA3QeXkIcFuq7NBuUH9BonroPEmIXNOa41PUP1IWq3mERNgzHZiuU8Ks/pFuU5HCMvv4qbTOIhiig7vidImHPpqYT/TCkuVi5w0ZZgkkBeLnxWxH0ldrfzgFBYAxnpTU8Ih/4VhG538Ix1hxPaM6cXds2ic71mBbtbSrk+zjtNPaeYk1O7UpcCw4jjHspU/rVV/DY51D5gSiiuaFPBMucnYPgUxy4FMBFfGrmGLIzTKiLzcz0DiSz1jBeTQOX++1nz+KDLBD8CPdi5k4dq7lLkapRk85qdEvgaG5RlHMSPSS3wDrQ51fD8= user@hostname"
}
' | jq
4.6.1. Modifying Operators
You can add or remove Operators from a cluster resource that has already been registered as part of a previous installation. This is only possible before you start the OpenShift Container Platform installation.
You set the required Operator definition by using the PATCH method for the /v2/clusters/{cluster_id} endpoint.
Prerequisites
- You have refreshed the API token.
-
You have exported the
CLUSTER_IDas an environment variable.
Procedure
Run the following command to modify the Operators:
$ curl https://api.openshift.com/api/assisted-install/v2/clusters/${CLUSTER_ID} \ -X PATCH \ -H "Authorization: Bearer ${API_TOKEN}" \ -H "Content-Type: application/json" \ -d ' { "olm_operators": [{"name": "mce"}, {"name": "cnv"}], 1 } ' | jq '.id'- 1
- Specify
cnvfor OpenShift Virtualization,mcefor multicluster engine,odffor Red Hat OpenShift Data Foundation, orlvmfor Logical Volume Manager Storage. To remove a previously installed Operator, exclude it from the list of values. To remove all previously installed Operators, specify an empty array:"olm_operators": [].
Sample output
{ <various cluster properties>, "monitored_operators": [ { "cluster_id": "b5259f97-be09-430e-b5eb-d78420ee509a", "name": "console", "operator_type": "builtin", "status_updated_at": "0001-01-01T00:00:00.000Z", "timeout_seconds": 3600 }, { "cluster_id": "b5259f97-be09-430e-b5eb-d78420ee509a", "name": "cvo", "operator_type": "builtin", "status_updated_at": "0001-01-01T00:00:00.000Z", "timeout_seconds": 3600 }, { "cluster_id": "b5259f97-be09-430e-b5eb-d78420ee509a", "name": "mce", "namespace": "multicluster-engine", "operator_type": "olm", "status_updated_at": "0001-01-01T00:00:00.000Z", "subscription_name": "multicluster-engine", "timeout_seconds": 3600 }, { "cluster_id": "b5259f97-be09-430e-b5eb-d78420ee509a", "name": "cnv", "namespace": "openshift-cnv", "operator_type": "olm", "status_updated_at": "0001-01-01T00:00:00.000Z", "subscription_name": "hco-operatorhub", "timeout_seconds": 3600 }, { "cluster_id": "b5259f97-be09-430e-b5eb-d78420ee509a", "name": "lvm", "namespace": "openshift-local-storage", "operator_type": "olm", "status_updated_at": "0001-01-01T00:00:00.000Z", "subscription_name": "local-storage-operator", "timeout_seconds": 4200 } ], <more cluster properties>NoteThe output is the description of the new cluster state. The
monitored_operatorsproperty in the output contains Operators of two types:-
"operator_type": "builtin": Operators of this type are an integral part of OpenShift Container Platform. -
"operator_type": "olm": Operators of this type are added manually by a user or automatically, as a dependency. In this example, the LVM Storage Operator is added automatically as a dependency of OpenShift Virtualization.
4.7. Registering a new infrastructure environment
Once you register a new cluster definition with the Assisted Installer API, create an infrastructure environment using the v2/infra-envs endpoint. Registering a new infrastructure environment requires the following settings:
-
name -
pull_secret -
cpu_architecture
See the infra-env-create-params model in the API viewer for details on the fields you can set when registering a new infrastructure environment. You can modify an infrastructure environment after you create it. As a best practice, consider including the cluster_id when creating a new infrastructure environment. The cluster_id will associate the infrastructure environment with a cluster definition. When creating the new infrastructure environment, the Assisted Installer will also generate a discovery ISO.
Prerequisites
-
You have generated a valid
API_TOKEN. Tokens expire every 15 minutes. - You have downloaded the pull secret.
-
Optional: You have registered a new cluster definition and exported the
cluster_id.
Procedure
Refresh the API token:
$ source refresh-token
Register a new infrastructure environment. Provide a name, preferably something including the cluster name. This example provides the cluster ID to associate the infrastructure environment with the cluster resource. The following example specifies the
image_type. You can specify eitherfull-isoorminimal-iso. The default value isminimal-iso.Optional: You can register a new infrastructure environment by slurping the pull secret file in the request:
$ curl https://api.openshift.com/api/assisted-install/v2/infra-envs \ -H "Authorization: Bearer ${API_TOKEN}" \ -H "Content-Type: application/json" \ -d "$(jq --null-input \ --slurpfile pull_secret ~/Downloads/pull-secret.txt \ --arg cluster_id ${CLUSTER_ID} ' { "name": "testcluster-infra-env", "image_type":"full-iso", "cluster_id": $cluster_id, "cpu_architecture" : "<architecture_name>", 1 "pull_secret": $pull_secret[0] | tojson } ')" | jq '.id'Note- 1
- Indicates the valid values. They are:
x86_64,arm64,ppc64le,s390x,multi
Optional: You can register a new infrastructure environment by writing the configuration to a JSON file and then referencing it in the request:
$ cat << EOF > infra-envs.json
{
 "name": "testcluster",
 "pull_secret": $PULL_SECRET,
 "proxy": {
    "http_proxy": "",
    "https_proxy": "",
    "no_proxy": ""
  },
  "ssh_authorized_key": "$CLUSTER_SSHKEY",
  "image_type": "full-iso",
  "cluster_id": "${CLUSTER_ID}",
  "openshift_version": "4.11"
}
EOF
$ curl -s -X POST "https://api.openshift.com/api/assisted-install/v2/infra-envs" -d @./infra-envs.json -H "Content-Type: application/json" -H "Authorization: Bearer $API_TOKEN" | jq '.id'
Assign the returned
idto theINFRA_ENV_IDvariable and export it:$ export INFRA_ENV_ID=<id>
Once you create an infrastructure environment and associate it to a cluster definition via the cluster_id, you can see the cluster settings in the Assisted Installer web user interface. If you close your terminal session, you need to re-export the id in a new terminal session.
4.8. Modifying an infrastructure environment
You can modify an infrastructure environment using the /v2/infra-envs/{infra_env_id} endpoint. Modifying an infrastructure environment is a common operation for adding settings such as networking, SSH keys, or ignition configuration overrides.
See the infra-env-update-params model in the API viewer for details on the fields you can set when modifying an infrastructure environment. When modifying the new infrastructure environment, the Assisted Installer will also re-generate the discovery ISO.
Prerequisites
- You have created a new infrastructure environment.
Procedure
Refresh the API token:
$ source refresh-token
Modify the infrastructure environment:
$ curl https://api.openshift.com/api/assisted-install/v2/infra-envs/${INFRA_ENV_ID} \
-X PATCH \
-H "Authorization: Bearer ${API_TOKEN}" \
-H "Content-Type: application/json" \
-d "$(jq --null-input \
  --slurpfile pull_secret ~/Downloads/pull-secret.txt '
    {
      "image_type":"minimal-iso",
      "pull_secret": $pull_secret[0] | tojson
    }
')" | jq
4.8.1. Optional: Adding kernel arguments
Providing kernel arguments to the Red Hat Enterprise Linux CoreOS (RHCOS) kernel via the Assisted Installer means passing specific parameters or options to the kernel at boot time, particularly when you cannot customize the kernel parameters of the discovery ISO. Kernel parameters can control various aspects of the kernel’s behavior and the operating system’s configuration, affecting hardware interaction, system performance, and functionality. Kernel arguments are used to customize or inform the node’s RHCOS kernel about the hardware configuration, debugging preferences, system services, and other low-level settings.
The RHCOS installer kargs modify command supports the append, delete, and replace options.
You can modify an infrastructure environment using the /v2/infra-envs/{infra_env_id} endpoint. When modifying the new infrastructure environment, the Assisted Installer will also re-generate the discovery ISO.
Procedure
Refresh the API token:
$ source refresh-token
Modify the kernel arguments:
$ curl https://api.openshift.com/api/assisted-install/v2/infra-envs/${INFRA_ENV_ID} \ -X PATCH \ -H "Authorization: Bearer ${API_TOKEN}" \ -H "Content-Type: application/json" \ -d "$(jq --null-input \ --slurpfile pull_secret ~/Downloads/pull-secret.txt ' { "kernel_arguments": [{ "operation": "append", "value": "<karg>=<value>" }], 1 "image_type":"minimal-iso", "pull_secret": $pull_secret[0] | tojson } ')" | jq- 1
- Replace
<karg>with the the kernel argument and<value>with the kernal argument value. For example:rd.net.timeout.carrier=60. You can specify multiple kernel arguments by adding a JSON object for each kernel argument.
4.9. Adding hosts
After configuring the cluster resource and infrastructure environment, download the discovery ISO image. You can choose from two images:
-
Full ISO image: Use the full ISO image when booting must be self-contained. The image includes everything needed to boot and start the Assisted Installer agent. The ISO image is about 1GB in size. This is the recommended method for the
s390xarchitecture when installing with RHEL KVM. - Minimal ISO image: Use the minimal ISO image when bandwidth over the virtual media connection is limited. This is the default setting. The image includes only what is required to boot a host with networking. The majority of the content is downloaded upon boot. The ISO image is about 100MB in size.
Currently, ISO images are not supported for installations on IBM Z (s390x) with z/VM. For details, see Booting hosts using iPXE.
You can boot hosts with the discovery image using three methods. For details, see Booting hosts with the discovery image.
Prerequisites
- You have created a cluster.
- You have created an infrastructure environment.
- You have completed the configuration.
- If the cluster hosts are behind a firewall that requires the use of a proxy, you have configured the username, password, IP address and port for the HTTP and HTTPS URLs of the proxy server.
-
You have selected an image type or will use the default
minimal-iso.
Procedure
- Configure the discovery image if needed. For details, see Configuring the discovery image.
Refresh the API token:
$ source refresh-token
Get the download URL:
$ curl -H "Authorization: Bearer ${API_TOKEN}" \
https://api.openshift.com/api/assisted-install/v2/infra-envs/${INFRA_ENV_ID}/downloads/image-url
Example output
{
  "expires_at": "2024-02-07T20:20:23.000Z",
  "url": "https://api.openshift.com/api/assisted-images/bytoken/<TOKEN>/<OCP_VERSION>/<CPU_ARCHITECTURE>/<FULL_OR_MINIMAL_IMAGE>.iso"
}
Download the discovery image:
$ wget -O discovery.iso <url>
Replace
<url>with the download URL from the previous step.- Boot the host(s) with the discovery image.
- Assign a role to host(s).
4.10. Modifying hosts
After adding hosts, modify the hosts as needed. The most common modifications are to the host_name and the host_role parameters.
You can modify a host by using the /v2/infra-envs/{infra_env_id}/hosts/{host_id} endpoint. See the host-update-params model in the API viewer for details on the fields you can set when modifying a host.
A host might be one of two roles:
-
master: A host with themasterrole will operate as a control plane host. -
worker: A host with theworkerrole will operate as a worker host.
By default, the Assisted Installer sets a host to auto-assign, which means the installation program determines whether the host is a master or worker role automatically. Use the following procedure to set the host’s role:
Prerequisites
- You have added hosts to the cluster.
Procedure
Refresh the API token:
$ source refresh-token
Get the host IDs:
$ curl -s -X GET "https://api.openshift.com/api/assisted-install/v2/clusters/$CLUSTER_ID" \
--header "Content-Type: application/json" \
  -H "Authorization: Bearer $API_TOKEN" \
| jq '.host_networks[].host_ids'
Modify the host:
$ curl https://api.openshift.com/api/assisted-install/v2/infra-envs/${INFRA_ENV_ID}/hosts/<host_id> \ 1 -X PATCH \ -H "Authorization: Bearer ${API_TOKEN}" \ -H "Content-Type: application/json" \ -d ' { "host_role":"worker" "host_name" : "worker-1" } ' | jq- 1
- Replace
<host_id>with the ID of the host.
4.10.1. Modifying storage disk configuration
Each host retrieved during host discovery can have multiple storage disks. You can optionally modify the default configurations for each disk.
Prerequisites
- Configure the cluster and discover the hosts. For details, see Additional resources.
Viewing the storage disks
You can view the hosts in your cluster, and the disks on each host. This enables you to perform actions on a specific disk.
Procedure
Refresh the API token:
$ source refresh-token
Get the host IDs for the cluster:
$ curl -s "https://api.openshift.com/api/assisted-install/v2/clusters/$CLUSTER_ID" \
  -H "Authorization: Bearer $API_TOKEN" \
| jq '.host_networks[].host_ids'
Sample output
$ "1022623e-7689-8b2d-7fbd-e6f4d5bb28e5"
NoteThis is the ID of a single host. Multiple host IDs are separated by commas.
Get the disks for a specific host:
$ curl https://api.openshift.com/api/assisted-install/v2/infra-envs/${INFRA_ENV_ID}/hosts/<host_id> \ 1 -H "Authorization: Bearer ${API_TOKEN}" \ | jq '.inventory | fromjson | .disks'- 1
- Replace
<host_id>with the ID of the relevant host.
Sample output
$ [ { "by_id": "/dev/disk/by-id/wwn-0x6c81f660f98afb002d3adc1a1460a506", "by_path": "/dev/disk/by-path/pci-0000:03:00.0-scsi-0:2:0:0", "drive_type": "HDD", "has_uuid": true, "hctl": "1:2:0:0", "id": "/dev/disk/by-id/wwn-0x6c81f660f98afb002d3adc1a1460a506", "installation_eligibility": { "eligible": true, "not_eligible_reasons": null }, "model": "PERC_H710P", "name": "sda", "path": "/dev/sda", "serial": "0006a560141adc3a2d00fb8af960f681", "size_bytes": 6595056500736, "vendor": "DELL", "wwn": "0x6c81f660f98afb002d3adc1a1460a506" } ]NoteThis is the output for one disk. It contains the
disk_idandinstallation_eligibilityproperties for the disk.
Changing the installation disk
The Assisted Installer randomly assigns an installation disk by default. If there are multiple storage disks for a host, you can select a different disk to be the installation disk. This automatically unassigns the previous disk.
You can select any disk whose installation_eligibility property is eligible: true to be the installation disk.
Procedure
- Get the host and storage disk IDs. For details, see Viewing the storage disks.
Optional: Identify the current installation disk:
$ curl https://api.openshift.com/api/assisted-install/v2/infra-envs/${INFRA_ENV_ID}/hosts/<host_id> \ 1 -H "Authorization: Bearer ${API_TOKEN}" \ | jq '.installation_disk_id'- 1
- Replace
<host_id>with the ID of the relevant host.
Assign a new installation disk:
$ curl https://api.openshift.com/api/assisted-install/v2/infra-envs/${INFRA_ENV_ID}/hosts/<host_id> \ 1
-X PATCH \
-H "Content-Type: application/json" \
-H "Authorization: Bearer ${API_TOKEN}" \

{
  "disks_selected_config": [
    {
      "id": "<disk_id>", 2
      "role": "install"
    }
  ]
}
Disabling disk formatting
The Assisted Installer marks all bootable disks for formatting during the installation process by default, regardless of whether or not they have been defined as the installation disk. Formatting causes data loss.
You can choose to disable the formatting of a specific disk. This should be performed with caution, as bootable disks may interfere with the installation process, mainly in terms of boot order.
You cannot disable formatting for the installation disk.
Procedure
- Get the host and storage disk IDs. For details, see Viewing the storage disks.
Run the following command:
$  curl https://api.openshift.com/api/assisted-install/v2/infra-envs/${INFRA_ENV_ID}/hosts/<host_id> \ 1
-X PATCH \
-H "Content-Type: application/json" \
-H "Authorization: Bearer ${API_TOKEN}" \

{
 "disks_skip_formatting": [
   {
     "disk_id": "<disk_id>", 2
     "skip_formatting": true 3
   }
 ]
}
4.11. Adding custom manifests
A custom manifest is a JSON or YAML file that contains advanced configurations not currently supported in the Assisted Installer user interface. You can create a custom manifest or use one provided by a third party. To create a custom manifest with the API, use the /v2/clusters/$CLUSTER_ID/manifests endpoint.
You can upload a base64-encoded custom manifest to either the openshift folder or the manifests folder with the Assisted Installer API. There is no limit to the number of custom manifests permitted.
Only one base64-encoded JSON manifest can be uploaded at a time. However, each uploaded base64-encoded YAML file can contain multiple custom manifests. Uploading a multi-document YAML manifest is faster than adding the YAML files individually.
For a file containing a single custom manifest, accepted file extensions include .yaml, .yml, or .json.
Single custom manifest example
{
    "apiVersion": "machineconfiguration.openshift.io/v1",
    "kind": "MachineConfig",
    "metadata": {
        "labels": {
            "machineconfiguration.openshift.io/role": "primary"
        },
        "name": "10_primary_storage_config"
    },
    "spec": {
        "config": {
            "ignition": {
                "version": "3.2.0"
            },
            "storage": {
                "disks": [
                    {
                        "device": "</dev/xxyN>",
                        "partitions": [
                            {
                                "label": "recovery",
                                "startMiB": 32768,
                                "sizeMiB": 16384
                            }
                        ]
                    }
                ],
                "filesystems": [
                    {
                        "device": "/dev/disk/by-partlabel/recovery",
                        "label": "recovery",
                        "format": "xfs"
                    }
                ]
            }
        }
    }
}
For a file containing multiple custom manifests, accepted file types include .yaml or .yml.
Multiple custom manifest example
apiVersion: machineconfiguration.openshift.io/v1
kind: MachineConfig
metadata:
  labels:
    machineconfiguration.openshift.io/role: master
  name: 99-openshift-machineconfig-master-kargs
spec:
  kernelArguments:
    - loglevel=7
---
apiVersion: machineconfiguration.openshift.io/v2
kind: MachineConfig
metadata:
  labels:
    machineconfiguration.openshift.io/role: worker
  name: 98-openshift-machineconfig-worker-kargs
spec:
  kernelArguments:
    - loglevel=5
- When you install OpenShift Container Platform on the Oracle Cloud Infrastructure (OCI) external platform, you must add the custom manifests provided by Oracle. For additional external partner integrations such as vSphere or Nutanix, this step is optional.
- For more information about custom manifests, see Additional Resources.
Prerequisites
-
You have generated a valid
API_TOKEN. Tokens expire every 15 minutes. -
You have registered a new cluster definition and exported the
cluster_idto the$CLUSTER_IDBASH variable.
Procedure
- Create a custom manifest file.
- Save the custom manifest file using the appropriate extension for the file format.
Refresh the API token:
$ source refresh-token
Add the custom manifest to the cluster by executing the following command:
$ curl -X POST "https://api.openshift.com/api/assisted-install/v2/clusters/$CLUSTER_ID/manifests" \
    -H "Authorization: Bearer $API_TOKEN" \
    -H "Content-Type: application/json" \
    -d '{
            "file_name":"manifest.json",
            "folder":"manifests",
            "content":"'"$(base64 -w 0 ~/manifest.json)"'"
    }' | jq
Replace
manifest.jsonwith the name of your manifest file. The second instance ofmanifest.jsonis the path to the file. Ensure the path is correct.Example output
{ "file_name": "manifest.json", "folder": "manifests" }NoteThe
base64 -w 0command base64-encodes the manifest as a string and omits carriage returns. Encoding with carriage returns will generate an exception.Verify that the Assisted Installer added the manifest:
curl -X GET "https://api.openshift.com/api/assisted-install/v2/clusters/$CLUSTER_ID/manifests/files?folder=manifests&file_name=manifest.json" -H "Authorization: Bearer $API_TOKEN"
Replace
manifest.jsonwith the name of your manifest file.
Additional resources
4.12. Preinstallation validations
The Assisted Installer ensures the cluster meets the prerequisites before installation, because it eliminates complex postinstallation troubleshooting, thereby saving significant amounts of time and effort. Before installing the cluster, ensure the cluster and each host pass preinstallation validation.
Additional resources
4.13. Installing the cluster
Once the cluster hosts past validation, you can install the cluster.
Prerequisites
- You have created a cluster and infrastructure environment.
- You have added hosts to the infrastructure environment.
- The hosts have passed validation.
Procedure
Refresh the API token:
$ source refresh-token
Install the cluster:
$ curl -H "Authorization: Bearer $API_TOKEN" \
-X POST \
https://api.openshift.com/api/assisted-install/v2/clusters/$CLUSTER_ID/actions/install | jq
- Complete any postinstallation platform integration steps.
Additional resources
Chapter 5. Optional: Enabling disk encryption
You can enable encryption of installation disks using either the TPM v2 or Tang encryption modes.
In some situations, when you enable TPM disk encryption in the firmware for a bare-metal host and then boot it from an ISO that you generate with the Assisted Installer, the cluster deployment can get stuck. This can happen if there are left-over TPM encryption keys from a previous installation on the host. For more information, see BZ#2011634. If you experience this problem, contact Red Hat support.
5.1. Enabling TPM v2 encryption
Prerequisites
-
Check to see if TPM v2 encryption is enabled in the BIOS on each host. Most Dell systems require this. Check the manual for your computer. The Assisted Installer will also validate that TPM is enabled in the firmware. See the
disk-encruptionmodel in the Assisted Installer API for additional details.
Verify that a TPM v2 encryption chip is installed on each node and enabled in the firmware.
Procedure
- Optional: Using the UI, in the Cluster details step of the user interface wizard, choose to enable TPM v2 encryption on either the control plane nodes, workers, or both.
Optional: Using the API, follow the "Modifying hosts" procedure. Set the
disk_encryption.enable_onsetting toall,masters, orworkers. Set thedisk_encryption.modesetting totpmv2.Refresh the API token:
$ source refresh-token
Enable TPM v2 encryption:
$ curl https://api.openshift.com/api/assisted-install/v2/clusters/${CLUSTER_ID} \
-X PATCH \
-H "Authorization: Bearer ${API_TOKEN}" \
-H "Content-Type: application/json" \
-d '
{
  "disk_encryption": {
    "enable_on": "none",
    "mode": "tpmv2"
  }
}
' | jq
Valid settings for
enable_onareall,master,worker, ornone.
5.2. Enabling Tang encryption
Prerequisites
- You have access to a Red Hat Enterprise Linux (RHEL) 8 machine that can be used to generate a thumbprint of the Tang exchange key.
Procedure
- Set up a Tang server or access an existing one. See Network-bound disk encryption for instructions. You can set multiple Tang servers, but the Assisted Installer must be able to connect to all of them during installation.
On the Tang server, retrieve the thumbprint for the Tang server using
tang-show-keys:$ tang-show-keys <port>
Optional: Replace
<port>with the port number. The default port number is80.Example thumbprint
1gYTN_LpU9ZMB35yn5IbADY5OQ0
Optional: Retrieve the thumbprint for the Tang server using
jose.Ensure
joseis installed on the Tang server:$ sudo dnf install jose
On the Tang server, retrieve the thumbprint using
jose:$ sudo jose jwk thp -i /var/db/tang/<public_key>.jwk
Replace
<public_key>with the public exchange key for the Tang server.Example thumbprint
1gYTN_LpU9ZMB35yn5IbADY5OQ0
- Optional: In the Cluster details step of the user interface wizard, choose to enable Tang encryption on either the control plane nodes, workers, or both. You will be required to enter URLs and thumbprints for the Tang servers.
Optional: Using the API, follow the "Modifying hosts" procedure.
Refresh the API token:
$ source refresh-token
Set the
disk_encryption.enable_onsetting toall,masters, orworkers. Set thedisk_encryption.modesetting totang. Setdisk_encyrption.tang_serversto provide the URL and thumbprint details about one or more Tang servers:$ curl https://api.openshift.com/api/assisted-install/v2/clusters/${CLUSTER_ID} \ -X PATCH \ -H "Authorization: Bearer ${API_TOKEN}" \ -H "Content-Type: application/json" \ -d ' { "disk_encryption": { "enable_on": "all", "mode": "tang", "tang_servers": "[{\"url\":\"http://tang.example.com:7500\",\"thumbprint\":\"PLjNyRdGw03zlRoGjQYMahSZGu9\"},{\"url\":\"http://tang2.example.com:7500\",\"thumbprint\":\"XYjNyRdGw03zlRoGjQYMahSZGu3\"}]" } } ' | jqValid settings for
enable_onareall,master,worker, ornone. Within thetang_serversvalue, comment out the quotes within the object(s).
5.3. Additional resources
Chapter 6. Configuring the discovery image
The Assisted Installer uses an initial image to run an agent that performs hardware and network validations before attempting to install OpenShift Container Platform. You can use Ignition to customize the discovery image.
Modifications to the discovery image will not persist in the system.
6.1. Creating an Ignition configuration file
Ignition is a low-level system configuration utility, which is part of the temporary initial root filesystem, the initramfs. When Ignition runs on the first boot, it finds configuration data in the Ignition configuration file and applies it to the host before switch_root is called to pivot to the host’s root filesystem.
Ignition uses a JSON configuration specification file to represent the set of changes that occur on the first boot.
Ignition versions newer than 3.2 are not supported, and will raise an error.
Procedure
Create an Ignition file and specify the configuration specification version:
$ vim ~/ignition.conf
{
  "ignition": { "version": "3.1.0" }
}
Add configuration data to the Ignition file. For example, add a password to the
coreuser.Generate a password hash:
$ openssl passwd -6
Add the generated password hash to the
coreuser:{ "ignition": { "version": "3.1.0" }, "passwd": { "users": [ { "name": "core", "passwordHash": "$6$spam$M5LGSMGyVD.9XOboxcwrsnwNdF4irpJdAWy.1Ry55syyUiUssIzIAHaOrUHr2zg6ruD8YNBPW9kW0H8EnKXyc1" } ] } }
Save the Ignition file and export it to the
IGNITION_FILEvariable:$ export IGNITION_FILE=~/ignition.conf
6.2. Modifying the discovery image with Ignition
Once you create an Ignition configuration file, you can modify the discovery image by patching the infrastructure environment using the Assisted Installer API.
Prerequisites
- If you used the UI to create the cluster, you have set up the API authentication.
-
You have an infrastructure environment and you have exported the infrastructure environment
idto theINFRA_ENV_IDvariable. -
You have a valid Ignition file and have exported the file name as
$IGNITION_FILE.
Procedure
Create an
ignition_config_overrideJSON object and redirect it to a file:$ jq -n \ --arg IGNITION "$(jq -c . $IGNITION_FILE)" \ '{ignition_config_override: $IGNITION}' \ > discovery_ignition.jsonRefresh the API token:
$ source refresh-token
Patch the infrastructure environment:
$ curl \
  --header "Authorization: Bearer $API_TOKEN" \
  --header "Content-Type: application/json" \
  -XPATCH \
  -d @discovery_ignition.json \
  https://api.openshift.com/api/assisted-install/v2/infra-envs/$INFRA_ENV_ID | jq
The
ignition_config_overrideobject references the Ignition file.- Download the updated discovery image.
Chapter 7. Booting hosts with the discovery image
The Assisted Installer uses an initial image to run an agent that performs hardware and network validations before attempting to install OpenShift Container Platform. You can boot hosts with the discovery image using three methods:
- USB drive
- Redfish virtual media
- iPXE
7.1. Creating an ISO image on a USB drive
You can install the Assisted Installer agent using a USB drive that contains the discovery ISO image. Starting the host with the USB drive prepares the host for the software installation.
Procedure
- On the administration host, insert a USB drive into a USB port.
Copy the ISO image to the USB drive, for example:
# dd if=<path_to_iso> of=<path_to_usb> status=progress
where:
- <path_to_iso>
-
is the relative path to the downloaded discovery ISO file, for example,
discovery.iso. - <path_to_usb>
is the location of the connected USB drive, for example,
/dev/sdb.After the ISO is copied to the USB drive, you can use the USB drive to install the Assisted Installer agent on the cluster host.
7.2. Booting with a USB drive
To register nodes with the Assisted Installer using a bootable USB drive, use the following procedure.
Procedure
- Insert the RHCOS discovery ISO USB drive into the target host.
- Configure the boot drive order in the server firmware settings to boot from the attached discovery ISO, and then reboot the server.
Wait for the host to boot up.
- For UI installations, on the administration host, return to the browser. Wait for the host to appear in the list of discovered hosts.
For API installations, refresh the token, check the enabled host count, and gather the host IDs:
$ source refresh-token
$ curl -s -X GET "https://api.openshift.com/api/assisted-install/v2/clusters/$CLUSTER_ID" \
--header "Content-Type: application/json" \
  -H "Authorization: Bearer $API_TOKEN" \
| jq '.enabled_host_count'
$ curl -s -X GET "https://api.openshift.com/api/assisted-install/v2/clusters/$CLUSTER_ID" \
--header "Content-Type: application/json" \
  -H "Authorization: Bearer $API_TOKEN" \
| jq '.host_networks[].host_ids'
Example output
[
  "1062663e-7989-8b2d-7fbb-e6f4d5bb28e5"
]
7.3. Booting from an HTTP-hosted ISO image using the Redfish API
You can provision hosts in your network using ISOs that you install using the Redfish Baseboard Management Controller (BMC) API.
Prerequisites
- Download the installation Red Hat Enterprise Linux CoreOS (RHCOS) ISO.
Procedure
- Copy the ISO file to an HTTP server accessible in your network.
Boot the host from the hosted ISO file, for example:
Call the redfish API to set the hosted ISO as the
VirtualMediaboot media by running the following command:$ curl -k -u <bmc_username>:<bmc_password> \ -d '{"Image":"<hosted_iso_file>", "Inserted": true}' \ -H "Content-Type: application/json" \ -X POST <host_bmc_address>/redfish/v1/Managers/iDRAC.Embedded.1/VirtualMedia/CD/Actions/VirtualMedia.InsertMediaWhere:
- <bmc_username>:<bmc_password>
- Is the username and password for the target host BMC.
- <hosted_iso_file>
-
Is the URL for the hosted installation ISO, for example:
https://example.com/rhcos-live-minimal.iso. The ISO must be accessible from the target host machine. - <host_bmc_address>
- Is the BMC IP address of the target host machine.
Set the host to boot from the
VirtualMediadevice by running the following command:$ curl -k -u <bmc_username>:<bmc_password> \ -X PATCH -H 'Content-Type: application/json' \ -d '{"Boot": {"BootSourceOverrideTarget": "Cd", "BootSourceOverrideMode": "UEFI", "BootSourceOverrideEnabled": "Once"}}' \ <host_bmc_address>/redfish/v1/Systems/System.Embedded.1Reboot the host:
$ curl -k -u <bmc_username>:<bmc_password> \
-d '{"ResetType": "ForceRestart"}' \
-H 'Content-type: application/json' \
-X POST <host_bmc_address>/redfish/v1/Systems/System.Embedded.1/Actions/ComputerSystem.Reset
Optional: If the host is powered off, you can boot it using the
{"ResetType": "On"}switch. Run the following command:$ curl -k -u <bmc_username>:<bmc_password> \ -d '{"ResetType": "On"}' -H 'Content-type: application/json' \ -X POST <host_bmc_address>/redfish/v1/Systems/System.Embedded.1/Actions/ComputerSystem.Reset
7.4. Booting hosts using iPXE
The Assisted Installer provides an iPXE script including all the artifacts needed to boot the discovery image for an infrastructure environment. Due to the limitations of the current HTTPS implementation of iPXE, the recommendation is to download and expose the needed artifacts in an HTTP server. Currently, even if iPXE supports HTTPS protocol, the supported algorithms are old and not recommended.
The full list of supported ciphers is in https://ipxe.org/crypto.
Prerequisites
- You have created an infrastructure environment by using the API or you have created a cluster by using the UI.
-
You have your infrastructure environment ID exported in your shell as
$INFRA_ENV_ID. -
You have credentials to use when accessing the API and have exported a token as
$API_TOKENin your shell. - You have an HTTP server to host the images.
When configuring via the UI, the $INFRA_ENV_ID and $API_TOKEN variables are already provided.
IBM Power only supports PXE, which also requires: You have installed grub2 at /var/lib/tftpboot You have installed DHCP and TFTP for PXE
Procedure
Download the iPXE script directly from the UI, or get the iPXE script from the Assisted Installer:
$ curl \
  --silent \
  --header "Authorization: Bearer $API_TOKEN" \
  https://api.openshift.com/api/assisted-install/v2/infra-envs/$INFRA_ENV_ID/downloads/files?file_name=ipxe-script > ipxe-script
Example
#!ipxe
initrd --name initrd http://api.openshift.com/api/assisted-images/images/<infra_env_id>/pxe-initrd?arch=x86_64&image_token=<token_string>&version=4.10
kernel http://api.openshift.com/api/assisted-images/boot-artifacts/kernel?arch=x86_64&version=4.10 initrd=initrd coreos.live.rootfs_url=http://api.openshift.com/api/assisted-images/boot-artifacts/rootfs?arch=x86_64&version=4.10 random.trust_cpu=on rd.luks.options=discard ignition.firstboot ignition.platform.id=metal console=tty1 console=ttyS1,115200n8 coreos.inst.persistent-kargs="console=tty1 console=ttyS1,115200n8"
boot
Download the required artifacts by extracting URLs from the
ipxe-script.Download the initial RAM disk:
$ awk '/^initrd /{print $NF}' ipxe-script | curl -o initrd.imgDownload the linux kernel:
$ awk '/^kernel /{print $2}' ipxe-script | curl -o kernelDownload the root filesystem:
$ grep ^kernel ipxe-script | xargs -n1| grep ^coreos.live.rootfs_url | cut -d = -f 2- | curl -o rootfs.img
Change the URLs to the different artifacts in the
ipxe-script`to match your local HTTP server. For example:#!ipxe set webserver http://192.168.0.1 initrd --name initrd $webserver/initrd.img kernel $webserver/kernel initrd=initrd coreos.live.rootfs_url=$webserver/rootfs.img random.trust_cpu=on rd.luks.options=discard ignition.firstboot ignition.platform.id=metal console=tty1 console=ttyS1,115200n8 coreos.inst.persistent-kargs="console=tty1 console=ttyS1,115200n8" boot
Optional: When installing with RHEL KVM on IBM zSystems you must boot the host by specifying additional kernel arguments
random.trust_cpu=on rd.luks.options=discard ignition.firstboot ignition.platform.id=metal console=tty1 console=ttyS1,115200n8 coreos.inst.persistent-kargs="console=tty1 console=ttyS1,115200n8
NoteIf you install with iPXE on RHEL KVM, in some circumstances, the VMs on the VM host are not rebooted on first boot and need to be started manually.
Optional: When installing on IBM Power you must download intramfs, kernel, and root as follows:
- Copy initrd.img and kernel.img to PXE directory `/var/lib/tftpboot/rhcos `
- Copy rootfs.img to HTTPD directory `/var/www/html/install `
Add following entry to `/var/lib/tftpboot/boot/grub2/grub.cfg `:
if [ ${net_default_mac} == fa:1d:67:35:13:20 ]; then
default=0
fallback=1
timeout=1
menuentry "CoreOS (BIOS)" {
echo "Loading kernel"
linux "/rhcos/kernel.img" ip=dhcp rd.neednet=1 ignition.platform.id=metal ignition.firstboot coreos.live.rootfs_url=http://9.114.98.8:8000/install/rootfs.img
echo "Loading initrd"
initrd "/rhcos/initrd.img"
}
fi
Chapter 8. Assigning roles to hosts
You can assign roles to your discovered hosts. These roles define the function of the host within the cluster. The roles can be one of the standard Kubernetes types: control plane (master) or worker.
The host must meet the minimum requirements for the role you selected. You can find the hardware requirements by referring to the Prerequisites section of this document or using the preflight requirement API.
If you do not select a role, the system selects one for you. You can change the role at any time before installation starts.
8.1. Selecting a role by using the UI
You can select a role after the host finishes its discovery.
Procedure
- Go to the Host Discovery tab and scroll down to the Host Inventory table.
- Select the Auto-assign drop-down for the required host.
- Select Control plane node to assign this host a control plane role.
- Select Worker to assign this host a worker role.
- Check the validation status.
8.2. Selecting a role by by using the API
You can select a role for the host using the /v2/infra-envs/{infra_env_id}/hosts/{host_id} endpoint. A host may be one of two roles:
-
master: A host with themasterrole will operate as a control plane host. -
worker: A host with theworkerrole will operate as a worker host.
By default, the Assisted Installer sets a host to auto-assign, which means the installer will determine whether the host is a master or worker role automatically. Use this procedure to set the host’s role.
Prerequisites
- You have added hosts to the cluster.
Procedure
Refresh the API token:
$ source refresh-token
Get the host IDs:
$ curl -s -X GET "https://api.openshift.com/api/assisted-install/v2/clusters/$CLUSTER_ID" \
--header "Content-Type: application/json" \
  -H "Authorization: Bearer $API_TOKEN" \
| jq '.host_networks[].host_ids'
Example output
[
  "1062663e-7989-8b2d-7fbb-e6f4d5bb28e5"
]
Modify the
host_rolesetting:$ curl https://api.openshift.com/api/assisted-install/v2/infra-envs/${INFRA_ENV_ID}/hosts/<host_id> \ -X PATCH \ -H "Authorization: Bearer ${API_TOKEN}" \ -H "Content-Type: application/json" \ -d ' { "host_role":"worker" } ' | jqReplace
<host_id>with the ID of the host.
8.3. Auto-assigning roles
Assisted Installer selects a role automatically for hosts if you do not assign a role yourself. The role selection mechanism factors the host’s memory, CPU, and disk space. It aims to assign a control plane role to the 3 weakest hosts that meet the minimum requirements for control plane nodes. All other hosts default to worker nodes. The goal is to provide enough resources to run the control plane and reserve the more capacity-intensive hosts for running the actual workloads.
You can override the auto-assign decision at any time before installation.
The validations make sure that the auto selection is a valid one.
8.4. Additional resources
Chapter 9. Preinstallation validations
9.1. Definition of preinstallation validations
The Assisted Installer aims to make cluster installation as simple, efficient, and error-free as possible. The Assisted Installer performs validation checks on the configuration and the gathered telemetry before starting an installation.
The Assisted Installer will use the information provided prior to installation, such as control plane topology, network configuration and hostnames. It will also use real time telemetry from the hosts you are attempting to install.
When a host boots the discovery ISO, an agent will start on the host. The agent will send information about the state of the host to the Assisted Installer.
The Assisted Installer uses all of this information to compute real time preinstallation validations. All validations are either blocking or non-blocking to the installation.
9.2. Blocking and non-blocking validations
A blocking validation will prevent progress of the installation, meaning that you will need to resolve the issue and pass the blocking validation before you can proceed.
A non-blocking validation is a warning and will tell you of things that might cause you a problem.
9.3. Validation types
The Assisted Installer performs two types of validation:
Host
Host validations ensure that the configuration of a given host is valid for installation.
Cluster
Cluster validations ensure that the configuration of the whole cluster is valid for installation.
9.4. Host validations
9.4.1. Getting host validations by using the REST API
If you use the web based UI, many of these validations will not show up by name. To get a list of validations consistent with the labels, use the following procedure.
Prerequisites
-
You have installed the
jqutility. - You have created an Infrastructure Environment by using the API or have created a cluster by using the UI.
- You have hosts booted with the discovery ISO
-
You have your Cluster ID exported in your shell as
CLUSTER_ID. -
You have credentials to use when accessing the API and have exported a token as
API_TOKENin your shell.
Procedures
Refresh the API token:
$ source refresh-token
Get all validations for all hosts:
$ curl \ --silent \ --header "Authorization: Bearer $API_TOKEN" \ https://api.openshift.com/api/assisted-install/v2/clusters/$CLUSTER_ID/hosts \ | jq -r .[].validations_info \ | jq 'map(.[])'
Get non-passing validations for all hosts:
$ curl \ --silent \ --header "Authorization: Bearer $API_TOKEN" \ https://api.openshift.com/api/assisted-install/v2/clusters/$CLUSTER_ID/hosts \ | jq -r .[].validations_info \ | jq 'map(.[]) | map(select(.status=="failure" or .status=="pending")) | select(length>0)'
9.4.2. Host validations in detail
| Parameter | Validation type | Description |
|---|---|---|
|
| non-blocking | Checks that the host has recently communicated with the Assisted Installer. |
|
| non-blocking | Checks that the Assisted Installer received the inventory from the host. |
|
| non-blocking | Checks that the number of CPU cores meets the minimum requirements. |
|
| non-blocking | Checks that the amount of memory meets the minimum requirements. |
|
| non-blocking | Checks that at least one available disk meets the eligibility criteria. |
|
| blocking | Checks that the number of cores meets the minimum requirements for the host role. |
|
| blocking | Checks that the amount of memory meets the minimum requirements for the host role. |
|
| blocking | For day 2 hosts, checks that the host can download ignition configuration from the day 1 cluster. |
|
| blocking | The majority group is the largest full-mesh connectivity group on the cluster, where all members can communicate with all other members. This validation checks that hosts in a multi-node, day 1 cluster are in the majority group. |
|
| blocking | Checks that the platform is valid for the network settings. |
|
| non-blocking | Checks if an NTP server has been successfully used to synchronize time on the host. |
|
| non-blocking | Checks if container images have been successfully pulled from the image registry. |
|
| blocking | Checks that disk speed metrics from an earlier installation meet requirements, if they exist. |
|
| blocking | Checks that the average network latency between hosts in the cluster meets the requirements. |
|
| blocking | Checks that the network packet loss between hosts in the cluster meets the requirements. |
|
| blocking | Checks that the host has a default route configured. |
|
| blocking | For a multi node cluster with user managed networking. Checks that the host is able to resolve the API domain name for the cluster. |
|
| blocking | For a multi node cluster with user managed networking. Checks that the host is able to resolve the internal API domain name for the cluster. |
|
| blocking | For a multi node cluster with user managed networking. Checks that the host is able to resolve the internal apps domain name for the cluster. |
|
| non-blocking | Checks that the host is compatible with the cluster platform |
|
| blocking | Checks that the wildcard DNS *.<cluster_name>.<base_domain> is not configured, because this causes known problems for OpenShift |
|
| non-blocking | Checks that the type of host and disk encryption configured meet the requirements. |
|
| blocking | Checks that this host does not have any overlapping subnets. |
|
| blocking | Checks that the hostname is unique in the cluster. |
|
| blocking | Checks the validity of the hostname, meaning that it matches the general form of hostnames and is not forbidden. |
|
| blocking | Checks that the host IP is in the address range of the machine CIDR. |
|
| blocking | Validates that the cluster meets the requirements of the Local Storage Operator. |
|
| blocking | Validates that the cluster meets the requirements of the Openshift Data Foundation Operator.
|
|
| blocking | Validates that the cluster meets the requirements of Container Native Virtualization.
|
|
| blocking | Validates that the cluster meets the requirements of the Logical Volume Manager Operator.
|
|
| non-blocking | Verifies that each valid disk sets disk.EnableUUID to true. In VSphere this will result in each disk having a UUID. |
|
| blocking | Checks that the discovery agent version is compatible with the agent docker image version. |
|
| blocking | Checks that installation disk is not skipping disk formatting. |
|
| blocking | Checks that all disks marked to skip formatting are in the inventory. A disk ID can change on reboot, and this validation prevents issues caused by that. |
|
| blocking | Checks the connection of the installation media to the host. |
|
| non-blocking | Checks that the machine network definition exists for the cluster. |
|
| blocking | Checks that the platform is compatible with the network settings. Some platforms are only permitted when installing Single Node Openshift or when using User Managed Networking. |
9.5. Cluster validations
9.5.1. Getting cluster validations by using the REST API
If you use the web based UI, many of these validations will not show up by name. To obtain a list of validations consistent with the labels, use the following procedure.
Prerequisites
-
You have installed the
jqutility. - You have created an Infrastructure Environment by using the API or have created a cluster by using the UI.
-
You have your Cluster ID exported in your shell as
CLUSTER_ID. -
You have credentials to use when accessing the API and have exported a token as
API_TOKENin your shell.
Procedures
Refresh the API token:
$ source refresh-token
Get all cluster validations:
$ curl \ --silent \ --header "Authorization: Bearer $API_TOKEN" \ https://api.openshift.com/api/assisted-install/v2/clusters/$CLUSTER_ID \ | jq -r .validations_info \ | jq 'map(.[])'
Get non-passing cluster validations:
$ curl \ --silent \ --header "Authorization: Bearer $API_TOKEN" \ https://api.openshift.com/api/assisted-install/v2/clusters/$CLUSTER_ID \ | jq -r .validations_info \ | jq '. | map(.[] | select(.status=="failure" or .status=="pending")) | select(length>0)'
9.5.2. Cluster validations in detail
| Parameter | Validation type | Description |
|---|---|---|
|
| non-blocking | Checks that the machine network definition exists for the cluster. |
|
| non-blocking | Checks that the cluster network definition exists for the cluster. |
|
| non-blocking | Checks that the service network definition exists for the cluster. |
|
| blocking | Checks that the defined networks do not overlap. |
|
| blocking | Checks that the defined networks share the same address families (valid address families are IPv4, IPv6) |
|
| blocking | Checks the cluster network prefix to ensure that it is valid and allows enough address space for all hosts. |
|
| blocking |
For a non user managed networking cluster. Checks that |
|
| non-blocking |
For a non user managed networking cluster. Checks that |
|
| blocking |
For a non user managed networking cluster. Checks if the |
|
| blocking |
For a non user managed networking cluster. Checks that |
|
| non-blocking |
For a non user managed networking cluster. Checks if the |
|
| blocking | Checks that all hosts in the cluster are in the "ready to install" status. |
|
| blocking | This validation only applies to multi-node clusters.
|
|
| non-blocking | Checks that the base DNS domain exists for the cluster. |
|
| non-blocking | Checks that the pull secret exists. Does not check that the pull secret is valid or authorized. |
|
| blocking | Checks that each of the host clocks are no more than 4 minutes out of sync with each other. |
|
| blocking | Validates that the cluster meets the requirements of the Local Storage Operator. |
|
| blocking | Validates that the cluster meets the requirements of the Openshift Data Foundation Operator.
|
|
| blocking | Validates that the cluster meets the requirements of Container Native Virtualization.
|
|
| blocking | Validates that the cluster meets the requirements of the Logical Volume Manager Operator.
|
|
| blocking | Checks the validity of the network type if it exists.
|
Chapter 10. Network configuration
This section describes the basics of network configuration using the Assisted Installer.
10.1. Cluster networking
There are various network types and addresses used by OpenShift and listed in the table below.
| Type | DNS | Description |
|---|---|---|
|
| The IP address pools from which Pod IP addresses are allocated. | |
|
| The IP address pool for services. | |
|
| The IP address blocks for machines forming the cluster. | |
|
|
| The VIP to use for API communication. This setting must either be provided or preconfigured in the DNS so that the default name resolves correctly. If you are deploying with dual-stack networking, this must be the IPv4 address. |
|
|
|
The VIPs to use for API communication. This setting must either be provided or preconfigured in the DNS so that the default name resolves correctly. If using dual stack networking, the first address must be the IPv4 address and the second address must be the IPv6 address. You must also set the |
|
|
| The VIP to use for ingress traffic. If you are deploying with dual-stack networking, this must be the IPv4 address. |
|
|
|
The VIPs to use for ingress traffic. If you are deploying with dual-stack networking, the first address must be the IPv4 address and the second address must be the IPv6 address. You must also set the |
OpenShift Container Platform 4.12 introduces the new apiVIPs and ingressVIPs settings to accept multiple IP addresses for dual-stack networking. When using dual-stack networking, the first IP address must be the IPv4 address and the second IP address must be the IPv6 address. The new settings will replace apiVIP and IngressVIP, but you must set both the new and old settings when modifying the configuration using the API.
Depending on the desired network stack, you can choose different network controllers. Currently, the Assisted Service can deploy OpenShift Container Platform clusters using one of the following configurations:
- IPv4
- IPv6
- Dual-stack (IPv4 + IPv6)
Supported network controllers depend on the selected stack and are summarized in the table below. For a detailed Container Network Interface (CNI) network provider feature comparison, refer to the OCP Networking documentation.
| Stack | SDN | OVN |
|---|---|---|
| IPv4 | Yes | Yes |
| IPv6 | No | Yes |
| Dual-stack | No | Yes |
OVN is the default Container Network Interface (CNI) in OpenShift Container Platform 4.12 and later releases. SDN is supported up to OpenShift Container Platform 4.14, but not for OpenShift Container Platform 4.15 and later releases.
10.1.1. Limitations
10.1.1.1. SDN
- The SDN controller is not supported with Single-node OpenShift (SNO).
- The SDN controller does not support IPv6.
- The SDN controller is not supported for OpenShift Container Platform 4.15 and later releases. For more information, see Deprecation of the OpenShift SDN network plugin in the OpenShift Container Platform release notes.
10.1.1.2. OVN-Kubernetes
Please see the OVN-Kubernetes limitations section in the OCP documentation.
10.1.2. Cluster network
The cluster network is a network from which every Pod deployed in the cluster gets its IP address. Given that the workload may live across many nodes forming the cluster, it’s important for the network provider to be able to easily find an individual node based on the Pod’s IP address. To do this, clusterNetwork.cidr is further split into subnets of the size defined in clusterNetwork.hostPrefix.
The host prefix specifies a length of the subnet assigned to each individual node in the cluster. An example of how a cluster may assign addresses for the multi-node cluster:
---
clusterNetwork:
- cidr: 10.128.0.0/14
hostPrefix: 23
---Creating a 3-node cluster using the snippet above may create the following network topology:
-
Pods scheduled in node #1 get IPs from
10.128.0.0/23 -
Pods scheduled in node #2 get IPs from
10.128.2.0/23 -
Pods scheduled in node #3 get IPs from
10.128.4.0/23
Explaining OVN-K8s internals is out of scope for this document, but the pattern described above provides a way to route Pod-to-Pod traffic between different nodes without keeping a big list of mapping between Pods and their corresponding nodes.
10.1.3. Machine network
The machine network is a network used by all the hosts forming the cluster to communicate with each other. This is also the subnet that must include the API and Ingress VIPs.
10.1.4. SNO compared to multi-node cluster
Depending on whether you are deploying a Single Node OpenShift or a multi-node cluster, different values are mandatory. The table below explains this in more detail.
| Parameter | SNO | Multi-Node Cluster with DHCP mode | Multi-Node Cluster without DHCP mode |
|---|---|---|---|
|
| Required | Required | Required |
|
| Required | Required | Required |
|
| Auto-assign possible (*) | Auto-assign possible (*) | Auto-assign possible (*) |
|
| Forbidden | Forbidden | Required |
|
| Forbidden | Forbidden | Required in 4.12 and later releases |
|
| Forbidden | Forbidden | Required |
|
| Forbidden | Forbidden | Required in 4.12 and later releases |
(*) Auto assignment of the machine network CIDR happens if there is only a single host network. Otherwise you need to specify it explicitly.
10.1.5. Air-gapped environments
The workflow for deploying a cluster without Internet access has some prerequisites which are out of scope of this document. You may consult the Zero Touch Provisioning the hard way Git repository for some insights.
10.2. VIP DHCP allocation
The VIP DHCP allocation is a feature allowing users to skip the requirement of manually providing virtual IPs for API and Ingress by leveraging the ability of a service to automatically assign those IP addresses from the DHCP server.
If you enable the feature, instead of using api_vips and ingress_vips from the cluster configuration, the service will send a lease allocation request and based on the reply it will use VIPs accordingly. The service will allocate the IP addresses from the Machine Network.
Please note this is not an OpenShift Container Platform feature and it has been implemented in the Assisted Service to make the configuration easier.
VIP DHCP allocation is currently limited to the OpenShift Container Platform SDN network type. SDN is not supported from OpenShift Container Platform version 4.15 and later. Therefore, support for VIP DHCP allocation is also ending from OpenShift Container Platform 4.15 and later.
10.2.1. Example payload to enable autoallocation
---
{
"vip_dhcp_allocation": true,
"network_type": "OVNKubernetes",
"user_managed_networking": false,
"cluster_networks": [
{
"cidr": "10.128.0.0/14",
"host_prefix": 23
}
],
"service_networks": [
{
"cidr": "172.30.0.0/16"
}
],
"machine_networks": [
{
"cidr": "192.168.127.0/24"
}
]
}
---10.2.2. Example payload to disable autoallocation
---
{
"api_vips": [
{
"ip": "192.168.127.100"
}
],
"ingress_vips": [
{
"ip": "192.168.127.101"
}
],
"vip_dhcp_allocation": false,
"network_type": "OVNKubernetes",
"user_managed_networking": false,
"cluster_networks": [
{
"cidr": "10.128.0.0/14",
"host_prefix": 23
}
],
"service_networks": [
{
"cidr": "172.30.0.0/16"
}
]
}
---10.3. Additional resources
- Bare metal IPI documentation provides additional explanation of the syntax for the VIP addresses.
10.4. Understanding differences between user- and cluster-managed networking
User managed networking is a feature in the Assisted Installer that allows customers with non-standard network topologies to deploy OpenShift Container Platform clusters. Examples include:
-
Customers with an external load balancer who do not want to use
keepalivedand VRRP for handling VIP addressses. - Deployments with cluster nodes distributed across many distinct L2 network segments.
10.4.1. Validations
There are various network validations happening in the Assisted Installer before it allows the installation to start. When you enable User Managed Networking, the following validations change:
- L3 connectivity check (ICMP) is performed instead of L2 check (ARP)
10.5. Static network configuration
You may use static network configurations when generating or updating the discovery ISO.
10.5.1. Prerequisites
- You are familiar with NMState.
10.5.2. NMState configuration
The NMState file in YAML format specifies the desired network configuration for the host. It has the logical names of the interfaces that will be replaced with the actual name of the interface at discovery time.
10.5.2.1. Example of NMState configuration
---
dns-resolver:
config:
server:
- 192.168.126.1
interfaces:
- ipv4:
address:
- ip: 192.168.126.30
prefix-length: 24
dhcp: false
enabled: true
name: eth0
state: up
type: ethernet
- ipv4:
address:
- ip: 192.168.141.30
prefix-length: 24
dhcp: false
enabled: true
name: eth1
state: up
type: ethernet
routes:
config:
- destination: 0.0.0.0/0
next-hop-address: 192.168.126.1
next-hop-interface: eth0
table-id: 254
---10.5.3. MAC interface mapping
MAC interface map is an attribute that maps logical interfaces defined in the NMState configuration with the actual interfaces present on the host.
The mapping should always use physical interfaces present on the host. For example, when the NMState configuration defines a bond or VLAN, the mapping should only contain an entry for parent interfaces.
10.5.3.1. Example of MAC interface mapping
---
mac_interface_map: [
{
mac_address: 02:00:00:2c:23:a5,
logical_nic_name: eth0
},
{
mac_address: 02:00:00:68:73:dc,
logical_nic_name: eth1
}
]
---10.5.4. Additional NMState configuration examples
The examples below are only meant to show a partial configuration. They are not meant to be used as-is, and you should always adjust to the environment where they will be used. If used incorrectly, they may leave your machines with no network connectivity.
10.5.4.1. Tagged VLAN
---
interfaces:
- ipv4:
address:
- ip: 192.168.143.15
prefix-length: 24
dhcp: false
enabled: true
ipv6:
enabled: false
name: eth0.404
state: up
type: vlan
vlan:
base-iface: eth0
id: 404
reorder-headers: true
---10.5.4.2. Network bond
---
interfaces:
- ipv4:
address:
- ip: 192.168.138.15
prefix-length: 24
dhcp: false
enabled: true
ipv6:
enabled: false
link-aggregation:
mode: active-backup
options:
all_slaves_active: delivered
miimon: "140"
slaves:
- eth0
- eth1
name: bond0
state: up
type: bond
---10.6. Applying a static network configuration with the API
You can apply a static network configuration using the Assisted Installer API.
Prerequisites
- You have created an infrastructure environment using the API or have created a cluster using the UI.
-
You have your infrastructure environment ID exported in your shell as
$INFRA_ENV_ID. -
You have credentials to use when accessing the API and have exported a token as
$API_TOKENin your shell. -
You have YAML files with a static network configuration available as
server-a.yamlandserver-b.yaml.
Procedure
Create a temporary file
/tmp/request-body.txtwith the API request:--- jq -n --arg NMSTATE_YAML1 "$(cat server-a.yaml)" --arg NMSTATE_YAML2 "$(cat server-b.yaml)" \ '{ "static_network_config": [ { "network_yaml": $NMSTATE_YAML1, "mac_interface_map": [{"mac_address": "02:00:00:2c:23:a5", "logical_nic_name": "eth0"}, {"mac_address": "02:00:00:68:73:dc", "logical_nic_name": "eth1"}] }, { "network_yaml": $NMSTATE_YAML2, "mac_interface_map": [{"mac_address": "02:00:00:9f:85:eb", "logical_nic_name": "eth1"}, {"mac_address": "02:00:00:c8:be:9b", "logical_nic_name": "eth0"}] } ] }' >> /tmp/request-body.txt ---Refresh the API token:
$ source refresh-token
Send the request to the Assisted Service API endpoint:
--- $ curl -H "Content-Type: application/json" \ -X PATCH -d @/tmp/request-body.txt \ -H "Authorization: Bearer ${API_TOKEN}" \ https://api.openshift.com/api/assisted-install/v2/infra-envs/$INFRA_ENV_ID ---
10.7. Additional resources
10.8. Converting to dual-stack networking
Dual-stack IPv4/IPv6 configuration allows deployment of a cluster with pods residing in both IPv4 and IPv6 subnets.
10.8.1. Prerequisites
- You are familiar with OVN-K8s documentation
10.8.2. Example payload for Single Node OpenShift
---
{
"network_type": "OVNKubernetes",
"user_managed_networking": false,
"cluster_networks": [
{
"cidr": "10.128.0.0/14",
"host_prefix": 23
},
{
"cidr": "fd01::/48",
"host_prefix": 64
}
],
"service_networks": [
{"cidr": "172.30.0.0/16"}, {"cidr": "fd02::/112"}
],
"machine_networks": [
{"cidr": "192.168.127.0/24"},{"cidr": "1001:db8::/120"}
]
}
---10.8.3. Example payload for an OpenShift Container Platform cluster consisting of many nodes
---
{
"vip_dhcp_allocation": false,
"network_type": "OVNKubernetes",
"user_managed_networking": false,
"api_vips": [
{
"ip": "192.168.127.100"
},
{
"ip": "2001:0db8:85a3:0000:0000:8a2e:0370:7334"
}
],
"ingress_vips": [
{
"ip": "192.168.127.101"
},
{
"ip": "2001:0db8:85a3:0000:0000:8a2e:0370:7335"
}
],
"cluster_networks": [
{
"cidr": "10.128.0.0/14",
"host_prefix": 23
},
{
"cidr": "fd01::/48",
"host_prefix": 64
}
],
"service_networks": [
{"cidr": "172.30.0.0/16"}, {"cidr": "fd02::/112"}
],
"machine_networks": [
{"cidr": "192.168.127.0/24"},{"cidr": "1001:db8::/120"}
]
}
---10.8.4. Limitations
The api_vips IP address and ingress_vips IP address settings must be of the primary IP address family when using dual-stack networking, which must be IPv4 addresses. Currently, Red Hat does not support dual-stack VIPs or dual-stack networking with IPv6 as the primary IP address family. Red Hat supports dual-stack networking with IPv4 as the primary IP address family and IPv6 as the secondary IP address family. Therefore, you must place the IPv4 entries before the IPv6 entries when entering the IP address values.
10.9. Additional resources
Chapter 11. Expanding the cluster
You can expand a cluster installed with the Assisted Installer by adding hosts using the user interface or the API.
11.1. Prerequisites
- You must have access to an Assisted Installer cluster.
-
You must install the OpenShift CLI (
oc). - Ensure that all the required DNS records exist for the cluster that you are adding the worker node to.
-
If you are adding a worker node to a cluster with multiple CPU architectures, you must ensure that the architecture is set to
multi. -
If you are adding
arm64,IBM Power, orIBM zSystemscompute nodes to an existingx86_64cluster, use a platform that supports a mixed architecture. For details, see Installing a mixed architecture cluster
11.2. Checking for multiple architectures
When adding a node to a cluster with multiple architectures, ensure that the architecture setting is set to multi.
Procedure
- Log in to the cluster using the CLI.
Check the
architecturesetting:$ oc adm release info -o json | jq .metadata.metadata
Ensure that the
architecturesetting is set to 'multi'.{ "release.openshift.io/architecture": "multi" }
11.3. Adding hosts with the UI
You can add hosts to clusters that were created using the Assisted Installer.
Adding hosts to Assisted Installer clusters is only supported for clusters running OpenShift Container Platform version 4.11 and up.
Procedure
- Log in to OpenShift Cluster Manager and click the cluster that you want to expand.
- Click Add hosts and download the discovery ISO for the new host, adding an SSH public key and configuring cluster-wide proxy settings as needed.
- Optional: Modify ignition files as needed.
- Boot the target host using the discovery ISO, and wait for the host to be discovered in the console.
-
Select the host role. It can be either a
workeror acontrol planehost. - Start the installation.
As the installation proceeds, the installation generates pending certificate signing requests (CSRs) for the host. When prompted, approve the pending CSRs to complete the installation.
When the host is successfully installed, it is listed as a host in the cluster web console.
New hosts will be encrypted using the same method as the original cluster.
11.4. Adding hosts with the API
You can add hosts to clusters using the Assisted Installer REST API.
Prerequisites
-
Install the OpenShift Cluster Manager CLI (
ocm). - Log in to OpenShift Cluster Manager as a user with cluster creation privileges.
-
Install
jq. - Ensure that all the required DNS records exist for the cluster that you want to expand.
Procedure
- Authenticate against the Assisted Installer REST API and generate an API token for your session. The generated token is valid for 15 minutes only.
Set the
$API_URLvariable by running the following command:$ export API_URL=<api_url> 1- 1
- Replace
<api_url>with the Assisted Installer API URL, for example,https://api.openshift.com
Import the cluster by running the following commands:
Set the
$CLUSTER_IDvariable. Log in to the cluster and run the following command:$ export CLUSTER_ID=$(oc get clusterversion -o jsonpath='{.items[].spec.clusterID}')Set the
$CLUSTER_REQUESTvariable that is used to import the cluster:$ export CLUSTER_REQUEST=$(jq --null-input --arg openshift_cluster_id "$CLUSTER_ID" '{ "api_vip_dnsname": "<api_vip>", 1 "openshift_cluster_id": $CLUSTER_ID, "name": "<openshift_cluster_name>" 2 }')- 1
- Replace
<api_vip>with the hostname for the cluster’s API server. This can be the DNS domain for the API server or the IP address of the single node which the host can reach. For example,api.compute-1.example.com. - 2
- Replace
<openshift_cluster_name>with the plain text name for the cluster. The cluster name should match the cluster name that was set during the Day 1 cluster installation.
Import the cluster and set the
$CLUSTER_IDvariable. Run the following command:$ CLUSTER_ID=$(curl "$API_URL/api/assisted-install/v2/clusters/import" -H "Authorization: Bearer ${API_TOKEN}" -H 'accept: application/json' -H 'Content-Type: application/json' \ -d "$CLUSTER_REQUEST" | tee /dev/stderr | jq -r '.id')
Generate the
InfraEnvresource for the cluster and set the$INFRA_ENV_IDvariable by running the following commands:- Download the pull secret file from Red Hat OpenShift Cluster Manager at console.redhat.com.
Set the
$INFRA_ENV_REQUESTvariable:export INFRA_ENV_REQUEST=$(jq --null-input \ --slurpfile pull_secret <path_to_pull_secret_file> \1 --arg ssh_pub_key "$(cat <path_to_ssh_pub_key>)" \2 --arg cluster_id "$CLUSTER_ID" '{ "name": "<infraenv_name>", 3 "pull_secret": $pull_secret[0] | tojson, "cluster_id": $cluster_id, "ssh_authorized_key": $ssh_pub_key, "image_type": "<iso_image_type>" 4 }')- 1
- Replace
<path_to_pull_secret_file>with the path to the local file containing the downloaded pull secret from Red Hat OpenShift Cluster Manager at console.redhat.com. - 2
- Replace
<path_to_ssh_pub_key>with the path to the public SSH key required to access the host. If you do not set this value, you cannot access the host while in discovery mode. - 3
- Replace
<infraenv_name>with the plain text name for theInfraEnvresource. - 4
- Replace
<iso_image_type>with the ISO image type, eitherfull-isoorminimal-iso.
Post the
$INFRA_ENV_REQUESTto the /v2/infra-envs API and set the$INFRA_ENV_IDvariable:$ INFRA_ENV_ID=$(curl "$API_URL/api/assisted-install/v2/infra-envs" -H "Authorization: Bearer ${API_TOKEN}" -H 'accept: application/json' -H 'Content-Type: application/json' -d "$INFRA_ENV_REQUEST" | tee /dev/stderr | jq -r '.id')
Get the URL of the discovery ISO for the cluster host by running the following command:
$ curl -s "$API_URL/api/assisted-install/v2/infra-envs/$INFRA_ENV_ID" -H "Authorization: Bearer ${API_TOKEN}" | jq -r '.download_url'Example output
https://api.openshift.com/api/assisted-images/images/41b91e72-c33e-42ee-b80f-b5c5bbf6431a?arch=x86_64&image_token=eyJhbGciOiJIUzI1NiIsInR5cCI6IkpXVCJ9.eyJleHAiOjE2NTYwMjYzNzEsInN1YiI6IjQxYjkxZTcyLWMzM2UtNDJlZS1iODBmLWI1YzViYmY2NDMxYSJ9.1EX_VGaMNejMhrAvVRBS7PDPIQtbOOc8LtG8OukE1a4&type=minimal-iso&version=4.12
Download the ISO:
$ curl -L -s '<iso_url>' --output rhcos-live-minimal.iso 1- 1
- Replace
<iso_url>with the URL for the ISO from the previous step.
-
Boot the new worker host from the downloaded
rhcos-live-minimal.iso. Get the list of hosts in the cluster that are not installed. Keep running the following command until the new host shows up:
$ curl -s "$API_URL/api/assisted-install/v2/clusters/$CLUSTER_ID" -H "Authorization: Bearer ${API_TOKEN}" | jq -r '.hosts[] | select(.status != "installed").id'Example output
2294ba03-c264-4f11-ac08-2f1bb2f8c296
Set the
$HOST_IDvariable for the new host, for example:$ HOST_ID=<host_id> 1- 1
- Replace
<host_id>with the host ID from the previous step.
Check that the host is ready to install by running the following command:
NoteEnsure that you copy the entire command including the complete
jqexpression.$ curl -s $API_URL/api/assisted-install/v2/clusters/$CLUSTER_ID -H "Authorization: Bearer ${API_TOKEN}" | jq ' def host_name($host): if (.suggested_hostname // "") == "" then if (.inventory // "") == "" then "Unknown hostname, please wait" else .inventory | fromjson | .hostname end else .suggested_hostname end; def is_notable($validation): ["failure", "pending", "error"] | any(. == $validation.status); def notable_validations($validations_info): [ $validations_info // "{}" | fromjson | to_entries[].value[] | select(is_notable(.)) ]; { "Hosts validations": { "Hosts": [ .hosts[] | select(.status != "installed") | { "id": .id, "name": host_name(.), "status": .status, "notable_validations": notable_validations(.validations_info) } ] }, "Cluster validations info": { "notable_validations": notable_validations(.validations_info) } } ' -rExample output
{ "Hosts validations": { "Hosts": [ { "id": "97ec378c-3568-460c-bc22-df54534ff08f", "name": "localhost.localdomain", "status": "insufficient", "notable_validations": [ { "id": "ntp-synced", "status": "failure", "message": "Host couldn't synchronize with any NTP server" }, { "id": "api-domain-name-resolved-correctly", "status": "error", "message": "Parse error for domain name resolutions result" }, { "id": "api-int-domain-name-resolved-correctly", "status": "error", "message": "Parse error for domain name resolutions result" }, { "id": "apps-domain-name-resolved-correctly", "status": "error", "message": "Parse error for domain name resolutions result" } ] } ] }, "Cluster validations info": { "notable_validations": [] } }When the previous command shows that the host is ready, start the installation using the /v2/infra-envs/{infra_env_id}/hosts/{host_id}/actions/install API by running the following command:
$ curl -X POST -s "$API_URL/api/assisted-install/v2/infra-envs/$INFRA_ENV_ID/hosts/$HOST_ID/actions/install" -H "Authorization: Bearer ${API_TOKEN}"As the installation proceeds, the installation generates pending certificate signing requests (CSRs) for the host.
ImportantYou must approve the CSRs to complete the installation.
Keep running the following API call to monitor the cluster installation:
$ curl -s "$API_URL/api/assisted-install/v2/clusters/$CLUSTER_ID" -H "Authorization: Bearer ${API_TOKEN}" | jq '{ "Cluster day-2 hosts": [ .hosts[] | select(.status != "installed") | {id, requested_hostname, status, status_info, progress, status_updated_at, updated_at, infra_env_id, cluster_id, created_at} ] }'Example output
{ "Cluster day-2 hosts": [ { "id": "a1c52dde-3432-4f59-b2ae-0a530c851480", "requested_hostname": "control-plane-1", "status": "added-to-existing-cluster", "status_info": "Host has rebooted and no further updates will be posted. Please check console for progress and to possibly approve pending CSRs", "progress": { "current_stage": "Done", "installation_percentage": 100, "stage_started_at": "2022-07-08T10:56:20.476Z", "stage_updated_at": "2022-07-08T10:56:20.476Z" }, "status_updated_at": "2022-07-08T10:56:20.476Z", "updated_at": "2022-07-08T10:57:15.306369Z", "infra_env_id": "b74ec0c3-d5b5-4717-a866-5b6854791bd3", "cluster_id": "8f721322-419d-4eed-aa5b-61b50ea586ae", "created_at": "2022-07-06T22:54:57.161614Z" } ] }Optional: Run the following command to see all the events for the cluster:
$ curl -s "$API_URL/api/assisted-install/v2/events?cluster_id=$CLUSTER_ID" -H "Authorization: Bearer ${API_TOKEN}" | jq -c '.[] | {severity, message, event_time, host_id}'Example output
{"severity":"info","message":"Host compute-0: updated status from insufficient to known (Host is ready to be installed)","event_time":"2022-07-08T11:21:46.346Z","host_id":"9d7b3b44-1125-4ad0-9b14-76550087b445"} {"severity":"info","message":"Host compute-0: updated status from known to installing (Installation is in progress)","event_time":"2022-07-08T11:28:28.647Z","host_id":"9d7b3b44-1125-4ad0-9b14-76550087b445"} {"severity":"info","message":"Host compute-0: updated status from installing to installing-in-progress (Starting installation)","event_time":"2022-07-08T11:28:52.068Z","host_id":"9d7b3b44-1125-4ad0-9b14-76550087b445"} {"severity":"info","message":"Uploaded logs for host compute-0 cluster 8f721322-419d-4eed-aa5b-61b50ea586ae","event_time":"2022-07-08T11:29:47.802Z","host_id":"9d7b3b44-1125-4ad0-9b14-76550087b445"} {"severity":"info","message":"Host compute-0: updated status from installing-in-progress to added-to-existing-cluster (Host has rebooted and no further updates will be posted. Please check console for progress and to possibly approve pending CSRs)","event_time":"2022-07-08T11:29:48.259Z","host_id":"9d7b3b44-1125-4ad0-9b14-76550087b445"} {"severity":"info","message":"Host: compute-0, reached installation stage Rebooting","event_time":"2022-07-08T11:29:48.261Z","host_id":"9d7b3b44-1125-4ad0-9b14-76550087b445"}- Log in to the cluster and approve the pending CSRs to complete the installation.
Verification
Check that the new host was successfully added to the cluster with a status of
Ready:$ oc get nodes
Example output
NAME STATUS ROLES AGE VERSION control-plane-1.example.com Ready master,worker 56m v1.25.0 compute-1.example.com Ready worker 11m v1.25.0
11.5. Installing a mixed-architecture cluster
From OpenShift Container Platform version 4.12.0 and later, a cluster with an x86_64 control plane can support mixed-architecture worker nodes of two different CPU architectures. Mixed-architecture clusters combine the strengths of each architecture and support a variety of workloads.
From version 4.12.0, you can add arm64 worker nodes to an existing OpenShift Container Platform cluster with an x86_64 control plane. From version 4.14.0, you can add IBM Power or IBM zSystems worker nodes to an existing x86_64 control plane.
The main steps of the installation are as follows:
- Create and register a multi-architecture cluster.
-
Create an
x86_64infrastructure environment, download the ISO forx86_64, and add the control plane. The control plane must have thex86_64architecture. -
Create an
arm64,IBM PowerorIBM zSystemsinfrastructure environment, download the ISO forarm64,IBM PowerorIBM zSystems, and add the worker nodes.
These steps are detailed in the procedure below.
Supported platforms
The table below lists the platforms that support a mixed-architecture cluster for each OpenShift Container Platform version. Use the appropriate platforms for the version you are installing.
| OpenShift Container Platform version | Supported platforms | Day 1 control plane architecture | Day 2 node architecture |
|---|---|---|---|
| 4.12.0 |
|
|
|
| 4.13.0 |
|
|
|
| 4.14.0 |
|
|
|
Technology Preview (TP) features are not supported with Red Hat production service level agreements (SLAs) and might not be functionally complete. Red Hat does not recommend using them in production. These features provide early access to upcoming product features, enabling customers to test functionality and provide feedback during the development process.
For more information about the support scope of Red Hat Technology Preview features, see Technology Preview Features Support Scope.
Main steps
- Start the procedure for installing OpenShift Container Platform using the API. For details, see Installing with the Assisted Installer API in the Additional Resources section.
When you reach the "Registering a new cluster" step of the installation, register the cluster as a
multi-architecturecluster:$ curl -s -X POST https://api.openshift.com/api/assisted-install/v2/clusters \ -H "Authorization: Bearer ${API_TOKEN}" \ -H "Content-Type: application/json" \ -d "$(jq --null-input \ --slurpfile pull_secret ~/Downloads/pull-secret.txt ' { "name": "testcluster", "openshift_version": "<version-number>-multi", 1 "cpu_architecture" : "multi" 2 "high_availability_mode": "full" 3 "base_dns_domain": "example.com", "pull_secret": $pull_secret[0] | tojson } ')" | jq '.id'When you reach the "Registering a new infrastructure environment" step of the installation, set
cpu_architecturetox86_64:$ curl https://api.openshift.com/api/assisted-install/v2/infra-envs \ -H "Authorization: Bearer ${API_TOKEN}" \ -H "Content-Type: application/json" \ -d "$(jq --null-input \ --slurpfile pull_secret ~/Downloads/pull-secret.txt \ --arg cluster_id ${CLUSTER_ID} ' { "name": "testcluster-infra-env", "image_type":"full-iso", "cluster_id": $cluster_id, "cpu_architecture" : "x86_64" "pull_secret": $pull_secret[0] | tojson } ')" | jq '.id'When you reach the "Adding hosts" step of the installation, set
host_roletomaster:NoteFor more information, see Assigning Roles to Hosts in Additional Resources.
$ curl https://api.openshift.com/api/assisted-install/v2/infra-envs/${INFRA_ENV_ID}/hosts/<host_id> \ -X PATCH \ -H "Authorization: Bearer ${API_TOKEN}" \ -H "Content-Type: application/json" \ -d ' { "host_role":"master" } ' | jq-
Download the discovery image for the
x86_64architecture. -
Boot the
x86_64architecture hosts using the generated discovery image. - Start the installation and wait for the cluster to be fully installed.
Repeat the "Registering a new infrastructure environment" step of the installation. This time, set
cpu_architectureto one of the following:ppc64le(for IBM Power),s390x(for IBM Z), orarm64. For example:$ curl -s -X POST https://api.openshift.com/api/assisted-install/v2/clusters \ -H "Authorization: Bearer ${API_TOKEN}" \ -H "Content-Type: application/json" \ -d "$(jq --null-input \ --slurpfile pull_secret ~/Downloads/pull-secret.txt ' { "name": "testcluster", "openshift_version": "4.12", "cpu_architecture" : "arm64" "high_availability_mode": "full" "base_dns_domain": "example.com", "pull_secret": $pull_secret[0] | tojson } ')" | jq '.id'Repeat the "Adding hosts" step of the installation. This time, set
host_roletoworker:NoteFor more details, see Assigning Roles to Hosts in Additional Resources.
$ curl https://api.openshift.com/api/assisted-install/v2/infra-envs/${INFRA_ENV_ID}/hosts/<host_id> \ -X PATCH \ -H "Authorization: Bearer ${API_TOKEN}" \ -H "Content-Type: application/json" \ -d ' { "host_role":"worker" } ' | jq-
Download the discovery image for the
arm64,ppc64leors390xarchitecture. - Boot the architecture hosts using the generated discovery image.
- Start the installation and wait for the cluster to be fully installed.
Verification
View the
arm64,ppc64leors390xworker nodes in the cluster by running the following command:$ oc get nodes -o wide
11.6. Installing a primary control plane node on a healthy cluster
This procedure describes how to install a primary control plane node on a healthy OpenShift Container Platform cluster.
If the cluster is unhealthy, additional operations are required before they can be managed. See Additional Resources for more information.
Prerequisites
- You have installed a healthy cluster with a minimum of three nodes.
-
You have assigned
role: masterto a single node.
Procedure
Retrieve pending
CertificateSigningRequests(CSRs):$ oc get csr | grep Pending
Example output
csr-5sd59   8m19s   kubernetes.io/kube-apiserver-client-kubelet   system:serviceaccount:openshift-machine-config-operator:node-bootstrapper   <none>              Pending
csr-xzqts   10s     kubernetes.io/kubelet-serving                 system:node:worker-6                                                   <none>              Pending
Approve pending CSRs:
$ oc get csr -o go-template='{{range .items}}{{if not .status}}{{.metadata.name}}{{"\n"}}{{end}}{{end}}' | xargs --no-run-if-empty oc adm certificate approveImportantYou must approve the CSRs to complete the installation.
Confirm the primary node is in
Readystatus:$ oc get nodes
Example output
NAME       STATUS   ROLES    AGE     VERSION
master-0   Ready    master   4h42m   v1.24.0+3882f8f
worker-1   Ready    worker   4h29m   v1.24.0+3882f8f
master-2   Ready    master   4h43m   v1.24.0+3882f8f
master-3   Ready    master   4h27m   v1.24.0+3882f8f
worker-4   Ready    worker   4h30m   v1.24.0+3882f8f
master-5   Ready    master   105s    v1.24.0+3882f8f
NoteThe
etcd-operatorrequires aMachineCustom Resource (CR) referencing the new node when the cluster runs with a functional Machine API.Link the
MachineCR withBareMetalHostandNode:Create the
BareMetalHostCR with a unique.metadata.namevalue:apiVersion: metal3.io/v1alpha1 kind: BareMetalHost metadata: name: custom-master3 namespace: openshift-machine-api annotations: spec: automatedCleaningMode: metadata bootMACAddress: 00:00:00:00:00:02 bootMode: UEFI customDeploy: method: install_coreos externallyProvisioned: true online: true userData: name: master-user-data-managed namespace: openshift-machine-api$ oc create -f <filename>
Apply the
BareMetalHostCR:$ oc apply -f <filename>
Create the
MachineCR using the unique.machine.namevalue:apiVersion: machine.openshift.io/v1beta1 kind: Machine metadata: annotations: machine.openshift.io/instance-state: externally provisioned metal3.io/BareMetalHost: openshift-machine-api/custom-master3 finalizers: - machine.machine.openshift.io generation: 3 labels: machine.openshift.io/cluster-api-cluster: test-day2-1-6qv96 machine.openshift.io/cluster-api-machine-role: master machine.openshift.io/cluster-api-machine-type: master name: custom-master3 namespace: openshift-machine-api spec: metadata: {} providerSpec: value: apiVersion: baremetal.cluster.k8s.io/v1alpha1 customDeploy: method: install_coreos hostSelector: {} image: checksum: "" url: "" kind: BareMetalMachineProviderSpec metadata: creationTimestamp: null userData: name: master-user-data-managed$ oc create -f <filename>
Apply the
MachineCR:$ oc apply -f <filename>
Link
BareMetalHost,Machine, andNodeusing thelink-machine-and-node.shscript:#!/bin/bash # Credit goes to https://bugzilla.redhat.com/show_bug.cgi?id=1801238. # This script will link Machine object and Node object. This is needed # in order to have IP address of the Node present in the status of the Machine. set -x set -e machine="$1" node="$2" if [ -z "$machine" -o -z "$node" ]; then echo "Usage: $0 MACHINE NODE" exit 1 fi uid=$(echo $node | cut -f1 -d':') node_name=$(echo $node | cut -f2 -d':') oc proxy & proxy_pid=$! function kill_proxy { kill $proxy_pid } trap kill_proxy EXIT SIGINT HOST_PROXY_API_PATH="http://localhost:8001/apis/metal3.io/v1alpha1/namespaces/openshift-machine-api/baremetalhosts" function wait_for_json() { local name local url local curl_opts local timeout local start_time local curr_time local time_diff name="$1" url="$2" timeout="$3" shift 3 curl_opts="$@" echo -n "Waiting for $name to respond" start_time=$(date +%s) until curl -g -X GET "$url" "${curl_opts[@]}" 2> /dev/null | jq '.' 2> /dev/null > /dev/null; do echo -n "." curr_time=$(date +%s) time_diff=$(($curr_time - $start_time)) if [[ $time_diff -gt $timeout ]]; then echo "\nTimed out waiting for $name" return 1 fi sleep 5 done echo " Success!" return 0 } wait_for_json oc_proxy "${HOST_PROXY_API_PATH}" 10 -H "Accept: application/json" -H "Content-Type: application/json" addresses=$(oc get node -n openshift-machine-api ${node_name} -o json | jq -c '.status.addresses') machine_data=$(oc get machine -n openshift-machine-api -o json ${machine}) host=$(echo "$machine_data" | jq '.metadata.annotations["metal3.io/BareMetalHost"]' | cut -f2 -d/ | sed 's/"//g') if [ -z "$host" ]; then echo "Machine $machine is not linked to a host yet." 1>&2 exit 1 fi # The address structure on the host doesn't match the node, so extract # the values we want into separate variables so we can build the patch # we need. hostname=$(echo "${addresses}" | jq '.[] | select(. | .type == "Hostname") | .address' | sed 's/"//g') ipaddr=$(echo "${addresses}" | jq '.[] | select(. | .type == "InternalIP") | .address' | sed 's/"//g') host_patch=' { "status": { "hardware": { "hostname": "'${hostname}'", "nics": [ { "ip": "'${ipaddr}'", "mac": "00:00:00:00:00:00", "model": "unknown", "speedGbps": 10, "vlanId": 0, "pxe": true, "name": "eth1" } ], "systemVendor": { "manufacturer": "Red Hat", "productName": "product name", "serialNumber": "" }, "firmware": { "bios": { "date": "04/01/2014", "vendor": "SeaBIOS", "version": "1.11.0-2.el7" } }, "ramMebibytes": 0, "storage": [], "cpu": { "arch": "x86_64", "model": "Intel(R) Xeon(R) CPU E5-2630 v4 @ 2.20GHz", "clockMegahertz": 2199.998, "count": 4, "flags": [] } } } } ' echo "PATCHING HOST" echo "${host_patch}" | jq . curl -s \ -X PATCH \ ${HOST_PROXY_API_PATH}/${host}/status \ -H "Content-type: application/merge-patch+json" \ -d "${host_patch}" oc get baremetalhost -n openshift-machine-api -o yaml "${host}"$ bash link-machine-and-node.sh custom-master3 worker-5
Confirm
etcdmembers:$ oc rsh -n openshift-etcd etcd-worker-2 etcdctl member list -w table
Example output
+--------+---------+--------+--------------+--------------+---------+
|   ID   |  STATUS |  NAME  |  PEER ADDRS  | CLIENT ADDRS | LEARNER |
+--------+---------+--------+--------------+--------------+---------+
|2c18942f| started |worker-3|192.168.111.26|192.168.111.26|  false  |
|61e2a860| started |worker-2|192.168.111.25|192.168.111.25|  false  |
|ead4f280| started |worker-5|192.168.111.28|192.168.111.28|  false  |
+--------+---------+--------+--------------+--------------+---------+
Confirm the
etcd-operatorconfiguration applies to all nodes:$ oc get clusteroperator etcd
Example output
NAME   VERSION   AVAILABLE   PROGRESSING   DEGRADED   SINCE   MESSAGE
etcd   4.11.5    True        False         False      5h54m
Confirm
etcd-operatorhealth:$ oc rsh -n openshift-etcd etcd-worker-0 etcdctl endpoint health
Example output
192.168.111.26 is healthy: committed proposal: took = 11.297561ms
192.168.111.25 is healthy: committed proposal: took = 13.892416ms
192.168.111.28 is healthy: committed proposal: took = 11.870755ms
Confirm node health:
$ oc get nodes
Example output
NAME       STATUS   ROLES    AGE     VERSION
master-0   Ready    master   6h20m   v1.24.0+3882f8f
worker-1   Ready    worker   6h7m    v1.24.0+3882f8f
master-2   Ready    master   6h20m   v1.24.0+3882f8f
master-3   Ready    master   6h4m    v1.24.0+3882f8f
worker-4   Ready    worker   6h7m    v1.24.0+3882f8f
master-5   Ready    master   99m     v1.24.0+3882f8f
Confirm the
ClusterOperatorshealth:$ oc get ClusterOperators
Example output
NAME                                      VERSION AVAILABLE PROGRESSING DEGRADED SINCE MSG
authentication                            4.11.5  True      False       False    5h57m
baremetal                                 4.11.5  True      False       False    6h19m
cloud-controller-manager                  4.11.5  True      False       False    6h20m
cloud-credential                          4.11.5  True      False       False    6h23m
cluster-autoscaler                        4.11.5  True      False       False    6h18m
config-operator                           4.11.5  True      False       False    6h19m
console                                   4.11.5  True      False       False    6h4m
csi-snapshot-controller                   4.11.5  True      False       False    6h19m
dns                                       4.11.5  True      False       False    6h18m
etcd                                      4.11.5  True      False       False    6h17m
image-registry                            4.11.5  True      False       False    6h7m
ingress                                   4.11.5  True      False       False    6h6m
insights                                  4.11.5  True      False       False    6h12m
kube-apiserver                            4.11.5  True      False       False    6h16m
kube-controller-manager                   4.11.5  True      False       False    6h16m
kube-scheduler                            4.11.5  True      False       False    6h16m
kube-storage-version-migrator             4.11.5  True      False       False    6h19m
machine-api                               4.11.5  True      False       False    6h15m
machine-approver                          4.11.5  True      False       False    6h19m
machine-config                            4.11.5  True      False       False    6h18m
marketplace                               4.11.5  True      False       False    6h18m
monitoring                                4.11.5  True      False       False    6h4m
network                                   4.11.5  True      False       False    6h20m
node-tuning                               4.11.5  True      False       False    6h18m
openshift-apiserver                       4.11.5  True      False       False    6h8m
openshift-controller-manager              4.11.5  True      False       False    6h7m
openshift-samples                         4.11.5  True      False       False    6h12m
operator-lifecycle-manager                4.11.5  True      False       False    6h18m
operator-lifecycle-manager-catalog        4.11.5  True      False       False    6h19m
operator-lifecycle-manager-pkgsvr         4.11.5  True      False       False    6h12m
service-ca                                4.11.5  True      False       False    6h19m
storage                                   4.11.5  True      False       False    6h19m
Confirm the
ClusterVersion:$ oc get ClusterVersion
Example output
NAME      VERSION   AVAILABLE   PROGRESSING   SINCE   STATUS
version   4.11.5    True        False         5h57m   Cluster version is 4.11.5
Remove the old control plane node:
Delete the
BareMetalHostCR:$ oc delete bmh -n openshift-machine-api custom-master3
Confirm the
Machineis unhealthy:$ oc get machine -A
Example output
NAMESPACE              NAME                              PHASE    AGE
openshift-machine-api  custom-master3                    Running  14h
openshift-machine-api  test-day2-1-6qv96-master-0        Failed   20h
openshift-machine-api  test-day2-1-6qv96-master-1        Running  20h
openshift-machine-api  test-day2-1-6qv96-master-2        Running  20h
openshift-machine-api  test-day2-1-6qv96-worker-0-8w7vr  Running  19h
openshift-machine-api  test-day2-1-6qv96-worker-0-rxddj  Running  19h
Delete the
MachineCR:$ oc delete machine -n openshift-machine-api test-day2-1-6qv96-master-0 machine.machine.openshift.io "test-day2-1-6qv96-master-0" deleted
Confirm removal of the
NodeCR:$ oc get nodes
Example output
NAME       STATUS   ROLES    AGE   VERSION
worker-1   Ready    worker   19h   v1.24.0+3882f8f
master-2   Ready    master   20h   v1.24.0+3882f8f
master-3   Ready    master   19h   v1.24.0+3882f8f
worker-4   Ready    worker   19h   v1.24.0+3882f8f
master-5   Ready    master   15h   v1.24.0+3882f8f
Check
etcd-operatorlogs to confirm status of theetcdcluster:$ oc logs -n openshift-etcd-operator etcd-operator-8668df65d-lvpjf
Example output
E0927 07:53:10.597523 1 base_controller.go:272] ClusterMemberRemovalController reconciliation failed: cannot remove member: 192.168.111.23 because it is reported as healthy but it doesn't have a machine nor a node resource
Remove the physical machine to allow
etcd-operatorto reconcile the cluster members:$ oc rsh -n openshift-etcd etcd-worker-2 etcdctl member list -w table; etcdctl endpoint health
Example output
+--------+---------+--------+--------------+--------------+---------+
|   ID   |  STATUS |  NAME  |  PEER ADDRS  | CLIENT ADDRS | LEARNER |
+--------+---------+--------+--------------+--------------+---------+
|2c18942f| started |worker-3|192.168.111.26|192.168.111.26|  false  |
|61e2a860| started |worker-2|192.168.111.25|192.168.111.25|  false  |
|ead4f280| started |worker-5|192.168.111.28|192.168.111.28|  false  |
+--------+---------+--------+--------------+--------------+---------+
192.168.111.26 is healthy: committed proposal: took = 10.458132ms
192.168.111.25 is healthy: committed proposal: took = 11.047349ms
192.168.111.28 is healthy: committed proposal: took = 11.414402ms
Additional resources
11.7. Installing a primary control plane node on an unhealthy cluster
This procedure describes how to install a primary control plane node on an unhealthy OpenShift Container Platform cluster.
Prerequisites
- You have installed a healthy cluster with a minimum of three nodes.
- You have created a control plane.
-
You have assigned
role: masterto a single node.
Procedure
Confirm initial state of the cluster:
$ oc get nodes
Example output
NAME       STATUS     ROLES    AGE   VERSION
worker-1   Ready      worker   20h   v1.24.0+3882f8f
master-2   NotReady   master   20h   v1.24.0+3882f8f
master-3   Ready      master   20h   v1.24.0+3882f8f
worker-4   Ready      worker   20h   v1.24.0+3882f8f
master-5   Ready      master   15h   v1.24.0+3882f8f
Confirm the
etcd-operatordetects the cluster as unhealthy:$ oc logs -n openshift-etcd-operator etcd-operator-8668df65d-lvpjf
Example output
E0927 08:24:23.983733 1 base_controller.go:272] DefragController reconciliation failed: cluster is unhealthy: 2 of 3 members are available, worker-2 is unhealthy
Confirm the
etcdctlmembers:$ oc rsh -n openshift-etcd etcd-worker-3 etcdctl member list -w table
Example output
+--------+---------+--------+--------------+--------------+---------+
|   ID   | STATUS  |  NAME  |  PEER ADDRS  | CLIENT ADDRS | LEARNER |
+--------+---------+--------+--------------+--------------+---------+
|2c18942f| started |worker-3|192.168.111.26|192.168.111.26|  false  |
|61e2a860| started |worker-2|192.168.111.25|192.168.111.25|  false  |
|ead4f280| started |worker-5|192.168.111.28|192.168.111.28|  false  |
+--------+---------+--------+--------------+--------------+---------+
Confirm that
etcdctlreports an unhealthy member of the cluster:$ etcdctl endpoint health
Example output
{"level":"warn","ts":"2022-09-27T08:25:35.953Z","logger":"client","caller":"v3/retry_interceptor.go:62","msg":"retrying of unary invoker failed","target":"etcd-endpoints://0xc000680380/192.168.111.25","attempt":0,"error":"rpc error: code = DeadlineExceeded desc = latest balancer error: last connection error: connection error: desc = \"transport: Error while dialing dial tcp 192.168.111.25: connect: no route to host\""}
192.168.111.28 is healthy: committed proposal: took = 12.465641ms
192.168.111.26 is healthy: committed proposal: took = 12.297059ms
192.168.111.25 is unhealthy: failed to commit proposal: context deadline exceeded
Error: unhealthy cluster
Remove the unhealthy control plane by deleting the
MachineCustom Resource:$ oc delete machine -n openshift-machine-api test-day2-1-6qv96-master-2
NoteThe
MachineandNodeCustom Resources (CRs) will not be deleted if the unhealthy cluster cannot run successfully.Confirm that
etcd-operatorhas not removed the unhealthy machine:$ oc logs -n openshift-etcd-operator etcd-operator-8668df65d-lvpjf -f
Example output
I0927 08:58:41.249222 1 machinedeletionhooks.go:135] skip removing the deletion hook from machine test-day2-1-6qv96-master-2 since its member is still present with any of: [{InternalIP } {InternalIP 192.168.111.26}]Remove the unhealthy
etcdctlmember manually:$ oc rsh -n openshift-etcd etcd-worker-3\ etcdctl member list -w table
Example output
+--------+---------+--------+--------------+--------------+---------+
|   ID   |  STATUS |  NAME  |  PEER ADDRS  | CLIENT ADDRS | LEARNER |
+--------+---------+--------+--------------+--------------+---------+
|2c18942f| started |worker-3|192.168.111.26|192.168.111.26|  false  |
|61e2a860| started |worker-2|192.168.111.25|192.168.111.25|  false  |
|ead4f280| started |worker-5|192.168.111.28|192.168.111.28|  false  |
+--------+---------+--------+--------------+--------------+---------+
Confirm that
etcdctlreports an unhealthy member of the cluster:$ etcdctl endpoint health
Example output
{"level":"warn","ts":"2022-09-27T10:31:07.227Z","logger":"client","caller":"v3/retry_interceptor.go:62","msg":"retrying of unary invoker failed","target":"etcd-endpoints://0xc0000d6e00/192.168.111.25","attempt":0,"error":"rpc error: code = DeadlineExceeded desc = latest balancer error: last connection error: connection error: desc = \"transport: Error while dialing dial tcp 192.168.111.25: connect: no route to host\""}
192.168.111.28 is healthy: committed proposal: took = 13.038278ms
192.168.111.26 is healthy: committed proposal: took = 12.950355ms
192.168.111.25 is unhealthy: failed to commit proposal: context deadline exceeded
Error: unhealthy cluster
Remove the unhealthy cluster by deleting the
etcdctlmember Custom Resource:$ etcdctl member remove 61e2a86084aafa62
Example output
Member 61e2a86084aafa62 removed from cluster 6881c977b97990d7
Confirm members of
etcdctlby running the following command:$ etcdctl member list -w table
Example output
+----------+---------+--------+--------------+--------------+-------+
|    ID    | STATUS  |  NAME  |  PEER ADDRS  | CLIENT ADDRS |LEARNER|
+----------+---------+--------+--------------+--------------+-------+
| 2c18942f | started |worker-3|192.168.111.26|192.168.111.26| false |
| ead4f280 | started |worker-5|192.168.111.28|192.168.111.28| false |
+----------+---------+--------+--------------+--------------+-------+
Review and approve Certificate Signing Requests
Review the Certificate Signing Requests (CSRs):
$ oc get csr | grep Pending
Example output
csr-5sd59   8m19s   kubernetes.io/kube-apiserver-client-kubelet   system:serviceaccount:openshift-machine-config-operator:node-bootstrapper   <none>              Pending
csr-xzqts   10s     kubernetes.io/kubelet-serving                 system:node:worker-6                                                   <none>              Pending
Approve all pending CSRs:
$ oc get csr -o go-template='{{range .items}}{{if not .status}}{{.metadata.name}}{{"\n"}}{{end}}{{end}}' | xargs --no-run-if-empty oc adm certificate approveNoteYou must approve the CSRs to complete the installation.
Confirm ready status of the control plane node:
$ oc get nodes
Example output
NAME       STATUS   ROLES    AGE     VERSION
worker-1   Ready    worker   22h     v1.24.0+3882f8f
master-3   Ready    master   22h     v1.24.0+3882f8f
worker-4   Ready    worker   22h     v1.24.0+3882f8f
master-5   Ready    master   17h     v1.24.0+3882f8f
master-6   Ready    master   2m52s   v1.24.0+3882f8f
Validate the
Machine,NodeandBareMetalHostCustom Resources.The
etcd-operatorrequiresMachineCRs to be present if the cluster is running with the functional Machine API.MachineCRs are displayed during theRunningphase when present.Create
MachineCustom Resource linked withBareMetalHostandNode.Make sure there is a
MachineCR referencing the newly added node.ImportantBoot-it-yourself will not create
BareMetalHostandMachineCRs, so you must create them. Failure to create theBareMetalHostandMachineCRs will generate errors when runningetcd-operator.Add
BareMetalHostCustom Resource:$ oc create bmh -n openshift-machine-api custom-master3
Add
MachineCustom Resource:$ oc create machine -n openshift-machine-api custom-master3
Link
BareMetalHost,Machine, andNodeby running thelink-machine-and-node.shscript:#!/bin/bash # Credit goes to https://bugzilla.redhat.com/show_bug.cgi?id=1801238. # This script will link Machine object and Node object. This is needed # in order to have IP address of the Node present in the status of the Machine. set -x set -e machine="$1" node="$2" if [ -z "$machine" -o -z "$node" ]; then echo "Usage: $0 MACHINE NODE" exit 1 fi uid=$(echo $node | cut -f1 -d':') node_name=$(echo $node | cut -f2 -d':') oc proxy & proxy_pid=$! function kill_proxy { kill $proxy_pid } trap kill_proxy EXIT SIGINT HOST_PROXY_API_PATH="http://localhost:8001/apis/metal3.io/v1alpha1/namespaces/openshift-machine-api/baremetalhosts" function wait_for_json() { local name local url local curl_opts local timeout local start_time local curr_time local time_diff name="$1" url="$2" timeout="$3" shift 3 curl_opts="$@" echo -n "Waiting for $name to respond" start_time=$(date +%s) until curl -g -X GET "$url" "${curl_opts[@]}" 2> /dev/null | jq '.' 2> /dev/null > /dev/null; do echo -n "." curr_time=$(date +%s) time_diff=$(($curr_time - $start_time)) if [[ $time_diff -gt $timeout ]]; then echo "\nTimed out waiting for $name" return 1 fi sleep 5 done echo " Success!" return 0 } wait_for_json oc_proxy "${HOST_PROXY_API_PATH}" 10 -H "Accept: application/json" -H "Content-Type: application/json" addresses=$(oc get node -n openshift-machine-api ${node_name} -o json | jq -c '.status.addresses') machine_data=$(oc get machine -n openshift-machine-api -o json ${machine}) host=$(echo "$machine_data" | jq '.metadata.annotations["metal3.io/BareMetalHost"]' | cut -f2 -d/ | sed 's/"//g') if [ -z "$host" ]; then echo "Machine $machine is not linked to a host yet." 1>&2 exit 1 fi # The address structure on the host doesn't match the node, so extract # the values we want into separate variables so we can build the patch # we need. hostname=$(echo "${addresses}" | jq '.[] | select(. | .type == "Hostname") | .address' | sed 's/"//g') ipaddr=$(echo "${addresses}" | jq '.[] | select(. | .type == "InternalIP") | .address' | sed 's/"//g') host_patch=' { "status": { "hardware": { "hostname": "'${hostname}'", "nics": [ { "ip": "'${ipaddr}'", "mac": "00:00:00:00:00:00", "model": "unknown", "speedGbps": 10, "vlanId": 0, "pxe": true, "name": "eth1" } ], "systemVendor": { "manufacturer": "Red Hat", "productName": "product name", "serialNumber": "" }, "firmware": { "bios": { "date": "04/01/2014", "vendor": "SeaBIOS", "version": "1.11.0-2.el7" } }, "ramMebibytes": 0, "storage": [], "cpu": { "arch": "x86_64", "model": "Intel(R) Xeon(R) CPU E5-2630 v4 @ 2.20GHz", "clockMegahertz": 2199.998, "count": 4, "flags": [] } } } } ' echo "PATCHING HOST" echo "${host_patch}" | jq . curl -s \ -X PATCH \ ${HOST_PROXY_API_PATH}/${host}/status \ -H "Content-type: application/merge-patch+json" \ -d "${host_patch}" oc get baremetalhost -n openshift-machine-api -o yaml "${host}"$ bash link-machine-and-node.sh custom-master3 worker-3
Confirm members of
etcdctlby running the following command:$ oc rsh -n openshift-etcd etcd-worker-3 etcdctl member list -w table
Example output
+---------+-------+--------+--------------+--------------+-------+
|   ID    | STATUS|  NAME  |   PEER ADDRS | CLIENT ADDRS |LEARNER|
+---------+-------+--------+--------------+--------------+-------+
| 2c18942f|started|worker-3|192.168.111.26|192.168.111.26| false |
| ead4f280|started|worker-5|192.168.111.28|192.168.111.28| false |
| 79153c5a|started|worker-6|192.168.111.29|192.168.111.29| false |
+---------+-------+--------+--------------+--------------+-------+
Confirm the
etcdoperator has configured all nodes:$ oc get clusteroperator etcd
Example output
NAME   VERSION   AVAILABLE   PROGRESSING   DEGRADED   SINCE
etcd   4.11.5    True        False         False      22h
Confirm health of
etcdctl:$ oc rsh -n openshift-etcd etcd-worker-3 etcdctl endpoint health
Example output
192.168.111.26 is healthy: committed proposal: took = 9.105375ms
192.168.111.28 is healthy: committed proposal: took = 9.15205ms
192.168.111.29 is healthy: committed proposal: took = 10.277577ms
Confirm the health of the nodes:
$ oc get Nodes
Example output
NAME       STATUS   ROLES    AGE   VERSION
worker-1   Ready    worker   22h   v1.24.0+3882f8f
master-3   Ready    master   22h   v1.24.0+3882f8f
worker-4   Ready    worker   22h   v1.24.0+3882f8f
master-5   Ready    master   18h   v1.24.0+3882f8f
master-6   Ready    master   40m   v1.24.0+3882f8f
Confirm the health of the
ClusterOperators:$ oc get ClusterOperators
Example output
NAME                               VERSION   AVAILABLE   PROGRESSING   DEGRADED   SINCE
authentication                     4.11.5    True        False         False      150m
baremetal                          4.11.5    True        False         False      22h
cloud-controller-manager           4.11.5    True        False         False      22h
cloud-credential                   4.11.5    True        False         False      22h
cluster-autoscaler                 4.11.5    True        False         False      22h
config-operator                    4.11.5    True        False         False      22h
console                            4.11.5    True        False         False      145m
csi-snapshot-controller            4.11.5    True        False         False      22h
dns                                4.11.5    True        False         False      22h
etcd                               4.11.5    True        False         False      22h
image-registry                     4.11.5    True        False         False      22h
ingress                            4.11.5    True        False         False      22h
insights                           4.11.5    True        False         False      22h
kube-apiserver                     4.11.5    True        False         False      22h
kube-controller-manager            4.11.5    True        False         False      22h
kube-scheduler                     4.11.5    True        False         False      22h
kube-storage-version-migrator      4.11.5    True        False         False      148m
machine-api                        4.11.5    True        False         False      22h
machine-approver                   4.11.5    True        False         False      22h
machine-config                     4.11.5    True        False         False      110m
marketplace                        4.11.5    True        False         False      22h
monitoring                         4.11.5    True        False         False      22h
network                            4.11.5    True        False         False      22h
node-tuning                        4.11.5    True        False         False      22h
openshift-apiserver                4.11.5    True        False         False      163m
openshift-controller-manager       4.11.5    True        False         False      22h
openshift-samples                  4.11.5    True        False         False      22h
operator-lifecycle-manager         4.11.5    True        False         False      22h
operator-lifecycle-manager-catalog 4.11.5    True        False         False      22h
operator-lifecycle-manager-pkgsvr  4.11.5    True        False         False      22h
service-ca                         4.11.5    True        False         False      22h
storage                            4.11.5    True        False         False      22h
Confirm the
ClusterVersion:$ oc get ClusterVersion
Example output
NAME      VERSION   AVAILABLE   PROGRESSING   SINCE   STATUS
version   4.11.5    True        False         22h     Cluster version is 4.11.5
11.8. Additional resources
Chapter 12. Optional: Installing on Nutanix
If you install OpenShift Container Platform on Nutanix, the Assisted Installer can integrate the OpenShift Container Platform cluster with the Nutanix platform, which exposes the Machine API to Nutanix and enables autoscaling and dynamically provisioning storage containers with the Nutanix Container Storage Interface (CSI).
12.1. Adding hosts on Nutanix with the UI
To add hosts on Nutanix with the user interface (UI), generate the discovery image ISO from the Assisted Installer. Use the minimal discovery image ISO. This is the default setting. The image includes only what is required to boot a host with networking. The majority of the content is downloaded upon boot. The ISO image is about 100MB in size.
After this is complete, you must create an image for the Nutanix platform and create the Nutanix virtual machines.
Prerequisites
- You have created a cluster profile in the Assisted Installer UI.
- You have a Nutanix cluster environment set up, and made a note of the cluster name and subnet name.
Procedure
- In Cluster details, select Nutanix from the Integrate with external partner platforms dropdown list. The Include custom manifest checkbox is optional.
- In Host discovery, click the Add hosts button.
Optional: Add an SSH public key so that you can connect to the Nutanix VMs as the
coreuser. Having a login to the cluster hosts can provide you with debugging information during the installation.- If you do not have an existing SSH key pair on your local machine, follow the steps in Generating a key pair for cluster node SSH access.
-
In the SSH public key field, click Browse to upload the
id_rsa.pubfile containing the SSH public key. Alternatively, drag and drop the file into the field from the file manager. To see the file in the file manager, select Show hidden files in the menu.
Select the desired provisioning type.
NoteMinimal image file: Provision with virtual media downloads a smaller image that will fetch the data needed to boot.
In Networking, select Cluster-managed networking. Nutanix does not support User-managed networking.
- Optional: If the cluster hosts are behind a firewall that requires the use of a proxy, select Configure cluster-wide proxy settings. Enter the username, password, IP address and port for the HTTP and HTTPS URLs of the proxy server.
- Optional: Configure the discovery image if you want to boot it with an ignition file. See Configuring the discovery image for additional details.
- Click Generate Discovery ISO.
- Copy the Discovery ISO URL.
- In the Nutanix Prism UI, follow the directions to upload the discovery image from the Assisted Installer.
In the Nutanix Prism UI, create the control plane (master) VMs through Prism Central.
-
Enter the Name. For example,
control-planeormaster. - Enter the Number of VMs. This should be 3 for the control plane.
- Ensure the remaining settings meet the minimum requirements for control plane hosts.
-
Enter the Name. For example,
In the Nutanix Prism UI, create the worker VMs through Prism Central.
-
Enter the Name. For example,
worker. - Enter the Number of VMs. You should create at least 2 worker nodes.
- Ensure the remaining settings meet the minimum requirements for worker hosts.
-
Enter the Name. For example,
-
Return to the Assisted Installer user interface and wait until the Assisted Installer discovers the hosts and each of them have a
Readystatus. - Continue with the installation procedure.
12.2. Adding hosts on Nutanix with the API
To add hosts on Nutanix with the API, generate the discovery image ISO from the Assisted Installer. Use the minimal discovery image ISO. This is the default setting. The image includes only what is required to boot a host with networking. The majority of the content is downloaded upon boot. The ISO image is about 100MB in size.
Once this is complete, you must create an image for the Nutanix platform and create the Nutanix virtual machines.
Prerequisites
- You have set up the Assisted Installer API authentication.
- You have created an Assisted Installer cluster profile.
- You have created an Assisted Installer infrastructure environment.
-
You have your infrastructure environment ID exported in your shell as
$INFRA_ENV_ID. - You have completed the Assisted Installer cluster configuration.
- You have a Nutanix cluster environment set up, and made a note of the cluster name and subnet name.
Procedure
- Configure the discovery image if you want it to boot with an ignition file.
Create a Nutanix cluster configuration file to hold the environment variables:
$ touch ~/nutanix-cluster-env.sh
$ chmod +x ~/nutanix-cluster-env.sh
If you have to start a new terminal session, you can reload the environment variables easily. For example:
$ source ~/nutanix-cluster-env.sh
Assign the Nutanix cluster’s name to the
NTX_CLUSTER_NAMEenvironment variable in the configuration file:$ cat << EOF >> ~/nutanix-cluster-env.sh export NTX_CLUSTER_NAME=<cluster_name> EOF
Replace
<cluster_name>with the name of the Nutanix cluster.Assign the Nutanix cluster’s subnet name to the
NTX_SUBNET_NAMEenvironment variable in the configuration file:$ cat << EOF >> ~/nutanix-cluster-env.sh export NTX_SUBNET_NAME=<subnet_name> EOF
Replace
<subnet_name>with the name of the Nutanix cluster’s subnet.Refresh the API token:
$ source refresh-token
Get the download URL:
$ curl -H "Authorization: Bearer ${API_TOKEN}" \
https://api.openshift.com/api/assisted-install/v2/infra-envs/${INFRA_ENV_ID}/downloads/image-url
Create the Nutanix image configuration file:
$ cat << EOF > create-image.json
{
  "spec": {
    "name": "ocp_ai_discovery_image.iso",
    "description": "ocp_ai_discovery_image.iso",
    "resources": {
      "architecture": "X86_64",
      "image_type": "ISO_IMAGE",
      "source_uri": "<image_url>",
      "source_options": {
        "allow_insecure_connection": true
      }
    }
  },
  "metadata": {
    "spec_version": 3,
    "kind": "image"
  }
}
EOF
Replace
<image_url>with the image URL downloaded from the previous step.Create the Nutanix image:
$ curl  -k -u <user>:'<password>' -X 'POST' \
'https://<domain-or-ip>:<port>/api/nutanix/v3/images \
  -H 'accept: application/json' \
  -H 'Content-Type: application/json' \
  -d @./create-image.json | jq '.metadata.uuid'
Replace
<user>with the Nutanix user name. Replace'<password>'with the Nutanix password. Replace<domain-or-ip>with the domain name or IP address of the Nutanix plaform. Replace<port>with the port for the Nutanix server. The port defaults to9440.Assign the returned UUID to the
NTX_IMAGE_UUIDenvironment variable in the configuration file:$ cat << EOF >> ~/nutanix-cluster-env.sh export NTX_IMAGE_UUID=<uuid> EOF
Get the Nutanix cluster UUID:
$ curl -k -u <user>:'<password>' -X 'POST' \
  'https://<domain-or-ip>:<port>/api/nutanix/v3/clusters/list' \
  -H 'accept: application/json' \
  -H 'Content-Type: application/json' \
  -d '{
  "kind": "cluster"
}'  | jq '.entities[] | select(.spec.name=="<nutanix_cluster_name>") | .metadata.uuid'
Replace
<user>with the Nutanix user name. Replace'<password>'with the Nutanix password. Replace<domain-or-ip>with the domain name or IP address of the Nutanix plaform. Replace<port>with the port for the Nutanix server. The port defaults to9440. Replace<nutanix_cluster_name>with the name of the Nutanix cluster.Assign the returned Nutanix cluster UUID to the
NTX_CLUSTER_UUIDenvironment variable in the configuration file:$ cat << EOF >> ~/nutanix-cluster-env.sh export NTX_CLUSTER_UUID=<uuid> EOF
Replace
<uuid>with the returned UUID of the Nutanix cluster.Get the Nutanix cluster’s subnet UUID:
$ curl -k -u <user>:'<password>' -X 'POST' \
  'https://<domain-or-ip>:<port>/api/nutanix/v3/subnets/list' \
  -H 'accept: application/json' \
  -H 'Content-Type: application/json' \
  -d '{
  "kind": "subnet",
  "filter": "name==<subnet_name>"
}' | jq '.entities[].metadata.uuid'
Replace
<user>with the Nutanix user name. Replace'<password>'with the Nutanix password. Replace<domain-or-ip>with the domain name or IP address of the Nutanix plaform. Replace<port>with the port for the Nutanix server. The port defaults to9440. Replace<subnet_name>with the name of the cluster’s subnet.Assign the returned Nutanix subnet UUID to the
NTX_CLUSTER_UUIDenvironment variable in the configuration file:$ cat << EOF >> ~/nutanix-cluster-env.sh export NTX_SUBNET_UUID=<uuid> EOF
Replace
<uuid>with the returned UUID of the cluster subnet.Ensure the Nutanix environment variables are set:
$ source ~/nutanix-cluster-env.sh
Create a VM configuration file for each Nutanix host. Create three control plane (master) VMs and at least two worker VMs. For example:
$ touch create-master-0.json
$ cat << EOF > create-master-0.json
{
   "spec": {
      "name": "<host_name>",
      "resources": {
         "power_state": "ON",
         "num_vcpus_per_socket": 1,
         "num_sockets": 16,
         "memory_size_mib": 32768,
         "disk_list": [
            {
               "disk_size_mib": 122880,
               "device_properties": {
                  "device_type": "DISK"
               }
            },
            {
               "device_properties": {
                  "device_type": "CDROM"
               },
               "data_source_reference": {
                 "kind": "image",
                 "uuid": "$NTX_IMAGE_UUID"
              }
            }
         ],
         "nic_list": [
            {
               "nic_type": "NORMAL_NIC",
               "is_connected": true,
               "ip_endpoint_list": [
                  {
                     "ip_type": "DHCP"
                  }
               ],
               "subnet_reference": {
                  "kind": "subnet",
                  "name": "$NTX_SUBNET_NAME",
                  "uuid": "$NTX_SUBNET_UUID"
               }
            }
         ],
         "guest_tools": {
            "nutanix_guest_tools": {
               "state": "ENABLED",
               "iso_mount_state": "MOUNTED"
            }
         }
      },
      "cluster_reference": {
         "kind": "cluster",
         "name": "$NTX_CLUSTER_NAME",
         "uuid": "$NTX_CLUSTER_UUID"
      }
   },
   "api_version": "3.1.0",
   "metadata": {
      "kind": "vm"
   }
}
EOF
Replace
<host_name>with the name of the host.Boot each Nutanix virtual machine:
$ curl -k -u <user>:'<password>' -X 'POST' \
  'https://<domain-or-ip>:<port>/api/nutanix/v3/vms' \
  -H 'accept: application/json' \
  -H 'Content-Type: application/json' \
  -d @./<vm_config_file_name> | jq '.metadata.uuid'
Replace
<user>with the Nutanix user name. Replace'<password>'with the Nutanix password. Replace<domain-or-ip>with the domain name or IP address of the Nutanix plaform. Replace<port>with the port for the Nutanix server. The port defaults to9440. Replace<vm_config_file_name>with the name of the VM configuration file.Assign the returned VM UUID to a unique environment variable in the configuration file:
$ cat << EOF >> ~/nutanix-cluster-env.sh
export NTX_MASTER_0_UUID=<uuid>
EOF
Replace
<uuid>with the returned UUID of the VM.NoteThe environment variable must have a unique name for each VM.
Wait until the Assisted Installer has discovered each VM and they have passed validation.
$ curl -s -X GET "https://api.openshift.com/api/assisted-install/v2/clusters/$CLUSTER_ID"
--header "Content-Type: application/json"
-H "Authorization: Bearer $API_TOKEN"
| jq '.enabled_host_count'
Modify the cluster definition to enable integration with Nutanix:
$ curl https://api.openshift.com/api/assisted-install/v2/clusters/${CLUSTER_ID} \ -X PATCH \ -H "Authorization: Bearer ${API_TOKEN}" \ -H "Content-Type: application/json" \ -d ' { "platform_type":"nutanix" } ' | jq- Continue with the installation procedure.
12.3. Nutanix postinstallation configuration
Follow the steps below to complete and validate the OpenShift Container Platform integration with the Nutanix cloud provider.
Prerequisites
- The Assisted Installer has finished installing the cluster successfully.
- The cluster is connected to console.redhat.com.
- You have access to the Red Hat OpenShift Container Platform command line interface.
12.3.1. Updating the Nutanix configuration settings
After installing OpenShift Container Platform on the Nutanix platform using the Assisted Installer, you must update the following Nutanix configuration settings manually:
-
<prismcentral_username>: The Nutanix Prism Central username. -
<prismcentral_password>: The Nutanix Prism Central password. -
<prismcentral_address>: The Nutanix Prism Central address. -
<prismcentral_port>: The Nutanix Prism Central port. -
<prismelement_username>: The Nutanix Prism Element username. -
<prismelement_password>: The Nutanix Prism Element password. -
<prismelement_address>: The Nutanix Prism Element address. -
<prismelement_port>: The Nutanix Prism Element port. -
<prismelement_clustername>: The Nutanix Prism Element cluster name. -
<nutanix_storage_container>: The Nutanix Prism storage container.
Procedure
In the OpenShift Container Platform command line interface, update the Nutanix cluster configuration settings:
$ oc patch infrastructure/cluster --type=merge --patch-file=/dev/stdin <<-EOF
{
  "spec": {
    "platformSpec": {
      "nutanix": {
        "prismCentral": {
          "address": "<prismcentral_address>",
          "port": <prismcentral_port>
        },
        "prismElements": [
          {
            "endpoint": {
              "address": "<prismelement_address>",
              "port": <prismelement_port>
            },
            "name": "<prismelement_clustername>"
          }
        ]
      },
      "type": "Nutanix"
    }
  }
}
EOF
Sample output
infrastructure.config.openshift.io/cluster patched
For additional details, see Creating a machine set on Nutanix.
Create the Nutanix secret:
$ cat <<EOF | oc create -f -
apiVersion: v1
kind: Secret
metadata:
   name: nutanix-credentials
   namespace: openshift-machine-api
type: Opaque
stringData:
  credentials: |
[{"type":"basic_auth","data":{"prismCentral":{"username":"${<prismcentral_username>}","password":"${<prismcentral_password>}"},"prismElements":null}}]
EOF
Sample output
secret/nutanix-credentials created
When installing OpenShift Container Platform version 4.13 or later, update the Nutanix cloud provider configuration:
Get the Nutanix cloud provider configuration YAML file:
$ oc get cm cloud-provider-config -o yaml -n openshift-config > cloud-provider-config-backup.yaml
Create a backup of the configuration file:
$ cp cloud-provider-config_backup.yaml cloud-provider-config.yaml
Open the configuration YAML file:
$ vi cloud-provider-config.yaml
Edit the configuration YAML file as follows:
kind: ConfigMap
apiVersion: v1
metadata:
  name: cloud-provider-config
  namespace: openshift-config
data:
  config: |
    {
    	"prismCentral": {
    		"address": "<prismcentral_address>",
    		"port":<prismcentral_port>,
    		"credentialRef": {
    		   "kind": "Secret",
    		   "name": "nutanix-credentials",
    		   "namespace": "openshift-cloud-controller-manager"
    		}
    	},
    	"topologyDiscovery": {
    		"type": "Prism",
    		"topologyCategories": null
    	},
    	"enableCustomLabeling": true
    }
Apply the configuration updates:
$ oc apply -f cloud-provider-config.yaml
Sample output
Warning: resource configmaps/cloud-provider-config is missing the kubectl.kubernetes.io/last-applied-configuration annotation which is required by oc apply. oc apply should only be used on resources created declaratively by either oc create --save-config or oc apply. The missing annotation will be patched automatically.

configmap/cloud-provider-config configured
12.3.2. Creating the Nutanix CSI Operator group
Create an Operator group for the Nutanix CSI Operator.
For a description of operator groups and related concepts, see Common Operator Framework Terms in Additional Resources.
Procedure
Open the Nutanix CSI Operator Group YAML file:
$ vi openshift-cluster-csi-drivers-operator-group.yaml
Edit the YAML file as follows:
apiVersion: operators.coreos.com/v1
kind: OperatorGroup
metadata:
  generateName: openshift-cluster-csi-drivers
  namespace: openshift-cluster-csi-drivers
spec:
  targetNamespaces:
  - openshift-cluster-csi-drivers
  upgradeStrategy: Default
Create the Operator Group:
$ oc create -f openshift-cluster-csi-drivers-operator-group.yaml
Sample output
operatorgroup.operators.coreos.com/openshift-cluster-csi-driversjw9cd created
12.3.3. Installing the Nutanix CSI Operator
The Nutanix Container Storage Interface (CSI) Operator for Kubernetes deploys and manages the Nutanix CSI Driver.
For instructions on performing this step through the OpenShift Container Platform web console, see the Installing the Operator section of the Nutanix CSI Operator document in Additional Resources.
Procedure
Get the parameter values for the Nutanix CSI Operator YAML file:
Check that the Nutanix CSI Operator exists:
$ oc get packagemanifests | grep nutanix
Sample output
nutanixcsioperator Certified Operators 129m
Assign the default channel for the Operator to a BASH variable:
$ DEFAULT_CHANNEL=$(oc get packagemanifests nutanixcsioperator -o jsonpath={.status.defaultChannel})Assign the starting cluster service version (CSV) for the Operator to a BASH variable:
$ STARTING_CSV=$(oc get packagemanifests nutanixcsioperator -o jsonpath=\{.status.channels[*].currentCSV\})Assign the catalog source for the subscription to a BASH variable:
$ CATALOG_SOURCE=$(oc get packagemanifests nutanixcsioperator -o jsonpath=\{.status.catalogSource\})Assign the Nutanix CSI Operator source namespace to a BASH variable:
$ SOURCE_NAMESPACE=$(oc get packagemanifests nutanixcsioperator -o jsonpath=\{.status.catalogSourceNamespace\})
Create the Nutanix CSI Operator YAML file using the BASH variables:
$ cat << EOF > nutanixcsioperator.yaml
apiVersion: operators.coreos.com/v1alpha1
kind: Subscription
metadata:
  name: nutanixcsioperator
  namespace: openshift-cluster-csi-drivers
spec:
  channel: $DEFAULT_CHANNEL
  installPlanApproval: Automatic
  name: nutanixcsioperator
  source: $CATALOG_SOURCE
  sourceNamespace: $SOURCE_NAMESPACE
  startingCSV: $STARTING_CSV
EOF
Create the CSI Nutanix Operator:
$ oc apply -f nutanixcsioperator.yaml
Sample output
subscription.operators.coreos.com/nutanixcsioperator created
Run the following command until the Operator subscription state changes to
AtLatestKnown. This indicates that the Operator subscription has been created, and may take some time.$ oc get subscription nutanixcsioperator -n openshift-cluster-csi-drivers -o 'jsonpath={..status.state}'
12.3.4. Deploying the Nutanix CSI storage driver
The Nutanix Container Storage Interface (CSI) Driver for Kubernetes provides scalable and persistent storage for stateful applications.
For instructions on performing this step through the OpenShift Container Platform web console, see the Installing the CSI Driver using the Operator section of the Nutanix CSI Operator document in Additional Resources.
Procedure
Create a
NutanixCsiStorageresource to deploy the driver:$ cat <<EOF | oc create -f - apiVersion: crd.nutanix.com/v1alpha1 kind: NutanixCsiStorage metadata: name: nutanixcsistorage namespace: openshift-cluster-csi-drivers spec: {} EOFSample output
snutanixcsistorage.crd.nutanix.com/nutanixcsistorage created
Create a Nutanix secret YAML file for the CSI storage driver:
$ cat <<EOF | oc create -f - apiVersion: v1 kind: Secret metadata: name: ntnx-secret namespace: openshift-cluster-csi-drivers stringData: # prism-element-ip:prism-port:admin:password key: <prismelement_address:prismelement_port:prismcentral_username:prismcentral_password> 1 EOFNote- 1
- Replace these parameters with actual values while keeping the same format.
Sample output
secret/nutanix-secret created
12.3.5. Validating the postinstallation configurations
Run the following steps to validate the configuration.
Procedure
Verify that you can create a storage class:
$ cat <<EOF | oc create -f - kind: StorageClass apiVersion: storage.k8s.io/v1 metadata: name: nutanix-volume annotations: storageclass.kubernetes.io/is-default-class: 'true' provisioner: csi.nutanix.com parameters: csi.storage.k8s.io/fstype: ext4 csi.storage.k8s.io/provisioner-secret-namespace: openshift-cluster-csi-drivers csi.storage.k8s.io/provisioner-secret-name: ntnx-secret storageContainer: <nutanix_storage_container> 1 csi.storage.k8s.io/controller-expand-secret-name: ntnx-secret csi.storage.k8s.io/node-publish-secret-namespace: openshift-cluster-csi-drivers storageType: NutanixVolumes csi.storage.k8s.io/node-publish-secret-name: ntnx-secret csi.storage.k8s.io/controller-expand-secret-namespace: openshift-cluster-csi-drivers reclaimPolicy: Delete allowVolumeExpansion: true volumeBindingMode: Immediate EOFNote- 1
- Take <nutanix_storage_container> from the Nutanix configuration; for example, SelfServiceContainer.
Sample output
storageclass.storage.k8s.io/nutanix-volume created
Verify that you can create the Nutanix persistent volume claim (PVC):
Create the persistent volume claim (PVC):
$ cat <<EOF | oc create -f -
kind: PersistentVolumeClaim
apiVersion: v1
metadata:
  name: nutanix-volume-pvc
  namespace: openshift-cluster-csi-drivers
  annotations:
    volume.beta.kubernetes.io/storage-provisioner: csi.nutanix.com
    volume.kubernetes.io/storage-provisioner: csi.nutanix.com
  finalizers:
    - kubernetes.io/pvc-protection
spec:
  accessModes:
    - ReadWriteOnce
  resources:
    requests:
      storage: 1Gi
  storageClassName: nutanix-volume
  volumeMode: Filesystem
EOF
Sample output
persistentvolumeclaim/nutanix-volume-pvc created
Validate that the persistent volume claim (PVC) status is Bound:
$ oc get pvc -n openshift-cluster-csi-drivers
Sample output
NAME                 STATUS    VOLUME   CAPACITY   ACCESS MODES   STORAGECLASS     AGE
nutanix-volume-pvc   Bound                                        nutanix-volume   52s
Chapter 13. Optional: Installing on vSphere
The Assisted Installer integrates the OpenShift Container Platform cluster with the vSphere platform, which exposes the Machine API to vSphere and enables autoscaling.
13.1. Adding hosts on vSphere
You can add hosts to the Assisted Installer cluster using the online vSphere client or the govc vSphere CLI tool. The following procedure demonstrates adding hosts with the govc CLI tool. To use the online vSphere Client, refer to the documentation for vSphere.
To add hosts on vSphere with the vSphere govc CLI, generate the discovery image ISO from the Assisted Installer. The minimal discovery image ISO is the default setting. This image includes only what is required to boot a host with networking. The majority of the content is downloaded upon boot. The ISO image is about 100MB in size.
After this is complete, you must create an image for the vSphere platform and create the vSphere virtual machines.
Prerequisites
- You are using vSphere 7.0.2 or higher.
-
You have the vSphere
govcCLI tool installed and configured. -
You have set
clusterSet disk.enableUUIDto true in vSphere. - You have created a cluster in the Assisted Installer UI, or
- You have created an Assisted Installer cluster profile and infrastructure environment with the API.
-
You have exported your infrastructure environment ID in your shell as
$INFRA_ENV_ID.
Procedure
- Configure the discovery image if you want it to boot with an ignition file.
- In Cluster details, select vSphere from the Integrate with external partner platforms dropdown list. The Include custom manifest checkbox is optional.
- In Host discovery, click the Add hosts button and select the provisioning type.
Add an SSH public key so that you can connect to the vSphere VMs as the
coreuser. Having a login to the cluster hosts can provide you with debugging information during the installation.- If you do not have an existing SSH key pair on your local machine, follow the steps in Generating a key pair for cluster node SSH access.
-
In the SSH public key field, click Browse to upload the
id_rsa.pubfile containing the SSH public key. Alternatively, drag and drop the file into the field from the file manager. To see the file in the file manager, select Show hidden files in the menu.
Select the desired discovery image ISO.
NoteMinimal image file: Provision with virtual media downloads a smaller image that will fetch the data needed to boot.
In Networking, select Cluster-managed networking or User-managed networking:
- Optional: If the cluster hosts are behind a firewall that requires the use of a proxy, select Configure cluster-wide proxy settings. Enter the username, password, IP address and port for the HTTP and HTTPS URLs of the proxy server.
- Optional: If the cluster hosts are in a network with a re-encrypting man-in-the-middle (MITM) proxy or the cluster needs to trust certificates for other purposes such as container image registries, select Configure cluster-wide trusted certificates and add the additional certificates.
- Optional: Configure the discovery image if you want to boot it with an ignition file. See Configuring the discovery image for additional details.
- Click Generate Discovery ISO.
- Copy the Discovery ISO URL.
Download the discovery ISO:
$ wget - O vsphere-discovery-image.iso <discovery_url>
Replace
<discovery_url>with the Discovery ISO URL from the preceding step.On the command line, power down and destroy any preexisting virtual machines:
$ for VM in $(/usr/local/bin/govc ls /<datacenter>/vm/<folder_name>)
do
 	/usr/local/bin/govc vm.power -off $VM
 	/usr/local/bin/govc vm.destroy $VM
done
Replace
<datacenter>with the name of the datacenter. Replace<folder_name>with the name of the VM inventory folder.Remove preexisting ISO images from the data store, if there are any:
$ govc datastore.rm -ds <iso_datastore> <image>
Replace
<iso_datastore>with the name of the data store. Replaceimagewith the name of the ISO image.Upload the Assisted Installer discovery ISO:
$ govc datastore.upload -ds <iso_datastore> vsphere-discovery-image.iso
Replace
<iso_datastore>with the name of the data store.NoteAll nodes in the cluster must boot from the discovery image.
Boot three control plane (master) nodes:
$ govc vm.create -net.adapter <network_adapter_type> \
                 -disk.controller <disk_controller_type> \
                 -pool=<resource_pool> \
                 -c=16 \
                 -m=32768 \
                 -disk=120GB \
                 -disk-datastore=<datastore_file> \
                 -net.address="<nic_mac_address>" \
                 -iso-datastore=<iso_datastore> \
                 -iso="vsphere-discovery-image.iso" \
                 -folder="<inventory_folder>" \
                 <hostname>.<cluster_name>.example.com
See vm.create for details.
NoteThe foregoing example illustrates the minimum required resources for control plane nodes.
Boot at least two worker nodes:
$ govc vm.create -net.adapter <network_adapter_type> \
                 -disk.controller <disk_controller_type> \
                 -pool=<resource_pool> \
                 -c=4 \
                 -m=8192 \
                 -disk=120GB \
                 -disk-datastore=<datastore_file> \
                 -net.address="<nic_mac_address>" \
                 -iso-datastore=<iso_datastore> \
                 -iso="vsphere-discovery-image.iso" \
                 -folder="<inventory_folder>" \
                 <hostname>.<cluster_name>.example.com
See vm.create for details.
NoteThe foregoing example illustrates the minimum required resources for worker nodes.
Ensure the VMs are running:
$ govc ls /<datacenter>/vm/<folder_name>
Replace
<datacenter>with the name of the datacenter. Replace<folder_name>with the name of the VM inventory folder.After 2 minutes, shut down the VMs:
$ for VM in $(govc ls /<datacenter>/vm/<folder_name>)
do
     govc vm.power -s=true $VM
done
Replace
<datacenter>with the name of the datacenter. Replace<folder_name>with the name of the VM inventory folder.Set the
disk.enableUUIDsetting toTRUE:$ for VM in $(govc ls /<datacenter>/vm/<folder_name>) do govc vm.change -vm $VM -e disk.enableUUID=TRUE doneReplace
<datacenter>with the name of the datacenter. Replace<folder_name>with the name of the VM inventory folder.NoteYou must set
disk.enableUUIDtoTRUEon all of the nodes to enable autoscaling with vSphere.Restart the VMs:
$  for VM in $(govc ls /<datacenter>/vm/<folder_name>)
do
     govc vm.power -on=true $VM
done
Replace
<datacenter>with the name of the datacenter. Replace<folder_name>with the name of the VM inventory folder.-
Return to the Assisted Installer user interface and wait until the Assisted Installer discovers the hosts and each of them have a
Readystatus. - Select roles if needed.
- In Networking, uncheck Allocate IPs via DHCP server.
- Set the API VIP address.
- Set the Ingress VIP address.
- Continue with the installation procedure.
13.2. vSphere postinstallation configuration using the CLI
After installing an OpenShift Container Platform cluster using the Assisted Installer on vSphere with the platform integration feature enabled, you must update the following vSphere configuration settings manually:
- vCenter username
- vCenter password
- vCenter address
- vCenter cluster
- datacenter
- datastore
- folder
Prerequisites
- The Assisted Installer has finished installing the cluster successfully.
- The cluster is connected to console.redhat.com.
Procedure
Generate a base64-encoded username and password for vCenter:
$ echo -n "<vcenter_username>" | base64 -w0
Replace
<vcenter_username>with your vCenter username.$ echo -n "<vcenter_password>" | base64 -w0
Replace
<vcenter_password>with your vCenter password.Backup the vSphere credentials:
$ oc get secret vsphere-creds -o yaml -n kube-system > creds_backup.yaml
Edit the vSphere credentials:
$ cp creds_backup.yaml vsphere-creds.yaml
$ vi vsphere-creds.yaml
apiVersion: v1
data:
  <vcenter_address>.username: <vcenter_username_encoded>
  <vcenter_address>.password: <vcenter_password_encoded>
kind: Secret
metadata:
  annotations:
    cloudcredential.openshift.io/mode: passthrough
  creationTimestamp: "2022-01-25T17:39:50Z"
  name: vsphere-creds
  namespace: kube-system
  resourceVersion: "2437"
  uid: 06971978-e3a5-4741-87f9-2ca3602f2658
type: Opaque
Replace
<vcenter_address>with the vCenter address. Replace<vcenter_username_encoded>with the base64-encoded version of your vSphere username. Replace<vcenter_password_encoded>with the base64-encoded version of your vSphere password.Replace the vSphere credentials:
$ oc replace -f vsphere-creds.yaml
Redeploy the kube-controller-manager pods:
$ oc patch kubecontrollermanager cluster -p='{"spec": {"forceRedeploymentReason": "recovery-'"$( date --rfc-3339=ns )"'"}}' --type=mergeBackup the vSphere cloud provider configuration:
$ oc get cm cloud-provider-config -o yaml -n openshift-config > cloud-provider-config_backup.yaml
Edit the cloud provider configuration:
$ cloud-provider-config_backup.yaml cloud-provider-config.yaml
$ vi cloud-provider-config.yaml
apiVersion: v1
data:
  config: |
    [Global]
    secret-name = "vsphere-creds"
    secret-namespace = "kube-system"
    insecure-flag = "1"

    [Workspace]
    server = "<vcenter_address>"
    datacenter = "<datacenter>"
    default-datastore = "<datastore>"
    folder = "/<datacenter>/vm/<folder>"

    [VirtualCenter "<vcenter_address>"]
    datacenters = "<datacenter>"
kind: ConfigMap
metadata:
  creationTimestamp: "2022-01-25T17:40:49Z"
  name: cloud-provider-config
  namespace: openshift-config
  resourceVersion: "2070"
  uid: 80bb8618-bf25-442b-b023-b31311918507
Replace
<vcenter_address>with the vCenter address. Replace<datacenter>with the name of the data center. Replace<datastore>with the name of the data store. Replace<folder>with the folder containing the cluster VMs.Apply the cloud provider configuration:
$ oc apply -f cloud-provider-config.yaml
Taint the nodes with the
uninitializedtaint:ImportantFollow steps 9 through 12 if you are installing OpenShift Container Platform 4.13 or later.
Identify the nodes to taint:
$ oc get nodes
Run the following command for each node:
$ oc adm taint node <node_name> node.cloudprovider.kubernetes.io/uninitialized=true:NoSchedule
Replace
<node_name>with the name of the node.
Example
$ oc get nodes
NAME                STATUS   ROLES                  AGE   VERSION
master-0   Ready    control-plane,master   45h   v1.26.3+379cd9f
master-1   Ready    control-plane,master   45h   v1.26.3+379cd9f
worker-0   Ready    worker                 45h   v1.26.3+379cd9f
worker-1   Ready    worker                 45h   v1.26.3+379cd9f
master-2   Ready    control-plane,master   45h   v1.26.3+379cd9f

$ oc adm taint node master-0 node.cloudprovider.kubernetes.io/uninitialized=true:NoSchedule
$ oc adm taint node master-1 node.cloudprovider.kubernetes.io/uninitialized=true:NoSchedule
$ oc adm taint node master-2 node.cloudprovider.kubernetes.io/uninitialized=true:NoSchedule
$ oc adm taint node worker-0 node.cloudprovider.kubernetes.io/uninitialized=true:NoSchedule
$ oc adm taint node worker-1 node.cloudprovider.kubernetes.io/uninitialized=true:NoSchedule
Back up the infrastructures configuration:
$ oc get infrastructures.config.openshift.io -o yaml > infrastructures.config.openshift.io.yaml.backup
Edit the infrastructures configuration:
$ cp infrastructures.config.openshift.io.yaml.backup infrastructures.config.openshift.io.yaml
$ vi infrastructures.config.openshift.io.yaml
apiVersion: v1
items:
- apiVersion: config.openshift.io/v1
  kind: Infrastructure
  metadata:
    creationTimestamp: "2022-05-07T10:19:55Z"
    generation: 1
    name: cluster
    resourceVersion: "536"
    uid: e8a5742c-6d15-44e6-8a9e-064b26ab347d
  spec:
    cloudConfig:
      key: config
      name: cloud-provider-config
    platformSpec:
      type: VSphere
      vsphere:
        failureDomains:
        - name: assisted-generated-failure-domain
          region: assisted-generated-region
          server: <vcenter_address>
          topology:
            computeCluster: /<data_center>/host/<vcenter_cluster>
            datacenter: <data_center>
            datastore: /<data_center>/datastore/<datastore>
            folder: "/<data_center>/path/to/folder"
            networks:
            - "VM Network"
            resourcePool: /<data_center>/host/<vcenter_cluster>/Resources
          zone: assisted-generated-zone
        nodeNetworking:
          external: {}
          internal: {}
        vcenters:
        - datacenters:
          - <data_center>
          server: <vcenter_address>

kind: List
metadata:
  resourceVersion: ""
Replace
<vcenter_address>with your vCenter address. Replace<datacenter>with the name of your vCenter data center. Replace<datastore>with the name of your vCenter data store. Replace<folder>with the folder containing the cluster VMs. Replace<vcenter_cluster>with the vSphere vCenter cluster where OpenShift Container Platform is installed.Apply the infrastructures configuration:
$ oc apply -f infrastructures.config.openshift.io.yaml --overwrite=true
13.3. vSphere postinstallation configuration using the UI
After installing an OpenShift Container Platform cluster using the Assisted Installer on vSphere with the platform integration feature enabled, you must update the following vSphere configuration settings manually:
- vCenter address
- vCenter cluster
- vCenter username
- vCenter password
- Datacenter
- Default data store
- Virtual machine folder
Prerequisites
- The Assisted Installer has finished installing the cluster successfully.
- The cluster is connected to console.redhat.com.
Procedure
- In the Administrator perspective, navigate to Home → Overview.
- Under Status, click vSphere connection to open the vSphere connection configuration wizard.
-
In the vCenter field, enter the network address of the vSphere vCenter server. This can be either a domain name or an IP address. It appears in the vSphere web client URL; for example
https://[your_vCenter_address]/ui. In the vCenter cluster field, enter the name of the vSphere vCenter cluster where OpenShift Container Platform is installed.
ImportantThis step is mandatory if you installed OpenShift Container Platform 4.13 or later.
- In the Username field, enter your vSphere vCenter username.
In the Password field, enter your vSphere vCenter password.
WarningThe system stores the username and password in the
vsphere-credssecret in thekube-systemnamespace of the cluster. An incorrect vCenter username or password makes the cluster nodes unschedulable.-
In the Datacenter field, enter the name of the vSphere data center that contains the virtual machines used to host the cluster; for example,
SDDC-Datacenter. In the Default data store field, enter the vSphere data store that stores the persistent data volumes; for example,
/SDDC-Datacenter/datastore/datastorename.WarningUpdating the vSphere data center or default data store after the configuration has been saved detaches any active vSphere
PersistentVolumes.-
In the Virtual Machine Folder field, enter the data center folder that contains the virtual machine of the cluster; for example,
/SDDC-Datacenter/vm/ci-ln-hjg4vg2-c61657-t2gzr. For the OpenShift Container Platform installation to succeed, all virtual machines comprising the cluster must be located in a single data center folder. -
Click Save Configuration. This updates the
cloud-provider-configfile in theopenshift-confignamespace, and starts the configuration process. - Reopen the vSphere connection configuration wizard and expand the Monitored operators panel. Check that the status of the operators is either Progressing or Healthy.
Verification
The connection configuration process updates operator statuses and control plane nodes. It takes approximately an hour to complete. During the configuration process, the nodes will reboot. Previously bound PersistentVolumeClaims objects might become disconnected.
Follow the steps below to monitor the configuration process.
Check that the configuration process completed successfully:
- In the OpenShift Container Platform Administrator perspective, navigate to Home → Overview.
- Under Status click Operators. Wait for all operator statuses to change from Progressing to All succeeded. A Failed status indicates that the configuration failed.
- Under Status, click Control Plane. Wait for the response rate of all Control Pane components to return to 100%. A Failed control plane component indicates that the configuration failed.
A failure indicates that at least one of the connection settings is incorrect. Change the settings in the vSphere connection configuration wizard and save the configuration again.
Check that you are able to bind
PersistentVolumeClaimsobjects by performing the following steps:Create a
StorageClassobject using the following YAML:kind: StorageClass apiVersion: storage.k8s.io/v1 metadata: name: vsphere-sc provisioner: kubernetes.io/vsphere-volume parameters: datastore: YOURVCENTERDATASTORE diskformat: thin reclaimPolicy: Delete volumeBindingMode: Immediate
Create a
PersistentVolumeClaimsobject using the following YAML:kind: PersistentVolumeClaim apiVersion: v1 metadata: name: test-pvc namespace: openshift-config annotations: volume.beta.kubernetes.io/storage-provisioner: kubernetes.io/vsphere-volume finalizers: - kubernetes.io/pvc-protection spec: accessModes: - ReadWriteOnce resources: requests: storage: 10Gi storageClassName: vsphere-sc volumeMode: Filesystem
For instructions, see Dynamic provisioning in the OpenShift Container Platform documentation. To troubleshoot a
PersistentVolumeClaimsobject, navigate to Storage → PersistentVolumeClaims in the Administrator perspective of the OpenShift Container Platform UI.
Chapter 14. Optional: Installing on Oracle Cloud Infrastructure (OCI)
From OpenShift Container Platform 4.14 and later versions, you can use the Assisted Installer to install a cluster on Oracle Cloud Infrastructure by using infrastructure that you provide. Oracle Cloud Infrastructure provides services that can meet your needs for regulatory compliance, performance, and cost-effectiveness. You can access OCI Resource Manager configurations to provision and configure OCI resources.
For OpenShift Container Platform 4.14 and 4.15, the OCI integration is a Technology Preview feature only. Technology Preview features are not supported with Red Hat production service level agreements (SLAs) and might not be functionally complete. Red Hat does not recommend using them in production. These features provide early access to upcoming product features, enabling customers to test functionality and provide feedback during the development process.
For more information about the support scope of Red Hat Technology Preview features, see Technology Preview Features - Scope of Support.
This section is a summary of the steps required in the Assisted Installer UI to support the integration with Oracle Cloud Infrastructure. It does not document the steps to be performed in Oracle Cloud Infrastructure, nor does it cover the integration between the two platforms. For a complete and comprehensive procedure, see Using the Assisted Installer to install a cluster on OCI.
14.1. Generating an OCI-compatible discovery ISO image
Generate the discovery ISO image in Assisted Installer by completing the required steps. You must upload the image to the Oracle Cloud Infrastructure before you install OpenShift Container Platform on Oracle Cloud Infrastructure.
Prerequisites
- You created a child compartment and an object storage bucket on Oracle Cloud Infrastructure. See Creating OCI resources and services in the OpenShift Container Platform documentation.
- You meet the requirements necessary for installing a cluster. For details, see Prerequisites.
Procedure
- Log in to the Red Hat Hybrid Cloud Console.
- Click Create cluster.
- On the Cluster type page, click the Datacenter tab.
- In the Assisted Installer section, click Create cluster.
On the Cluster Details page, complete the following fields:
-
In the Cluster name field, specify the name of your cluster, such as
ocidemo. -
In the Base domain field, specify the base domain of the cluster, such as
splat-oci.devcluster.openshift.com. Take the base domain from OCI after creating a compartment and a zone. - In the OpenShift version field, specify OpenShift 4.15 or a later version.
-
In the CPU architecture field, specify
x86_64orArm64. - From the Integrate with external partner platforms list, select Oracle Cloud Infrastructure. The Include custom manifests checkbox is automatically selected.
-
In the Cluster name field, specify the name of your cluster, such as
- Click Next.
- On the Operators page, click Next.
On the Host Discovery page, perform the following actions:
- Click Add host to display a dialog box.
-
For the SSH public key field, upload a public SSH key from your local system. You can generate an SSH key pair with
ssh-keygen. - Click Generate Discovery ISO to generate the discovery image ISO file.
- Download the file to your local system. You will then upload the file to the bucket in Oracle Cloud Infrastructure as an Object.
14.2. Assigning node roles and custom manifests
After you provision Oracle Cloud Infrastructure (OCI) resources and upload OpenShift Container Platform custom manifest configuration files to OCI, you must complete the remaining cluster installation steps on the Assisted Installer before you can create an instance OCI.
Prerequisites
- You created a resource stack on OCI, and the stack includes the custom manifest configuration files and OCI Resource Manager configuration resources. For details, see Downloading manifest files and deployment resources in the OpenShift Container Platform documentation.
Procedure
- From the Red Hat Hybrid Cloud Console, go to the Host discovery page.
- Under the Role column, assign a node role, either Control plane node or Worker, for each targeted hostname. Click Next.
- Accept the default settings for the Storage and Networking pages.
- Click Next to go to the Custom manifests page.
-
In the Folder field, select
manifests. -
In the File name field, enter a value such as
oci-ccm.yml. -
In the Content section, click Browse. Select the CCM manifest located in
custom_ manifest/manifests/oci-ccm.yml. Click Add another manifest. Repeat the same steps for the following manifests provided by Oracle:
-
CSI driver manifest:
custom_ manifest/manifests/oci-csi.yml. -
CCM machine configuration:
custom_ manifest/openshift/machineconfig-ccm.yml. -
CSI driver machine configuration:
custom_ manifest/openshift/machineconfig-csi.yml.
-
CSI driver manifest:
- Complete the Review and create step to create your OpenShift Container Platform cluster on OCI.
- Click Install cluster to finalize the cluster installation.
Chapter 15. Troubleshooting
There are cases where the Assisted Installer cannot begin the installation or the cluster fails to install properly. In these events, it is helpful to understand the likely failure modes as well as how to troubleshoot the failure.
15.1. Troubleshooting discovery ISO issues
The Assisted Installer uses an ISO image to run an agent that registers the host to the cluster and performs hardware and network validations before attempting to install OpenShift. You can follow these procedures to troubleshoot problems related to the host discovery.
Once you start the host with the discovery ISO image, the Assisted Installer discovers the host and presents it in the Assisted Service UI. See Configuring the discovery image for additional details.
15.1.1. Verify the discovery agent is running
Prerequisites
- You have created an infrastructure environment by using the API or have created a cluster by using the UI.
- You booted a host with the Infrastructure Environment discovery ISO and the host failed to register.
- You have SSH access to the host.
- You provided an SSH public key in the "Add hosts" dialog before generating the Discovery ISO so that you can SSH into your machine without a password.
Procedure
- Verify that your host machine is powered on.
- If you selected DHCP networking, check that the DHCP server is enabled.
- If you selected Static IP, bridges and bonds networking, check that your configurations are correct.
Verify that you can access your host machine using SSH, a console such as the BMC, or a virtual machine console:
$ ssh core@<host_ip_address>
You can specify private key file using the
-iparameter if it isn’t stored in the default directory.$ ssh -i <ssh_private_key_file> core@<host_ip_address>
If you fail to ssh to the host, the host failed during boot or it failed to configure the network.
Upon login you should see this message:
Example login
 If you are not seeing this message it means that the host didn’t boot with the assisted-installer ISO. Make sure you configured the boot order properly (The host should boot once from the live-ISO).
Check the agent service logs:
$ sudo journalctl -u agent.service
In the following example, the errors indicate there is a network issue:
Example agent service log screenshot of agent service log

If there is an error pulling the agent image, check the proxy settings. Verify that the host is connected to the network. You can use
nmclito get additional information about your network configuration.
15.1.2. Verify the agent can access the assisted-service
Prerequisites
- You have created an Infrastructure Environment by using the API or have created a cluster by using the UI.
- You booted a host with the Infrastructure Environment discovery ISO and the host failed to register.
- You verified the discovery agent is running.
Procedure
Check the agent logs to verify the agent can access the Assisted Service:
$ sudo journalctl TAG=agent
The errors in the following example indicate that the agent failed to access the Assisted Service.
Example agent log
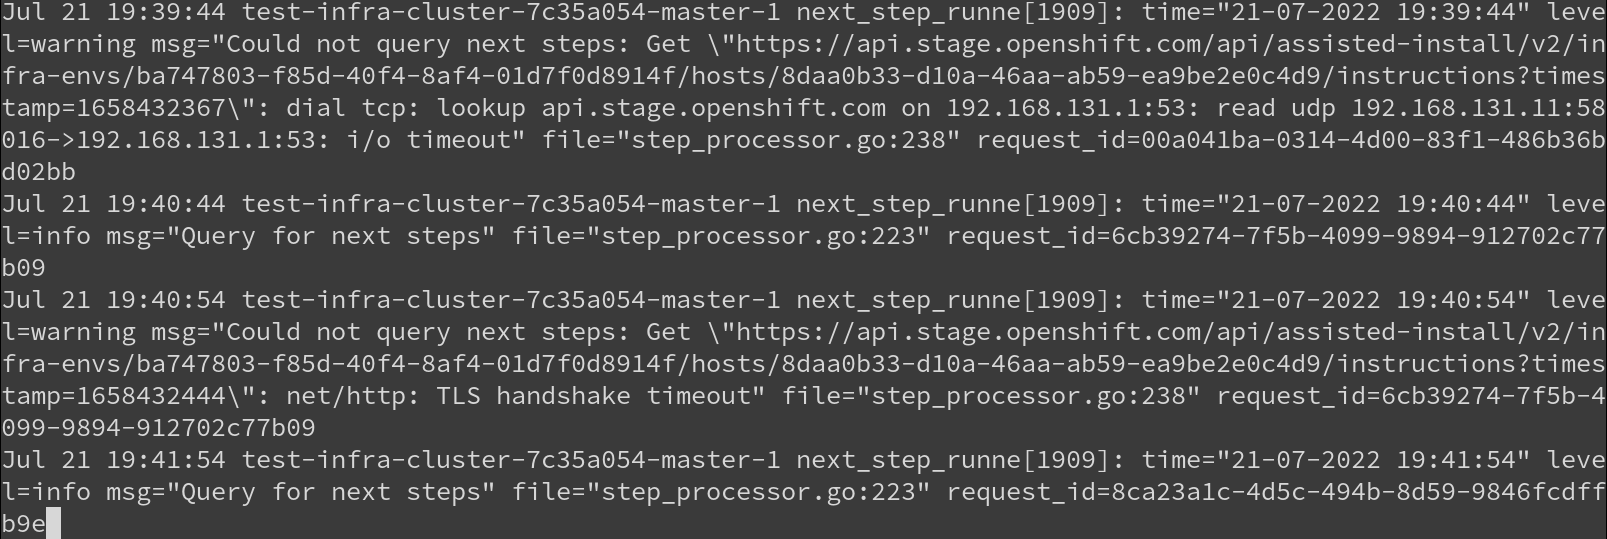
Check the proxy settings you configured for the cluster. If configured, the proxy must allow access to the Assisted Service URL.
15.2. Troubleshooting minimal discovery ISO issues
The minimal ISO image should be used when bandwidth over the virtual media connection is limited. It includes only what is required to boot a host with networking. The majority of the content is downloaded upon boot. The resulting ISO image is about 100MB in size compared to 1GB for the full ISO image.
15.2.1. Troubleshooting minimal ISO boot failure by interrupting the boot process
If your environment requires static network configuration to access the Assisted Installer service, any issues with that configuration might prevent the minimal ISO from booting properly. If the boot screen shows that the host has failed to download the root file system image, the network might not be configured correctly.
You can interrupt the kernel boot early in the bootstrap process, before the root file system image is downloaded. This allows you to access the root console and review the network configurations.
Example rootfs download failure
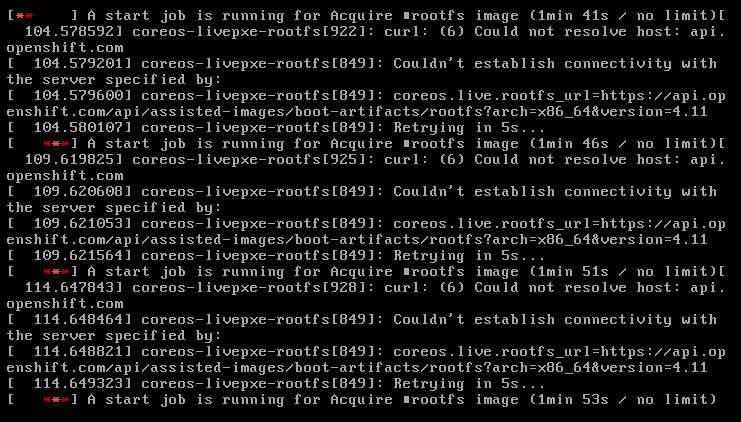
Procedure
Add the
.spec.kernelArgumentsstanza to theinfraEnvobject of the cluster you are deploying:NoteFor details on modifying an infrastructure environment, see Additional Resources.
# ... spec: clusterRef: name: sno1 namespace: sno1 cpuArchitecture: x86_64 ipxeScriptType: DiscoveryImageAlways kernelArguments: - operation: append value: rd.break=initqueue 1 nmStateConfigLabelSelector: matchLabels: nmstate-label: sno1 pullSecretRef: name: assisted-deployment-pull-secret- 1
rd.break=initqueueinterrupts the boot at thedracutmain loop. See rd.break options for debugging kernel boot for details.
-
Wait for the related nodes to reboot automatically and for the boot to abort at the
iniqueuestage, beforerootfsis downloaded. You will be redirected to the root console. Identify and change the incorrect network configurations. Here are some useful diagnostic commands:
View system logs by using
journalctl, for example:# journalctl -p err //Sorts logs by errors # journalctl -p crit //Sorts logs by critical errors # journalctl -p warning //Sorts logs by warnings
View network connection information by using
nmcli, as follows:# nmcli conn show
Check the configuration files for incorrect network connections, for example:
# cat /etc/assisted/network/host0/eno3.nmconnection
-
Press
control+dto resume the bootstrap process. The server downloadsrootfsand completes the process. -
Reopen the
infraEnvobject and remove the.spec.kernelArgumentsstanza.
Additional resources
15.3. Correcting a host’s boot order
Once the installation that runs as part of the Discovery Image completes, the Assisted Installer reboots the host. The host must boot from its installation disk to continue forming the cluster. If you have not correctly configured the host’s boot order, it will boot from another disk instead, interrupting the installation.
If the host boots the discovery image again, the Assisted Installer will immediately detect this event and set the host’s status to Installing Pending User Action. Alternatively, if the Assisted Installer does not detect that the host has booted the correct disk within the allotted time, it will also set this host status.
Procedure
- Reboot the host and set its boot order to boot from the installation disk. If you didn’t select an installation disk, the Assisted Installer selected one for you. To view the selected installation disk, click to expand the host’s information in the host inventory, and check which disk has the “Installation disk” role.
15.4. Rectifying partially-successful installations
There are cases where the Assisted Installer declares an installation to be successful even though it encountered errors:
- If you requested to install OLM operators and one or more failed to install, log into the cluster’s console to remediate the failures.
- If you requested to install more than two worker nodes and at least one failed to install, but at least two succeeded, add the failed workers to the installed cluster.
15.5. API connectivity failure when adding nodes to a cluster
When you add a node to an existing cluster as part of day 2 operations, the node downloads the ignition configuration file from the day 1 cluster. If the download fails and the node is unable to connect to the cluster, the status of the host in the Host discovery step changes to Insufficient. Clicking this status displays the following error message:
The host failed to download the ignition file from <URL>. You must ensure the host can reach the URL. Check your DNS and network configuration or update the IP address or domain used to reach the cluster.

error: ignition file download failed.... no route to host
There are a number of possible reasons for the connectivity failure. Here are some recommended actions.
Procedure
Check the IP address and domain name of the cluster:
- Click the set the IP or domain used to reach the cluster hyperlink.
- In the Update cluster hostname window, enter the correct IP address or domain name for the cluster.
- Check your DNS settings to ensure that the DNS can resolve the domain that you provided.
-
Ensure that port
22624is open in all firewalls. Check the agent logs of the host to verify that the agent can access the Assisted Service via SSH:
$ sudo journalctl TAG=agent
NoteFor more details, see Verify the agent can access the Assisted Service.