
지원 경험에서 최대한 활용하기
sos 유틸리티를 사용하여 RHEL 서버에서 문제 해결 정보 수집
초록
보다 포괄적 수용을 위한 오픈 소스 용어 교체
Red Hat은 코드, 문서, 웹 속성에서 문제가 있는 용어를 교체하기 위해 최선을 다하고 있습니다. 먼저 마스터(master), 슬레이브(slave), 블랙리스트(blacklist), 화이트리스트(whitelist) 등 네 가지 용어를 교체하고 있습니다. 이러한 변경 작업은 작업 범위가 크므로 향후 여러 릴리스에 걸쳐 점차 구현할 예정입니다. 자세한 내용은 CTO Chris Wright의 메시지를 참조하십시오.
Red Hat 문서에 관한 피드백 제공
문서에 대한 피드백에 감사드립니다. 어떻게 개선할 수 있는지 알려주십시오.
Jira를 통해 피드백 제출 (등록 필요)
- Jira 웹 사이트에 로그인합니다.
- 상단 탐색 모음에서 생성 을 클릭합니다.
- Summary (요약) 필드에 설명 제목을 입력합니다.
- Description (설명) 필드에 개선을 위한 제안을 입력합니다. 문서의 관련 부분에 대한 링크를 포함합니다.
- 대화 상자 하단에서 생성 을 클릭합니다.
1장. 기술 지원에 대한 보고서 생성
sos 유틸리티를 사용하면 구성, 진단 및 문제 해결 데이터를 수집하고 Red Hat 기술 지원에 해당 파일을 제공할 수 있습니다.
1.1. sos 유틸리티의 기능
이 보고서는 RHEL 시스템에 대한 서비스 요청 분석을 수행할 때 Red Hat 기술 지원 엔지니어의 공통 시작점입니다. sos 유틸리티( sosreport라고도 함)는 Red Hat 지원 엔지니어가 지원 사례에서 보고된 문제 조사 전반에 걸쳐 참조할 수 있는 진단 정보를 수집할 수 있는 표준화된 방법을 제공합니다. sos 유틸리티를 사용하면 데이터 출력을 반복적으로 요청하지 않도록 하는 데 도움이 됩니다.
sos 유틸리티를 사용하면 하나 이상의 시스템에서 다양한 디버깅 정보를 수집하고 선택적으로 중요한 데이터를 정리하여 Red Hat에 보고서 형태로 업로드할 수 있습니다. 특히 세 가지 sos 구성 요소는 다음을 수행합니다.
SOS 보고서는하나의 시스템에서 디버깅 정보를 수집합니다.참고이 프로그램은 원래
sosreport라고 이름이 지정되었습니다.sosreport실행은 동일한 인수를 사용하여보고서가 대신 호출되는 것처럼계속 작동합니다.-
SOS 수집은 지정된 노드 집합에서 개별sos보고서를 실행하고 수집할 수 있습니다. -
SOS는 사용자 이름, 호스트 이름, IP 또는 MAC 주소 또는 기타 사용자 지정 데이터와 같은 잠재적으로 민감한 정보를 정리합니다.
보고서에 수집된 정보에는 다음과 같은 구성 세부 정보, 시스템 정보 및 RHEL 시스템의 진단 정보가 포함됩니다.
- 실행 중인 커널 버전입니다.
- 로드된 커널 모듈.
- 시스템 및 서비스 구성 파일
- 진단 명령 출력.
- 설치된 패키지 목록입니다.
sos 유틸리티는 sosreport- <host_name> - <support_case_number> - <YYYYY-MM-DD> -<unique_random_characters > .tar.xz 라는 아카이브에 수집된 데이터를 씁니다.
유틸리티는 아카이브 및 MD5 체크섬을 /var/tmp/ 디렉터리에 저장합니다.
[root@server1 ~]# ll /var/tmp/sosreport*
total 18704
-rw-------. 1 root root 19136596 Jan 25 07:42 sosreport-server1-12345678-2022-01-25-tgictvu.tar.xz
-rw-r--r--. 1 root root       33 Jan 25 07:42 sosreport-server1-12345678-2022-01-25-tgictvu.tar.xz.md5
추가 리소스
-
sosreport(1)도움말 페이지
1.2. 명령줄에서 sos 패키지 설치
sos 유틸리티를 사용하려면 sos 패키지를 설치합니다.
사전 요구 사항
-
root권한이 필요합니다.
절차
sos패키지를 설치합니다.[root@server ~]# dnf install sos
검증 단계
rpm유틸리티를 사용하여sos패키지가 설치되었는지 확인합니다.[root@server ~]# rpm -q sos sos-4.2-15.el9.noarch
1.3. 명령줄에서 sos 보고서 생성
RHEL 서버에서 sos report 명령을 사용하여 sos 보고서를 수집합니다.
사전 요구 사항
-
sos패키지가 설치되어 있습니다. -
root권한이 필요합니다.
절차
sos report명령을 실행하고 화면에 있는 지침을 따릅니다.sos보고서를 Red Hat에 생성한 직후에 전송하려면--upload옵션을 추가할 수 있습니다.[user@server1 ~]$ sudo sos report [sudo] password for user: sos report (version 4.2) This command will collect diagnostic and configuration information from this Red Hat Enterprise Linux system and installed applications. An archive containing the collected information will be generated in /var/tmp/sos.qkn_b7by and may be provided to a Red Hat support representative. ... Press ENTER to continue, or CTRL-C to quit.
(선택 사항) Red Hat에서 기술 지원 케이스를 이미 연 경우 케이스 번호를 입력하여
sos보고서 파일 이름에 삽입하고--upload옵션을 지정한 경우 해당 케이스에 업로드됩니다. 케이스 번호가 없는 경우 이 필드를 비워 둡니다. 케이스 번호를 입력하는 것은 선택 사항이며sos유틸리티 작동에는 영향을 미치지 않습니다.Please enter the case id that you are generating this report for []: <8-digit_case_number>콘솔 출력 끝에 표시된
sos보고서 파일 이름을 기록해 두십시오.... Finished running plugins Creating compressed archive... Your sos report has been generated and saved in: /var/tmp/sosreport-server1-12345678-2022-04-17-qmtnqng.tar.xz Size 16.51MiB Owner root md5 bba955bbd9a434954e18da0c6778ba9a Please send this file to your support representative.
-
대화형 입력을 요청하지 않고
--batch옵션을 사용하여sos보고서를 생성할 수 있습니다.
[user@server1 ~]$ sudo sos report --batch --case-id <8-digit_case_number>
-
--clean옵션을 사용하여 방금 수집된sos보고서를 난독 처리할 수도 있습니다.
[user@server1 ~]$ sudo sos report --clean검증 단계
sos유틸리티가 명령 출력의 설명과 일치하는/var/tmp/에 아카이브를 생성했는지 확인합니다.[user@server1 ~]$ sudo ls -l /var/tmp/sosreport* [sudo] password for user: -rw-------. 1 root root 17310544 Sep 17 19:11 /var/tmp/sosreport-server1-12345678-2022-04-17-qmtnqng.tar.xz
추가 리소스
1.4. 여러 시스템에서 동시에 보고서 생성 및 수집
sos 유틸리티를 사용하여 여러 시스템에서 sos report 명령을 트리거할 수 있습니다. 보고서가 종료될 때까지 기다렸다가 생성된 모든 보고서를 수집합니다.
사전 요구 사항
- 실행할 클러스터 유형 또는 노드 목록을 알고 있습니다.
-
모든 시스템에
sos패키지를 설치했습니다. -
모든 시스템의
root계정에 대한ssh키가 있거나--password옵션을 통해 루트 암호를 제공할 수 있습니다.
절차
sos 수집명령을 실행하고 화면에 있는 지침을 따릅니다.참고기본적으로
sos 수집은 보고서를 수집할노드 를 자동으로 식별하기 위해 실행되는 클러스터 유형을 식별합니다.-
-- cluster또는-- nodes옵션을 사용하여 클러스터 또는 노드 유형을 수동으로 설정할 수 있습니다. -
--master옵션을 사용하여 원격 노드에서sos유틸리티를 가리켜 클러스터 유형과 노드 목록을 확인할 수도 있습니다. 따라서sos보고서를 수집하기 위해 클러스터 노드 중 하나에 로그인할 필요가 없습니다. 워크스테이션에서 이를 수행할 수 있습니다. -
sos 보고서를Red Hat에 생성한 직후에 전송하려면--upload옵션을 추가할 수 있습니다. -
유효한
sos보고서--batch및--clean옵션과 같은 보고서 실행으로 전달됩니다.
-
[root@primary-rhel9 ~]# sos collect --nodes=sos-node1,sos-node2 -o process,apache --log-size=50

sos-collector (version 4.2)

This utility is used to collect sosreports from multiple nodes simultaneously.
It uses OpenSSH's ControlPersist feature to connect to nodes and run commands remotely. If your system installation of OpenSSH is older than 5.6, please upgrade.

An archive of sosreport tarballs collected from the nodes will be generated in /var/tmp/sos.o4l55n1s and may be provided to an appropriate support representative.

The generated archive may contain data considered sensitive and its content should be reviewed by the originating organization before being passed to any third party.

No configuration changes will be made to the system running this utility or remote systems that it connects to.


Press ENTER to continue, or CTRL-C to quit


Please enter the case id you are collecting reports for: <8-digit_case_number>

sos-collector ASSUMES that SSH keys are installed on all nodes unless the
--password option is provided.

The following is a list of nodes to collect from:
    primary-rhel9
    sos-node1
    sos-node2


Press ENTER to continue with these nodes, or press CTRL-C to quit


Connecting to nodes...

Beginning collection of sosreports from 3 nodes, collecting a maximum of 4 concurrently

primary-rhel9 : Generating sosreport...
sos-node1  : Generating sosreport...
sos-node2 : Generating sosreport...
primary-rhel9 : Retrieving sosreport...
sos-node1  : Retrieving sosreport...
primary-rhel9  : Successfully collected sosreport
sos-node1 : Successfully collected sosreport
sos-node2 : Retrieving sosreport...
sos-node2 : Successfully collected sosreport

The following archive has been created. Please provide it to your support team.
    /var/tmp/sos-collector-2022-05-15-pafsr.tar.xz

[root@primary-rhel9 ~]#
검증 단계
sos collect명령이 명령 출력의 설명과 일치하는/var/tmp/디렉터리에 아카이브를 생성했는지 확인합니다.[root@primary-rhel9 ~]# ls -l /var/tmp/sos-collector* -rw-------. 1 root root 160492 May 15 13:35 /var/tmp/sos-collector-2022-05-15-pafsr.tar.xz
추가 리소스
-
--batch및--clean옵션을 사용하는 방법에 대한 예제는 명령줄에서sos보고서 생성을 참조하십시오.
1.5. sos 보고서 정리
sos 유틸리티는 사용자 이름, 호스트 이름, IP 또는 MAC 주소 또는 기타 사용자 지정 키워드와 같은 잠재적으로 민감한 데이터를 난독 처리하는 루틴을 제공합니다. 원본 sos 보고서 또는 sos 수집 은 변경되지 않고 그대로 유지되며 새로운 *-obfuscated.tar.xz 파일이 생성되고 타사와 공유되도록 설계되었습니다.
sos 보고서에 명확한 기능을 추가하거나 --clean 옵션을 사용하여 명령을 수집할 수 있습니다.
[user@server1 ~]$ sudo sos report --clean
사전 요구 사항
-
sos 보고서 또는 sos가 tarball을수집합니다. - (선택 사항) 사용자 이름, 호스트 이름 및 난독 처리하려는 기타 데이터 이외의 특정 키워드 목록이 있습니다.
절차
sos명령을 실행합니다.보고서 또는화면의 지시에 따라 정리된sos에서 tarball을 수집하여-
--keywords옵션을 추가하여 지정된 키워드 목록을 추가로 정리할 수 있습니다. 더 민감한 사용자 이름을 난독 처리하도록
--usernames옵션을 추가할 수 있습니다.자동 사용자 이름 정리는 UID가 1000 이상인 사용자의
lastlog파일을 통해 보고된 사용자에 대해 자동으로 실행됩니다. 이 옵션은 실제 로그인으로 표시되지 않을 수 있지만 특정 로그 파일에서 발생할 수 있는 LDAP 사용자에게 사용됩니다.
-
[user@server1 ~]$ sudo sos clean /var/tmp/sos-collector-2022-05-15-pafsr.tar.xz
[sudo] password for user:

sos clean (version 4.2)

This command will attempt to obfuscate information that is generally considered to be potentially sensitive. Such information includes IP addresses, MAC addresses, domain names, and any user-provided keywords.

Note that this utility provides a best-effort approach to data obfuscation, but it does not guarantee that such obfuscation provides complete coverage of all such data in the archive, or that any obfuscation is provided to data that does not fit the description above.

Users should review any resulting data and/or archives generated or processed by this utility for remaining sensitive content before being passed to a third party.


Press ENTER to continue, or CTRL-C to quit.

Found 4 total reports to obfuscate, processing up to 4 concurrently

sosreport-primary-rhel9-2022-05-15-nchbdmd :      Extracting...
sosreport-sos-node1-2022-05-15-wmlomgu :      Extracting...
sosreport-sos-node2-2022-05-15-obsudzc :      Extracting...
sos-collector-2022-05-15-pafsr :                   Beginning obfuscation...
sosreport-sos-node1-2022-05-15-wmlomgu :      Beginning obfuscation...
sos-collector-2022-05-15-pafsr :                   Obfuscation completed
sosreport-primary-rhel9-2022-05-15-nchbdmd :      Beginning obfuscation...
sosreport-sos-node2-2022-05-15-obsudzc :      Beginning obfuscation...
sosreport-primary-rhel9-2022-05-15-nchbdmd :      Re-compressing...
sosreport-sos-node2-2022-05-15-obsudzc :      Re-compressing...
sosreport-sos-node1-2022-05-15-wmlomgu :      Re-compressing...
sosreport-primary-rhel9-2022-05-15-nchbdmd :      Obfuscation completed
sosreport-sos-node2-2022-05-15-obsudzc :      Obfuscation completed
sosreport-sos-node1-2022-05-15-wmlomgu :      Obfuscation completed

Successfully obfuscated 4 report(s)

A mapping of obfuscated elements is available at
    /var/tmp/sos-collector-2022-05-15-pafsr-private_map

The obfuscated archive is available at
    /var/tmp/sos-collector-2022-05-15-pafsr-obfuscated.tar.xz

    Size    157.10KiB
    Owner    root

Please send the obfuscated archive to your support representative and keep the mapping file private
검증 단계
sos clean명령이 난독 처리 아카이브와 명령 출력의 설명과 일치하는/var/tmp/디렉터리에 난독 처리 매핑을 생성했는지 확인합니다.[user@server1 ~]$ sudo ls -l /var/tmp/sos-collector-2022-05-15-pafsr-private_map /var/tmp/sos-collector-2022-05-15-pafsr-obfuscated.tar.xz [sudo] password for user: -rw-------. 1 root root 160868 May 15 16:10 /var/tmp/sos-collector-2022-05-15-pafsr-obfuscated.tar.xz -rw-------. 1 root root 96622 May 15 16:10 /var/tmp/sos-collector-2022-05-15-pafsr-private_map난독 처리 매핑이 있는지
*-private_map파일을 확인합니다.[user@server1 ~]$ sudo cat /var/tmp/sos-collector-2022-05-15-pafsr-private_map [sudo] password for user: { "hostname_map": { "pmoravec-rhel9": "host0" }, "ip_map": { "10.44.128.0/22": "100.0.0.0/22", .. "username_map": { "foobaruser": "obfuscateduser0", "jsmith": "obfuscateduser1", "johndoe": "obfuscateduser2" } }
Red Hat 지원에서 원래 값을 번역해야 하는 난독 처리 용어를 참조할 수 있으므로 원래 아카이브와 *private_map 파일을 로컬로 유지합니다.
1.6. GPG 암호 암호화를 사용하여 보고서 생성 및 보안
다음 절차에서는 sos 보고서를 생성하고 암호를 기반으로 대칭 GPG2 암호화를 사용하여 보호하는 방법을 설명합니다. 예를 들어 공용 네트워크를 통해 타사로 전송해야 하는 경우 sos 보고서의 내용을 암호로 보호할 수 있습니다.
암호화된 sos 보고서를 만들 때 디스크 공간을 일시적으로 두 번 사용하므로 충분한 공간이 있는지 확인하십시오.
-
sos유틸리티는 암호화되지 않은sos보고서를 생성합니다. -
유틸리티는
sos보고서를 새 파일로 암호화합니다. - 그런 다음 유틸리티는 암호화되지 않은 아카이브를 제거합니다.
사전 요구 사항
-
sos패키지가 설치되어 있습니다. -
root권한이 필요합니다.
절차
sos report명령을 실행하고--encrypt-pass옵션으로 암호를 지정합니다.sos보고서를 Red Hat에 생성한 직후에 전송하려면--upload옵션을 추가할 수 있습니다.[user@server1 ~]$ sudo sos report --encrypt-pass my-passphrase [sudo] password for user: sosreport (version 4.2) This command will collect diagnostic and configuration information from this Red Hat Enterprise Linux system and installed applications. An archive containing the collected information will be generated in /var/tmp/sos.6lck0myd and may be provided to a Red Hat support representative. ... Press ENTER to continue, or CTRL-C to quit.
(선택 사항) Red Hat에서 기술 지원 케이스를 이미 연 경우 케이스 번호를 입력하여
sos보고서 파일 이름에 삽입하고--upload옵션을 지정한 경우 해당 케이스에 업로드됩니다. 케이스 번호가 없는 경우 이 필드를 비워 둡니다. 케이스 번호를 입력하는 것은 선택 사항이며sos유틸리티 작동에는 영향을 미치지 않습니다.Please enter the case id that you are generating this report for []: <8-digit_case_number>-
콘솔 출력 끝에 표시된
sos보고서 파일 이름을 기록해 두십시오.
Finished running plugins
Creating compressed archive...

Your sosreport has been generated and saved in:
/var/tmp/secured-sosreport-server1-12345678-2022-01-24-ueqijfm.tar.xz.gpg

Size    17.53MiB
Owner   root
md5     32e2bdb23a9ce3d35d59e1fc4c91fe54

Please send this file to your support representative.
검증 단계
sos유틸리티에서 다음 요구 사항을 충족하는 아카이브가 생성되었는지 확인합니다.-
파일 이름은 보안된 상태로
시작합니다. -
파일 이름은
.gpg확장자로 끝납니다. /var/tmp/디렉터리에 있습니다.[user@server1 ~]$ sudo ls -l /var/tmp/sosreport* [sudo] password for user: -rw-------. 1 root root 18381537 Jan 24 17:55 /var/tmp/secured-sosreport-server1-12345678-2022-01-24-ueqijfm.tar.xz.gpg
-
파일 이름은 보안된 상태로
암호화에 사용한 것과 동일한 암호로 아카이브의 암호를 해독할 수 있는지 확인합니다.
gpg명령을 사용하여 아카이브의 암호를 해독합니다.[user@server1 ~]$ sudo gpg --output decrypted-sosreport.tar.gz --decrypt /var/tmp/secured-sosreport-server1-12345678-2022-01-24-ueqijfm.tar.xz.gpg메시지가 표시되면 아카이브를 암호화하는 데 사용한 암호를 입력합니다.
┌──────────────────────────────────────────────────────┐ │ Enter passphrase │ │ │ │ │ │ Passphrase: <passphrase> │ │ │ │ <OK> <Cancel> │ └──────────────────────────────────────────────────────┘gpg유틸리티에서.tar.gz파일 확장자로 암호화되지 않은 아카이브를 생성했는지 확인합니다.[user@server1 ~]$ sudo ls -l decrypted-sosreport.tar.gz [sudo] password for user: -rw-r--r--. 1 root root 18381537 Jan 24 17:59 decrypted-sosreport.tar.gz
추가 리소스
1.7. 키 쌍에 따라 GPG 암호화를 사용하여 보고서 생성 및 보안
다음 절차에서는 GPG 인증 키의 키 쌍을 기반으로 하여 sos 보고서를 생성하고 GPG2 암호화를 사용하여 보호하는 방법을 설명합니다. 예를 들어 서버에 저장된 sos 보고서를 보호하려는 경우 이러한 유형의 암호화로 sos 보고서의 내용을 보호할 수 있습니다.
암호화된 sos 보고서를 만들 때 디스크 공간을 일시적으로 두 번 사용하므로 충분한 공간이 있는지 확인하십시오.
-
sos유틸리티는 암호화되지 않은sos보고서를 생성합니다. -
유틸리티는
sos보고서를 새 파일로 암호화합니다. - 그런 다음 유틸리티는 암호화되지 않은 아카이브를 제거합니다.
사전 요구 사항
-
sos패키지가 설치되어 있습니다. -
root권한이 필요합니다. - GPG2 키를 생성했습니다.
절차
sos report명령을 실행하고--encrypt-key옵션을 사용하여 GPG 인증 키를 소유하는 사용자 이름을 지정합니다.sos보고서를 Red Hat에 생성한 직후에 전송하려면--upload옵션을 추가할 수 있습니다.참고sos report명령을 실행하는 사용자는sos보고서를 암호화하고 암호 해독하는 데 사용되는 GPG 인증 키를 소유하는 사용자와 동일해야 합니다. 사용자가sudo를 사용하여sos report명령을 실행하는 경우 인증 키도sudo를 사용하여 설정해야 합니다. 그렇지 않으면 사용자가 해당 계정에 대한 직접 쉘 액세스 권한이 있어야 합니다.[user@server1 ~]$ sudo sos report --encrypt-key root [sudo] password for user: sosreport (version 4.2) This command will collect diagnostic and configuration information from this Red Hat Enterprise Linux system and installed applications. An archive containing the collected information will be generated in /var/tmp/sos.6ucjclgf and may be provided to a Red Hat support representative. ... Press ENTER to continue, or CTRL-C to quit.
(선택 사항) Red Hat에서 기술 지원 케이스를 이미 연 경우 케이스 번호를 입력하여
sos보고서 파일 이름에 삽입하고--upload옵션을 지정한 경우 해당 케이스에 업로드됩니다. 케이스 번호가 없는 경우 이 필드를 비워 둡니다. 케이스 번호를 입력하는 것은 선택 사항이며sos유틸리티 작동에는 영향을 미치지 않습니다.Please enter the case id that you are generating this report for []: <8-digit_case_number>콘솔 출력 끝에 표시된
sos보고서 파일 이름을 기록해 두십시오.... Finished running plugins Creating compressed archive... Your sosreport has been generated and saved in: /var/tmp/secured-sosreport-server1-23456789-2022-02-27-zhdqhdi.tar.xz.gpg Size 15.44MiB Owner root md5 ac62697e33f3271dbda92290583d1242 Please send this file to your support representative.
검증 단계
sos유틸리티에서 다음 요구 사항을 충족하는 아카이브가 생성되었는지 확인합니다.-
파일 이름은 보안된 상태로
시작합니다. -
파일 이름은
.gpg확장자로 끝납니다. /var/tmp/디렉터리에 있습니다.[user@server1 ~]$ sudo ls -l /var/tmp/sosreport* [sudo] password for user: -rw-------. 1 root root 16190013 Jan 24 17:55 /var/tmp/secured-sosreport-server1-23456789-2022-01-27-zhdqhdi.tar.xz.gpg
-
파일 이름은 보안된 상태로
암호화에 사용한 것과 동일한 키로 아카이브의 암호를 해독할 수 있는지 확인합니다.
gpg명령을 사용하여 아카이브의 암호를 해독합니다.[user@server1 ~]$ sudo gpg --output decrypted-sosreport.tar.gz --decrypt /var/tmp/secured-sosreport-server1-23456789-2022-01-27-zhdqhdi.tar.xz.gpg메시지가 표시되면 GPG 키를 만들 때 사용한 암호를 입력합니다.
┌────────────────────────────────────────────────────────────────┐ │ Please enter the passphrase to unlock the OpenPGP secret key: │ │ "GPG User (first key) <root@example.com>" │ │ 2048-bit RSA key, ID BF28FFA302EF4557, │ │ created 2020-01-13. │ │ │ │ │ │ Passphrase: <passphrase> │ │ │ │ <OK> <Cancel> │ └────────────────────────────────────────────────────────────────┘gpg유틸리티에서.tar.gz파일 확장자로 암호화되지 않은 아카이브를 생성했는지 확인합니다.[user@server1 ~]$ sudo ll decrypted-sosreport.tar.gz [sudo] password for user: -rw-r--r--. 1 root root 16190013 Jan 27 17:47 decrypted-sosreport.tar.gz
추가 리소스
1.8. GPG2 키 생성
다음 절차에서는 암호화 유틸리티에서 사용할 GPG2 키를 생성하는 방법을 설명합니다.
사전 요구 사항
-
root권한이 필요합니다.
절차
pinentry유틸리티를 설치하고 구성합니다.[root@server ~]# dnf install pinentry [root@server ~]# mkdir ~/.gnupg -m 700 [root@server ~]# echo "pinentry-program /usr/bin/pinentry-curses" >> ~/.gnupg/gpg-agent.conf
기본 세부 정보를 사용하여 GPG
키 쌍을 생성하는 데 사용되는 키 입력파일을 만듭니다. 예를 들면 다음과 같습니다.[root@server ~]# cat >key-input <<EOF %echo Generating a standard key Key-Type: RSA Key-Length: 2048 Name-Real: GPG User Name-Comment: first key Name-Email: root@example.com Expire-Date: 0 %commit %echo Finished creating standard key EOF
(선택 사항) 기본적으로 GPG2는 해당 인증 키를
~/.gnupg파일에 저장합니다. 사용자 지정 인증 키 위치를 사용하려면GNUPGHOME환경 변수를 루트에서만 액세스할 수 있는 디렉터리로 설정합니다.[root@server ~]# export GNUPGHOME=/root/backup [root@server ~]# mkdir -p $GNUPGHOME -m 700
키
입력 파일의 콘텐츠를 기반으로 새 GPG2 키를생성합니다.[root@server ~]# gpg2 --batch --gen-key key-inputGPG2 키를 보호하려면 암호를 입력합니다. 이 암호를 사용하여 암호 해독을 위해 개인 키에 액세스합니다.
┌──────────────────────────────────────────────────────┐
│ Please enter the passphrase to                       │
│ protect your new key                                 │
│                                                      │
│ Passphrase: <passphrase>                             │
│                                                      │
│	 <OK>                             <Cancel>         │
└──────────────────────────────────────────────────────┘
다시 입력하여 올바른 암호를 확인합니다.
┌──────────────────────────────────────────────────────┐
│ Please re-enter this passphrase                      │
│                                                      │
│ Passphrase: <passphrase>                             │
│                                                      │
│	 <OK>                             <Cancel>         │
└──────────────────────────────────────────────────────┘
새 GPG2 키가 성공적으로 생성되었는지 확인합니다.
gpg: keybox '/root/backup/pubring.kbx' created
gpg: Generating a standard key
gpg: /root/backup/trustdb.gpg: trustdb created
gpg: key BF28FFA302EF4557 marked as ultimately trusted
gpg: directory '/root/backup/openpgp-revocs.d' created
gpg: revocation certificate stored as '/root/backup/openpgp-revocs.d/8F6FCF10C80359D5A05AED67BF28FFA302EF4557.rev'
gpg: Finished creating standard key
검증 단계
서버에서 GPG 키를 나열합니다.
[root@server ~]# gpg2 --list-secret-keys
gpg: checking the trustdb
gpg: marginals needed: 3  completes needed: 1  trust model: pgp
gpg: depth: 0  valid:   1  signed:   0  trust: 0-, 0q, 0n, 0m, 0f, 1u
/root/backup/pubring.kbx
------------------------
sec   rsa2048 2020-01-13 [SCEA]
      8F6FCF10C80359D5A05AED67BF28FFA302EF4557
uid           [ultimate] GPG User (first key) <root@example.com>
추가 리소스
1.9. 복구 환경에서 sos 보고서 생성
RHEL(Red Hat Enterprise Linux) 호스트가 제대로 부팅되지 않으면 호스트를 복구 환경으로 부팅하여 sos 보고서를 수집할 수 있습니다.
복구 환경을 사용하여 /mnt/sysroot 에 대상 시스템을 마운트하고 해당 콘텐츠에 액세스한 후 sos report 명령을 실행할 수 있습니다.
사전 요구 사항
- 호스트가 베어 메탈 서버인 경우 시스템에 대한 물리적 액세스가 필요합니다.
- 호스트가 가상 시스템인 경우 하이퍼바이저에서 가상 시스템의 설정에 액세스해야 합니다.
- RHEL 설치 트리를 제공하는 ISO 이미지 파일, 설치 DVD, netboot CD 또는 PXE(Preboot Execution Environment) 구성과 같은 RHEL 설치 소스.
절차
- 설치 소스에서 호스트를 부팅합니다.
설치 미디어의 부팅 메뉴에서
문제 해결옵션을 선택합니다.
문제 해결 메뉴에서
Rescue a Red Hat Enterprise Linux 시스템옵션을 선택합니다.
Rescue 메뉴에서
1을 선택하고 Enter 키를 눌러 계속 진행하고/mnt/sysroot디렉터리에 시스템을 마운트합니다.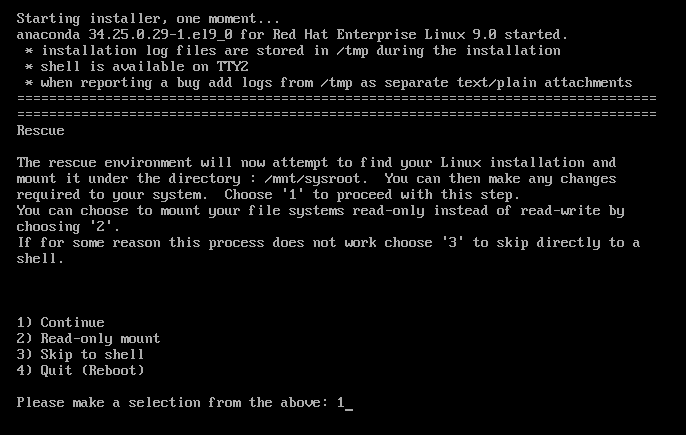
메시지가 표시되면 Enter 키를 눌러 쉘을 가져옵니다.
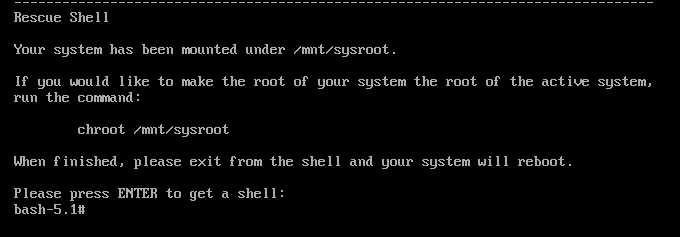
chroot명령을 사용하여 rescue 세션의 명확한 root 디렉토리를/mnt/sysroot디렉토리로 변경합니다.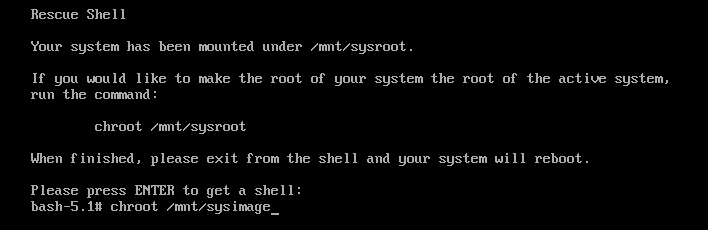
선택 사항: 네트워크가 inital Rescue 환경에서 작동하지 않을 수 있으므로 먼저 설정해야 합니다. 예를 들어 네트워크에 고정 IP 주소가 필요하고
sos보고서를 네트워크를 통해 전송하려는 경우 네트워크를 구성합니다.사용하려는 이더넷 장치를 식별합니다.
# ip link show … 2: enp1s0: <BROADCAST,MULTICAST,UP,LOWER_UP> mtu 1500 qdisc fq_codel state UP mode DEFAULT group default qlen 1000 link/ether 52:54:00:74:79:56 brd ff:ff:ff:ff:ff:ff네트워크 인터페이스에 IP 주소를 할당하고 기본 게이트웨이를 설정합니다. 예를 들어, 255.255.255.0 이라는 서브넷이 있는 192.168.0.1 의 IP 주소를 24 의 CIDR로 추가하려면 enp1s0 장치에 다음을 입력합니다.
# ip address add <192.168.0.1/24> dev <enp1s0>
# ip route add default via <192.168.0.254>
/etc/resolv.conf파일에nameserver항목을 추가합니다. 예를 들면 다음과 같습니다.# nameserver <192.168.0.5>
sos report명령을 실행하고 화면에 있는 지침을 따릅니다.sos보고서를 Red Hat에 생성한 직후에 전송하려면--upload옵션을 추가할 수 있습니다.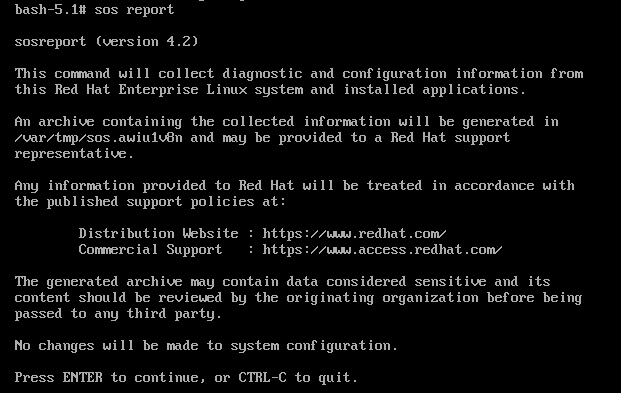
선택 사항: Red Hat에서 기술 지원 케이스를 이미 개설한 경우
sos보고서 파일 이름에 포함할 케이스 번호를 입력하면--upload옵션을 지정하고 호스트가 인터넷에 연결된 경우 해당 케이스에 업로드됩니다. 케이스 번호가 없는 경우 이 필드를 비워 둡니다. 케이스 번호를 입력하는 것은 선택 사항이며sos유틸리티 작동에는 영향을 미치지 않습니다.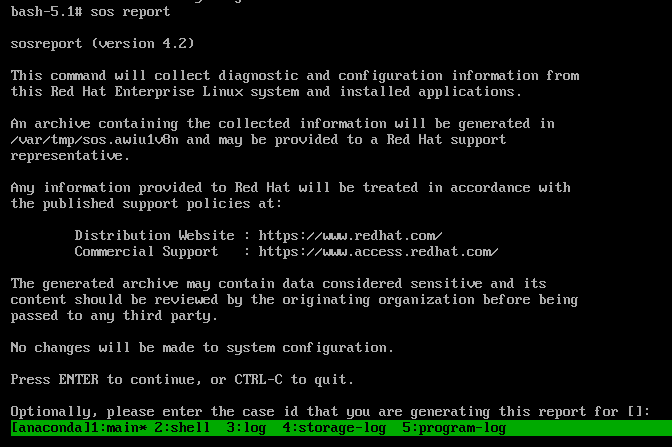
콘솔 출력 끝에 표시된
sos보고서 파일 이름을 기록해 두십시오.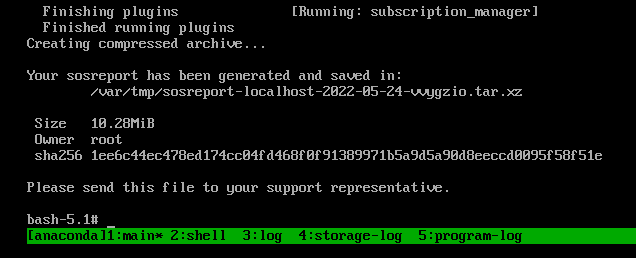
-
호스트에 인터넷에 연결되어 있지 않은 경우
scp와 같은 파일 전송 유틸리티를 사용하여 네트워크의 다른 호스트에sos보고서를 전송한 다음 Red Hat 기술 지원 케이스에 업로드합니다.
검증 단계
sos유틸리티에서/var/tmp/디렉터리에 아카이브를 생성했는지 확인합니다.
추가 리소스
- 복구 환경에서 sosreport를 생성하는 방법.
- chrooting 없이 복구 환경에서 네트워킹 활성화
- RHEL 설치 DVD의 ISO를 다운로드하려면 Red Hat 고객 포털의 다운로드 섹션을 참조하십시오. 제품 다운로드.
-
Red Hat 기술 지원을 제공하는 방법.
1.10. Red Hat 기술 지원을 제공하기 위한 방법
다음 방법을 사용하여 sos 보고서를 Red Hat 기술 지원에 업로드할 수 있습니다.
sos report명령으로 업로드--upload옵션을 사용하여sos보고서를 생성한 후 즉시 Red Hat으로 전송합니다.다음 옵션 중 하나를 제공하는 경우:
- 메시지가 표시되면 케이스 ID
-
--case-id옵션 --ticket-number옵션sos유틸리티는 장치를 인증한 후sos보고서를 케이스에 업로드합니다.
-
케이스 번호를 제공하지 않거나 장치를 인증하지 않으면 유틸리티는 익명 업로드를 사용하여 Red Hat 공개 SFTP 사이트에
sos보고서를 업로드합니다. Red Hat 기술 지원 엔지니어에게 업로드에 사용되는 보조 사용자의 이름과 이름을 제공하여 액세스할 수 있습니다. Red Hat 기술 지원에
sos보고서를 생성하고 업로드합니다.[user@server1 ~]$ sudo sos report --upload sosreport (version 4.7.0) ... Optionally, please enter the case id that you are generating this report for []: ... Your sosreport has been generated and saved in: /var/tmp/sosreport-localhost-2024-03-19-xavvwkw.tar.xz ...케이스 ID를 지정하면 출력은 다음과 같습니다.
Attempting upload to Red Hat Customer Portal
Please visit the following URL to authenticate this device: https://sso.redhat.com/device?user_code=VGEL-PYIM
Device authorized correctly. Uploading file to Red Hat Customer Portal
Uploaded archive successfully
케이스 ID를 지정하지 않으면 출력은 다음과 같습니다.
Attempting upload to Red Hat Secure FTP
Please visit the following URL to authenticate this device: https://sso.redhat.com/device?user_code=VGEL-PYIM
Device authorized correctly. Uploading file to Red Hat Secure FTP
Uploaded archive successfully
- Red Hat 고객 포털을 통해 파일 업로드
Red Hat 사용자 계정을 사용하여 Red Hat 고객 포털 웹 사이트의
지원 케이스섹션에 로그인하여sos보고서를 기술 지원 케이스에 업로드할 수 있습니다.로그인하려면 지원 케이스 를 참조하십시오.
추가 리소스
-
SFTP 및
curl과 같은sos보고서에 Red Hat 기술 지원을 제공하는 방법에 대한 추가 방법은 Red Hat 기술 자료 문서 Red Hat 지원에 파일 제공 방법 (vmcore, rhev logcollector, sosreports, heap dumps, 로그 파일 등)을 참조하십시오.
2장. RHEL 웹 콘솔을 사용하여 진단 보고서 생성 및 유지 관리
RHEL 웹 콘솔에서 진단 보고서를 생성, 다운로드 및 삭제합니다.
2.1. RHEL 웹 콘솔을 사용하여 진단 보고서 생성
사전 요구 사항
- RHEL 웹 콘솔이 설치되었습니다. 자세한 내용은 웹 콘솔 설치를 참조하십시오.
-
cockpit-storaged패키지가 시스템에 설치됩니다. - 관리자 권한이 있어야 합니다.
절차
- RHEL 웹 콘솔에 로그인합니다. 자세한 내용은 웹 콘솔에 로그인 을 참조하십시오.
- 왼쪽 메뉴에서 Tools > 진단 보고서를 선택합니다.
새 진단 보고서를 생성하려면 버튼을 클릭합니다.
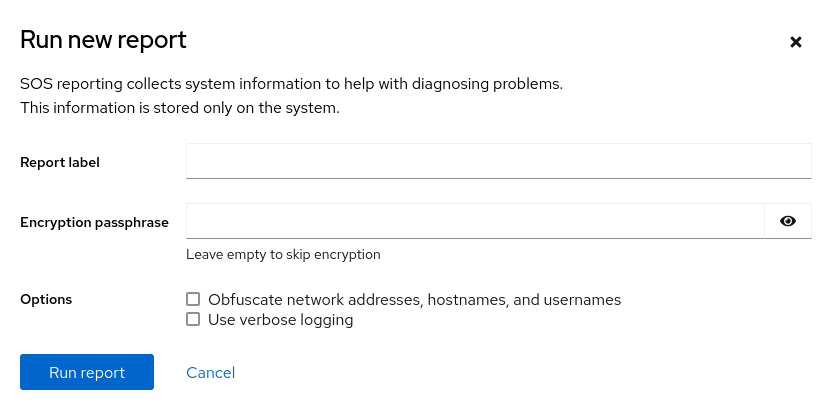
- 생성할 보고서의 레이블을 입력합니다.
(선택 사항) 보고서 사용자 지정.
- 보고서를 암호화할 암호화 암호를 입력합니다. 보고서의 암호화를 건너뛰려면 필드를 비워 둡니다.
- 네트워크 주소, 호스트 이름 및 사용자 이름을 Obfuscate 네트워크 주소, 호스트 이름 가져오기 확인란을 선택하여 특정 데이터를 난독화합니다.
- 확인란을 선택합니다. 자세한 로깅을 사용하여 로깅 세부 정보 표시 수준을 높입니다.
- 버튼을 클릭하여 보고서를 생성하고 프로세스가 완료될 때까지 기다립니다. 보고서 중지 버튼을 사용하여 보고서 생성을 할 수 있습니다.
2.2. RHEL 웹 콘솔을 사용하여 진단 보고서 다운로드
사전 요구 사항
- RHEL 웹 콘솔이 설치되었습니다. 자세한 내용은 웹 콘솔 설치를 참조하십시오.
- 관리자 권한이 있어야 합니다.
- 하나 이상의 진단 보고서가 생성되었습니다.
절차
- RHEL 웹 콘솔에 로그인합니다. 자세한 내용은 웹 콘솔에 로그인 을 참조하십시오.
- 왼쪽 메뉴에서 Tools > 진단 보고서를 선택합니다.
- 버튼을 클릭합니다. 다운로드가 자동으로 시작됩니다.
다음 단계
Red Hat 기술 지원 팀에 진단 보고서를 제공하는 방법에 대한 방법은 Red Hat 기술 지원에 sos 보고서를 제공하는 방법을 참조하십시오.
2.3. RHEL 웹 콘솔을 사용하여 진단 보고서 삭제
사전 요구 사항
- RHEL 웹 콘솔이 설치되었습니다. 자세한 내용은 웹 콘솔 설치를 참조하십시오.
- 관리자 권한이 있어야 합니다.
- 하나 이상의 진단 보고서가 생성되었습니다.
절차
- RHEL 웹 콘솔에 로그인합니다. 자세한 내용은 웹 콘솔에 로그인 을 참조하십시오.
- 왼쪽 메뉴에서 Tools > 진단 보고서를 선택합니다.
- 삭제할 보고서 옆에 있는 버튼의 세로를 클릭한 다음 버튼을 클릭합니다.
- 영구적으로 보고서 삭제 창에서 .