
Security hardening
Enhancing security of Red Hat Enterprise Linux 9 systems
Résumé
Rendre l'open source plus inclusif
Red Hat s'engage à remplacer les termes problématiques dans son code, sa documentation et ses propriétés Web. Nous commençons par ces quatre termes : master, slave, blacklist et whitelist. En raison de l'ampleur de cette entreprise, ces changements seront mis en œuvre progressivement au cours de plusieurs versions à venir. Pour plus de détails, voir le message de notre directeur technique Chris Wright.
Fournir un retour d'information sur la documentation de Red Hat
Nous apprécions vos commentaires sur notre documentation. Faites-nous savoir comment nous pouvons l'améliorer.
Soumettre des commentaires sur des passages spécifiques
- Consultez la documentation au format Multi-page HTML et assurez-vous que le bouton Feedback apparaît dans le coin supérieur droit après le chargement complet de la page.
- Utilisez votre curseur pour mettre en évidence la partie du texte que vous souhaitez commenter.
- Cliquez sur le bouton Add Feedback qui apparaît près du texte en surbrillance.
- Ajoutez vos commentaires et cliquez sur Submit.
Soumettre des commentaires via Bugzilla (compte requis)
- Connectez-vous au site Web de Bugzilla.
- Sélectionnez la version correcte dans le menu Version.
- Saisissez un titre descriptif dans le champ Summary.
- Saisissez votre suggestion d'amélioration dans le champ Description. Incluez des liens vers les parties pertinentes de la documentation.
- Cliquez sur Submit Bug.
Chapitre 1. Securing RHEL during installation
Security begins even before you start the installation of Red Hat Enterprise Linux. Configuring your system securely from the beginning makes it easier to implement additional security settings later.
1.1. BIOS and UEFI security
Password protection for the BIOS (or BIOS equivalent) and the boot loader can prevent unauthorized users who have physical access to systems from booting using removable media or obtaining root privileges through single user mode. The security measures you should take to protect against such attacks depends both on the sensitivity of the information about the workstation and the location of the machine.
For example, if a machine is used in a trade show and contains no sensitive information, then it may not be critical to prevent such attacks. However, if an employee’s laptop with private, unencrypted SSH keys for the corporate network is left unattended at that same trade show, it could lead to a major security breach with ramifications for the entire company.
If the workstation is located in a place where only authorized or trusted people have access, however, then securing the BIOS or the boot loader may not be necessary.
1.1.1. BIOS passwords
The two primary reasons for password protecting the BIOS of a computer are[1]:
- Preventing changes to BIOS settings — If an intruder has access to the BIOS, they can set it to boot from a CD-ROM or a flash drive. This makes it possible for them to enter rescue mode or single user mode, which in turn allows them to start arbitrary processes on the system or copy sensitive data.
- Preventing system booting — Some BIOSes allow password protection of the boot process. When activated, an attacker is forced to enter a password before the BIOS launches the boot loader.
Because the methods for setting a BIOS password vary between computer manufacturers, consult the computer’s manual for specific instructions.
If you forget the BIOS password, it can either be reset with jumpers on the motherboard or by disconnecting the CMOS battery. For this reason, it is good practice to lock the computer case if possible. However, consult the manual for the computer or motherboard before attempting to disconnect the CMOS battery.
1.1.2. Non-BIOS-based systems security
Other systems and architectures use different programs to perform low-level tasks roughly equivalent to those of the BIOS on x86 systems. For example, the Unified Extensible Firmware Interface (UEFI) shell.
For instructions on password protecting BIOS-like programs, see the manufacturer’s instructions.
1.2. Disk partitioning
Red Hat recommends creating separate partitions for the /boot, /, /home, /tmp, and /var/tmp/ directories.
/boot-
This partition is the first partition that is read by the system during boot up. The boot loader and kernel images that are used to boot your system into Red Hat Enterprise Linux 9 are stored in this partition. This partition should not be encrypted. If this partition is included in
/and that partition is encrypted or otherwise becomes unavailable then your system is not able to boot. /home-
When user data (
/home) is stored in/instead of in a separate partition, the partition can fill up causing the operating system to become unstable. Also, when upgrading your system to the next version of Red Hat Enterprise Linux 9 it is a lot easier when you can keep your data in the/homepartition as it is not be overwritten during installation. If the root partition (/) becomes corrupt your data could be lost forever. By using a separate partition there is slightly more protection against data loss. You can also target this partition for frequent backups. /tmpand/var/tmp/-
Both the
/tmpand/var/tmp/directories are used to store data that does not need to be stored for a long period of time. However, if a lot of data floods one of these directories it can consume all of your storage space. If this happens and these directories are stored within/then your system could become unstable and crash. For this reason, moving these directories into their own partitions is a good idea.
During the installation process, you have an option to encrypt partitions. You must supply a passphrase. This passphrase serves as a key to unlock the bulk encryption key, which is used to secure the partition’s data.
1.3. Restricting network connectivity during the installation process
When installing Red Hat Enterprise Linux 9, the installation medium represents a snapshot of the system at a particular time. Because of this, it may not be up-to-date with the latest security fixes and may be vulnerable to certain issues that were fixed only after the system provided by the installation medium was released.
When installing a potentially vulnerable operating system, always limit exposure only to the closest necessary network zone. The safest choice is the “no network” zone, which means to leave your machine disconnected during the installation process. In some cases, a LAN or intranet connection is sufficient while the Internet connection is the riskiest. To follow the best security practices, choose the closest zone with your repository while installing Red Hat Enterprise Linux 9 from a network.
1.4. Installing the minimum amount of packages required
It is best practice to install only the packages you will use because each piece of software on your computer could possibly contain a vulnerability. If you are installing from the DVD media, take the opportunity to select exactly what packages you want to install during the installation. If you find you need another package, you can always add it to the system later.
1.5. Post-installation procedures
The following steps are the security-related procedures that should be performed immediately after installation of Red Hat Enterprise Linux 9.
Update your system. Enter the following command as root:
# dnf updateEven though the firewall service,
firewalld, is automatically enabled with the installation of Red Hat Enterprise Linux, there are scenarios where it might be explicitly disabled, for example in the kickstart configuration. In such a case, it is recommended to consider re-enabling the firewall.To start
firewalldenter the following commands as root:# systemctl start firewalld # systemctl enable firewalld
To enhance security, disable services you do not need. For example, if there are no printers installed on your computer, disable the
cupsservice using the following command:# systemctl disable cupsTo review active services, enter the following command:
$ systemctl list-units | grep service
Chapitre 2. Installing the system in FIPS mode
To enable the cryptographic module self-checks mandated by the Federal Information Processing Standard (FIPS) 140-3, you have to operate RHEL 9 in FIPS mode.
You can achieve this by:
- Starting the installation in FIPS mode.
- Switching the system into FIPS mode after the installation.
To avoid cryptographic key material regeneration and reevaluation of the compliance of the resulting system associated with converting already deployed systems, Red Hat recommends starting the installation in FIPS mode.
The cryptographic modules of RHEL 9 are not yet certified for the FIPS 140-3 requirements.
2.1. Federal Information Processing Standard (FIPS)
The Federal Information Processing Standard (FIPS) Publication 140-3 is a computer security standard developed by the U.S. Government and industry working group to validate the quality of cryptographic modules. See the official FIPS publications at NIST Computer Security Resource Center.
The FIPS 140-3 standard ensures that cryptographic tools implement their algorithms correctly. One of the mechanisms for that is runtime self-checks. See the full FIPS 140-3 standard at FIPS PUB 140-3 for further details and other specifications of the FIPS standard.
To learn about compliance requirements, see the Red Hat Government Standards page.
2.2. Installing the system with FIPS mode enabled
To enable the cryptographic module self-checks mandated by the Federal Information Processing Standard (FIPS) Publication 140-3, enable FIPS mode during the system installation.
Red Hat recommends installing RHEL with FIPS mode enabled, as opposed to enabling FIPS mode later. Enabling FIPS mode during the installation ensures that the system generates all keys with FIPS-approved algorithms and continuous monitoring tests in place.
Procédure
Add the
fips=1option to the kernel command line during the system installation.During the software selection stage, do not install any third-party software.
After the installation, the system starts in FIPS mode automatically.
Vérification
After the system starts, check that FIPS mode is enabled:
$ fips-mode-setup --check
FIPS mode is enabled.
Ressources supplémentaires
- Editing boot options section in the Boot options for RHEL Installer document
2.3. Ressources supplémentaires
Chapitre 3. Using system-wide cryptographic policies
The system-wide cryptographic policies is a system component that configures the core cryptographic subsystems, covering the TLS, IPsec, SSH, DNSSec, and Kerberos protocols. It provides a small set of policies, which the administrator can select.
3.1. Politiques cryptographiques à l'échelle du système
When a system-wide policy is set up, applications in RHEL follow it and refuse to use algorithms and protocols that do not meet the policy, unless you explicitly request the application to do so. That is, the policy applies to the default behavior of applications when running with the system-provided configuration but you can override it if required.
RHEL 9 contains the following predefined policies:
|
| The default system-wide cryptographic policy level offers secure settings for current threat models. It allows the TLS 1.2 and 1.3 protocols, as well as the IKEv2 and SSH2 protocols. The RSA keys and Diffie-Hellman parameters are accepted if they are at least 2048 bits long. |
|
| This policy ensures maximum compatibility with Red Hat Enterprise Linux 6 and earlier; it is less secure due to an increased attack surface. SHA-1 is allowed to be used as TLS hash, signature, and algorithm. CBC-mode ciphers are allowed to be used with SSH. Applications using GnuTLS allow certificates signed with SHA-1. It allows the TLS 1.2 and 1.3 protocols, as well as the IKEv2 and SSH2 protocols. The RSA keys and Diffie-Hellman parameters are accepted if they are at least 2048 bits long. |
|
| A conservative security level that is believed to withstand any near-term future attacks. This level does not allow the use of SHA-1 in DNSSec or as an HMAC. SHA2-224 and SHA3-224 hashes are disabled. 128-bit ciphers are disabled. CBC-mode ciphers are disabled except in Kerberos. It allows the TLS 1.2 and 1.3 protocols, as well as the IKEv2 and SSH2 protocols. The RSA keys and Diffie-Hellman parameters are accepted if they are at least 3072 bits long. |
|
|
A policy level that conforms with the FIPS 140-2 requirements. This is used internally by the |
Red Hat continuously adjusts all policy levels so that all libraries, except when using the LEGACY policy, provide secure defaults. Even though the LEGACY profile does not provide secure defaults, it does not include any algorithms that are easily exploitable. As such, the set of enabled algorithms or acceptable key sizes in any provided policy may change during the lifetime of Red Hat Enterprise Linux.
Such changes reflect new security standards and new security research. If you must ensure interoperability with a specific system for the whole lifetime of Red Hat Enterprise Linux, you should opt-out from cryptographic-policies for components that interact with that system or re-enable specific algorithms using custom policies.
Because a cryptographic key used by a certificate on the Customer Portal API does not meet the requirements by the FUTURE system-wide cryptographic policy, the redhat-support-tool utility does not work with this policy level at the moment.
To work around this problem, use the DEFAULT crypto policy while connecting to the Customer Portal API.
The specific algorithms and ciphers described in the policy levels as allowed are available only if an application supports them.
Tool for managing crypto policies
To view or change the current system-wide cryptographic policy, use the update-crypto-policies tool, for example:
$ update-crypto-policies --show
DEFAULT
# update-crypto-policies --set FUTURE
Setting system policy to FUTURE
To ensure that the change of the cryptographic policy is applied, restart the system.
Strong crypto defaults by removing insecure cipher suites and protocols
The following list contains cipher suites and protocols removed from the core cryptographic libraries in Red Hat Enterprise Linux 9. They are not present in the sources, or their support is disabled during the build, so applications cannot use them.
- DES (since RHEL 7)
- All export grade cipher suites (since RHEL 7)
- MD5 in signatures (since RHEL 7)
- SSLv2 (since RHEL 7)
- SSLv3 (since RHEL 8)
- All ECC curves < 224 bits (since RHEL 6)
- All binary field ECC curves (since RHEL 6)
Algorithmes désactivés à tous les niveaux de la politique
The following algorithms are disabled in LEGACY, DEFAULT, FUTURE and FIPS cryptographic policies included in RHEL 9. They can be enabled only by applying a custom cryptographic policy or by an explicit configuration of individual applications, but the resulting configuration would not be considered supported.
- TLS antérieur à la version 1.2 (depuis RHEL 9, était < 1.0 dans RHEL 8)
- DTLS antérieur à la version 1.2 (depuis RHEL 9, était < 1.0 dans RHEL 8)
- DH avec les paramètres < 2048 bits (depuis RHEL 9, était < 1024 bits dans RHEL 8)
- RSA avec une taille de clé de < 2048 bits (depuis RHEL 9, était < 1024 bits dans RHEL 8)
- DSA (depuis RHEL 9, était < 1024 bits dans RHEL 8)
- 3DES (depuis RHEL 9)
- RC4 (depuis RHEL 9)
- FFDHE-1024 (depuis RHEL 9)
- DHE-DSS (depuis RHEL 9)
- Camellia (depuis RHEL 9)
- ARIA
- IKEv1 (depuis RHEL 8)
Algorithms enabled in the crypto-policies levels
The following table shows the comparison of all four crypto-policies levels with regard to select algorithms.
LEGACY | DEFAULT | FIPS | FUTURE | |
|---|---|---|---|---|
| IKEv1 | non | non | non | non |
| 3DES | non | non | non | non |
| RC4 | non | non | non | non |
| DH | min. 2048-bit | min. 2048-bit | min. 2048-bit | min. 3072-bit |
| RSA | min. 2048-bit | min. 2048-bit | min. 2048-bit | min. 3072-bit |
| DSA | non | non | non | non |
| TLS v1.1 and older | non | non | non | non |
| TLS v1.2 and newer | yes | yes | yes | yes |
| SHA-1 in digital signatures and certificates | yes | non | non | non |
| CBC mode ciphers | yes | no[a] | no[b] | no[c] |
| Symmetric ciphers with keys < 256 bits | yes | yes | yes | non |
[a]
CBC ciphers are disabled for SSH
[b]
CBC ciphers are disabled for all protocols except Kerberos
[c]
CBC ciphers are disabled for all protocols except Kerberos
| ||||
Ressources supplémentaires
-
update-crypto-policies(8)man page
3.2. Switching the system-wide cryptographic policy to mode compatible with earlier releases
The default system-wide cryptographic policy in Red Hat Enterprise Linux 9 does not allow communication using older, insecure protocols. For environments that require to be compatible with Red Hat Enterprise Linux 6 and in some cases also with earlier releases, the less secure LEGACY policy level is available.
Switching to the LEGACY policy level results in a less secure system and applications.
Procédure
To switch the system-wide cryptographic policy to the
LEGACYlevel, enter the following command asroot:# update-crypto-policies --set LEGACY Setting system policy to LEGACY
Ressources supplémentaires
-
For the list of available cryptographic policy levels, see the
update-crypto-policies(8)man page. -
For defining custom cryptographic policies, see the
Custom Policiessection in theupdate-crypto-policies(8)man page and theCrypto Policy Definition Formatsection in thecrypto-policies(7)man page.
3.3. Mise en place de politiques cryptographiques à l'échelle du système dans la console web
You can set one of system-wide cryptographic policies and subpolicies directly in the RHEL web console interface. Besides the four predefined system-wide cryptographic policies, you can also apply the following combinations of policies and subpolicies through the graphical interface now:
-
DEFAULT:SHA1est la politiqueDEFAULTavec l'algorithmeSHA-1activé. -
LEGACY:AD-SUPPORTest la stratégieLEGACYavec des paramètres moins sûrs qui améliorent l'interopérabilité des services Active Directory. -
FIPS:OSPPest la politiqueFIPSavec des restrictions supplémentaires inspirées de la norme Critères communs pour l'évaluation de la sécurité des technologies de l'information.
Conditions préalables
- La console web RHEL 9 a été installée. Pour plus de détails, voir Installation et activation de la console web.
-
You have
rootprivileges or permissions to enter administrative commands withsudo.
Procédure
- Log in to the web console. For more information, see Logging in to the web console.
Dans la carte Configuration de la page Overview, cliquez sur la valeur actuelle de votre police d'assurance à côté de Crypto policy.

In the Change crypto policy dialog window, click on the policy you want to start using on your system.
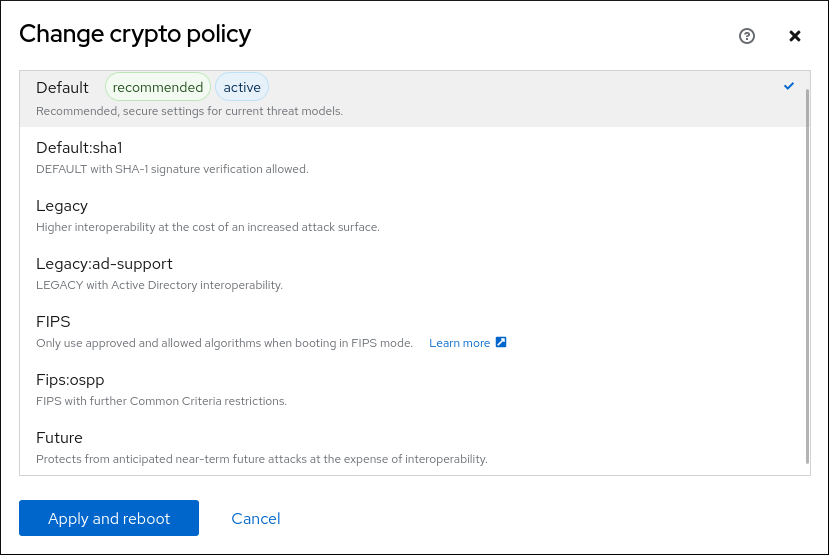
- Cliquez sur le bouton .
Vérification
-
After the restart, log back in to web console, and check that the Crypto policy value corresponds to the one you selected. Alternatively, you can enter the
update-crypto-policies --showcommand to display the current system-wide cryptographic policy in your terminal.
3.4. Switching the system to FIPS mode
The system-wide cryptographic policies contain a policy level that enables cryptographic modules self-checks in accordance with the requirements by the Federal Information Processing Standard (FIPS) Publication 140-3. The fips-mode-setup tool that enables or disables FIPS mode internally uses the FIPS system-wide cryptographic policy level.
Red Hat recommends installing Red Hat Enterprise Linux 9 with FIPS mode enabled, as opposed to enabling FIPS mode later. Enabling FIPS mode during the installation ensures that the system generates all keys with FIPS-approved algorithms and continuous monitoring tests in place.
The cryptographic modules of RHEL 9 are not yet certified for the FIPS 140-3 requirements.
Procédure
To switch the system to FIPS mode:
# fips-mode-setup --enable
Kernel initramdisks are being regenerated. This might take some time.
Setting system policy to FIPS
Note: System-wide crypto policies are applied on application start-up.
It is recommended to restart the system for the change of policies
to fully take place.
FIPS mode will be enabled.
Please reboot the system for the setting to take effect.
Redémarrez votre système pour permettre au noyau de passer en mode FIPS :
# reboot
Vérification
After the restart, you can check the current state of FIPS mode:
# fips-mode-setup --check
FIPS mode is enabled.
Ressources supplémentaires
-
fips-mode-setup(8)man page - Installing the system in FIPS mode
- Security Requirements for Cryptographic Modules on the National Institute of Standards and Technology (NIST) web site.
3.5. Enabling FIPS mode in a container
To enable the full set of cryptographic module self-checks mandated by the Federal Information Processing Standard Publication 140-2 (FIPS mode), the host system kernel must be running in FIPS mode. The podman utility automatically enables FIPS mode on supported containers.
The fips-mode-setup command does not work correctly in containers, and it cannot be used to enable or check FIPS mode in this scenario.
The cryptographic modules of RHEL 9 are not yet certified for the FIPS 140-3 requirements.
Conditions préalables
- The host system must be in FIPS mode.
Procédure
-
On systems with FIPS mode enabled, the
podmanutility automatically enables FIPS mode on supported containers.
Ressources supplémentaires
3.6. List of RHEL applications using cryptography that is not compliant with FIPS 140-3
Red Hat recommends utilizing libraries from the core crypto components set, as they are guaranteed to pass all relevant crypto certifications, such as FIPS 140-3, and also follow the RHEL system-wide crypto policies.
See the RHEL core crypto components article for an overview of the core cryptographic components, the information about how are they selected, how are they integrated into the operating system, how do they support hardware security modules and smart cards, and how do cryptographic certifications apply to them.
Tableau 3.1. List of RHEL 8 applications using cryptography that is not compliant with FIPS 140-3
| Application | Détails |
|---|---|
| Bacula | Implements the CRAM-MD5 authentication protocol. |
| Cyrus SASL | Uses the SCRAM-SHA-1 authentication method. |
| Dovecot | Uses SCRAM-SHA-1. |
| Emacs | Uses SCRAM-SHA-1. |
| FreeRADIUS | Uses MD5 and SHA-1 for authentication protocols. |
| Ghostscript | Custom cryptography implementation (MD5, RC4, SHA-2, AES) to encrypt and decrypt documents. |
| GRUB2 |
Supports legacy firmware protocols requiring SHA-1 and includes the |
| ipxe | Implements TLS stack. |
| Kerberos | Preserves support for SHA-1 (interoperability with Windows). |
| lasso |
The |
| MariaDB, MariaDB Connector |
The |
| MySQL |
|
| OpenIPMI | The RAKP-HMAC-MD5 authentication method is not approved for FIPS usage and does not work in FIPS mode. |
| Ovmf (UEFI firmware), Edk2, shim | Full crypto stack (an embedded copy of the OpenSSL library). |
| perl-CPAN | Digest MD5 authentication. |
| perl-Digest-HMAC, perl-Digest-SHA | Uses HMAC, HMAC-SHA1, HMAC-MD5, SHA-1, SHA-224, and so on. |
| perl-Mail-DKIM | The Signer class uses the RSA-SHA1 algorithm by default. |
| PKCS #12 file processing (OpenSSL, GnuTLS, NSS, Firefox, Java) | All uses of PKCS #12 are not FIPS-compliant, because the Key Derivation Function (KDF) used for calculating the whole-file HMAC is not FIPS-approved. As such, PKCS #12 files are considered to be plain text for the purposes of FIPS compliance. For key-transport purposes, wrap PKCS #12 (.p12) files using a FIPS-approved encryption scheme. |
| Poppler | Can save PDFs with signatures, passwords, and encryption based on non-allowed algorithms if they are present in the original PDF (for example MD5, RC4, and SHA-1). |
| PostgreSQL | KDF uses SHA-1. |
| QAT Engine | Mixed hardware and software implementation of cryptographic primitives (RSA, EC, DH, AES, …) |
| Rubis | Provides insecure MD5 and SHA-1 library functions. |
| Samba | Preserves support for RC4 and DES (interoperability with Windows). |
| Syslinux | BIOS passwords use SHA-1. |
| Unbound | DNS specification requires that DNSSEC resolvers use a SHA-1-based algorithm in DNSKEY records for validation. |
| Valgrind | AES, SHA hashes.[a] |
[a]
Re-implements in software hardware-offload operations, such as AES-NI or SHA-1 and SHA-2 on ARM.
| |
3.7. Excluding an application from following system-wide crypto policies
You can customize cryptographic settings used by your application preferably by configuring supported cipher suites and protocols directly in the application.
You can also remove a symlink related to your application from the /etc/crypto-policies/back-ends directory and replace it with your customized cryptographic settings. This configuration prevents the use of system-wide cryptographic policies for applications that use the excluded back end. Furthermore, this modification is not supported by Red Hat.
3.7.1. Examples of opting out of system-wide crypto policies
wget
To customize cryptographic settings used by the wget network downloader, use --secure-protocol and --ciphers options. For example:
$ wget --secure-protocol=TLSv1_1 --ciphers="SECURE128" https://example.com
See the HTTPS (SSL/TLS) Options section of the wget(1) man page for more information.
boucler
To specify ciphers used by the curl tool, use the --ciphers option and provide a colon-separated list of ciphers as a value. For example:
$ curl https://example.com --ciphers '@SECLEVEL=0:DES-CBC3-SHA:RSA-DES-CBC3-SHA'
See the curl(1) man page for more information.
Firefox
Even though you cannot opt out of system-wide cryptographic policies in the Firefox web browser, you can further restrict supported ciphers and TLS versions in Firefox’s Configuration Editor. Type about:config in the address bar and change the value of the security.tls.version.min option as required. Setting security.tls.version.min to 1 allows TLS 1.0 as the minimum required, security.tls.version.min 2 enables TLS 1.1, and so on.
OpenSSH
To opt out of system-wide crypto policies for your OpenSSH client, perform one of the following tasks:
-
For a given user, override the global
ssh_configwith a user-specific configuration in the~/.ssh/configfile. -
For the entire system, specify the crypto policy in a drop-in configuration file located in the
/etc/ssh/ssh_config.d/directory, with a two-digit number prefix smaller than 50, so that it lexicographically precedes the50-redhat.conffile, and with a.confsuffix, for example,49-crypto-policy-override.conf.
See the ssh_config(5) man page for more information.
Libreswan
See the Configuring IPsec connections that opt out of the system-wide crypto policies in the Securing networks document for detailed information.
Ressources supplémentaires
-
update-crypto-policies(8)man page
3.8. Customizing system-wide cryptographic policies with subpolicies
Use this procedure to adjust the set of enabled cryptographic algorithms or protocols.
You can either apply custom subpolicies on top of an existing system-wide cryptographic policy or define such a policy from scratch.
The concept of scoped policies allows enabling different sets of algorithms for different back ends. You can limit each configuration directive to specific protocols, libraries, or services.
Furthermore, directives can use asterisks for specifying multiple values using wildcards.
The /etc/crypto-policies/state/CURRENT.pol file lists all settings in the currently applied system-wide cryptographic policy after wildcard expansion. To make your cryptographic policy more strict, consider using values listed in the /usr/share/crypto-policies/policies/FUTURE.pol file.
You can find example subpolicies in the /usr/share/crypto-policies/policies/modules/ directory. The subpolicy files in this directory contain also descriptions in lines that are commented out.
Procédure
Checkout to the
/etc/crypto-policies/policies/modules/directory:# cd /etc/crypto-policies/policies/modules/Create subpolicies for your adjustments, for example:
# touch MYCRYPTO-1.pmod
# touch SCOPES-AND-WILDCARDS.pmod
ImportantUse upper-case letters in file names of policy modules.
Open the policy modules in a text editor of your choice and insert options that modify the system-wide cryptographic policy, for example:
# vi MYCRYPTO-1.pmodmin_rsa_size = 3072 hash = SHA2-384 SHA2-512 SHA3-384 SHA3-512
# vi SCOPES-AND-WILDCARDS.pmod# Disable the AES-128 cipher, all modes cipher = -AES-128-* # Disable CHACHA20-POLY1305 for the TLS protocol (OpenSSL, GnuTLS, NSS, and OpenJDK) cipher@TLS = -CHACHA20-POLY1305 # Allow using the FFDHE-1024 group with the SSH protocol (libssh and OpenSSH) group@SSH = FFDHE-1024+ # Disable all CBC mode ciphers for the SSH protocol (libssh and OpenSSH) cipher@SSH = -*-CBC # Allow the AES-256-CBC cipher in applications using libssh cipher@libssh = AES-256-CBC+
- Save the changes in the module files.
Apply your policy adjustments to the
DEFAULTsystem-wide cryptographic policy level:# update-crypto-policies --set DEFAULT:MYCRYPTO-1:SCOPES-AND-WILDCARDSTo make your cryptographic settings effective for already running services and applications, restart the system:
# reboot
Vérification
Check that the
/etc/crypto-policies/state/CURRENT.polfile contains your changes, for example:$ cat /etc/crypto-policies/state/CURRENT.pol | grep rsa_size min_rsa_size = 3072
Ressources supplémentaires
-
Custom Policiessection in theupdate-crypto-policies(8)man page -
Crypto Policy Definition Formatsection in thecrypto-policies(7)man page - How to customize crypto policies in RHEL 8.2 Red Hat blog article
3.9. Re-enabling SHA-1
The use of the SHA-1 algorithm for creating and verifying signatures is restricted in the DEFAULT cryptographic policy. If your scenario requires the use of SHA-1 for verifying existing or third-party cryptographic signatures, you can enable it by applying the SHA1 subpolicy, which RHEL 9 provides by default. Note that it weakens the security of the system.
Conditions préalables
-
The system uses the
DEFAULTsystem-wide cryptographic policy.
Procédure
Apply the
SHA1subpolicy to theDEFAULTcryptographic policy:# update-crypto-policies --set DEFAULT:SHA1 Setting system policy to DEFAULT:SHA1 Note: System-wide crypto policies are applied on application start-up. It is recommended to restart the system for the change of policies to fully take place.Redémarrer le système :
# reboot
Vérification
Display the current cryptographic policy:
# update-crypto-policies --show
DEFAULT:SHA1
Switching to the LEGACY cryptographic policy by using the update-crypto-policies --set LEGACY command also enables SHA-1 for signatures. However, the LEGACY cryptographic policy makes your system much more vulnerable by also enabling other weak cryptographic algorithms. Use this workaround only for scenarios that require the enablement of other legacy cryptographic algorithms than SHA-1 signatures.
Ressources supplémentaires
3.10. Creating and setting a custom system-wide cryptographic policy
The following steps demonstrate customizing the system-wide cryptographic policies by a complete policy file.
Procédure
Create a policy file for your customizations:
# cd /etc/crypto-policies/policies/
# touch MYPOLICY.pol
Alternatively, start by copying one of the four predefined policy levels:
# cp /usr/share/crypto-policies/policies/DEFAULT.pol /etc/crypto-policies/policies/MYPOLICY.polEdit the file with your custom cryptographic policy in a text editor of your choice to fit your requirements, for example:
# vi /etc/crypto-policies/policies/MYPOLICY.polSwitch the system-wide cryptographic policy to your custom level:
# update-crypto-policies --set MYPOLICYTo make your cryptographic settings effective for already running services and applications, restart the system:
# reboot
Ressources supplémentaires
-
Custom Policiessection in theupdate-crypto-policies(8)man page and theCrypto Policy Definition Formatsection in thecrypto-policies(7)man page - How to customize crypto policies in RHEL Red Hat blog article
Chapitre 4. Définition d'une politique cryptographique personnalisée à l'aide du rôle de système RHEL crypto-policies
En tant qu'administrateur, vous pouvez utiliser le rôle système crypto_policies RHEL pour configurer rapidement et de manière cohérente des politiques cryptographiques personnalisées sur de nombreux systèmes différents à l'aide du package Ansible Core.
4.1. crypto_policies Variables et faits relatifs au rôle du système
Dans un playbook crypto_policies System Role, vous pouvez définir les paramètres du fichier de configuration crypto_policies en fonction de vos préférences et de vos limites.
Si vous ne configurez aucune variable, le rôle système ne configure pas le système et se contente de signaler les faits.
Variables sélectionnées pour le rôle du système crypto_policies
crypto_policies_policy- Détermine la stratégie cryptographique que le rôle système applique aux nœuds gérés. Pour plus d'informations sur les différentes stratégies cryptographiques, voir Stratégies cryptographiques à l'échelle du système.
crypto_policies_reload-
S'il est défini sur
yes, les services concernés, actuellement les servicesipsec,bindetsshd, se rechargent après l'application d'une stratégie cryptographique. La valeur par défaut estyes. crypto_policies_reboot_ok-
S'il est défini sur
yeset qu'un redémarrage est nécessaire après que le rôle système a modifié la politique de cryptage, il définitcrypto_policies_reboot_requiredsuryes. La valeur par défaut estno.
Faits définis par le système crypto_policies Rôle
crypto_policies_active- Liste la politique actuellement sélectionnée.
crypto_policies_available_policies- Répertorie toutes les politiques disponibles sur le système.
crypto_policies_available_subpolicies- Répertorie toutes les sous-politiques disponibles sur le système.
Ressources supplémentaires
4.2. Définition d'une politique cryptographique personnalisée à l'aide du rôle de système crypto_policies
Vous pouvez utiliser le rôle de système crypto_policies pour configurer un grand nombre de nœuds gérés de manière cohérente à partir d'un seul nœud de contrôle.
Conditions préalables
-
Accès et autorisations à un ou plusieurs managed nodes, qui sont des systèmes que vous souhaitez configurer avec le rôle de système
crypto_policies. Accès et autorisations à un nœud de contrôle, qui est un système à partir duquel Red Hat Ansible Core configure d'autres systèmes.
Sur le nœud de contrôle :
-
Les paquets
ansible-coreetrhel-system-rolessont installés.
-
Les paquets
RHEL 8.0-8.5 provided access to a separate Ansible repository that contains Ansible Engine 2.9 for automation based on Ansible. Ansible Engine contains command-line utilities such as ansible, ansible-playbook, connectors such as docker and podman, and many plugins and modules. For information about how to obtain and install Ansible Engine, see the How to download and install Red Hat Ansible Engine Knowledgebase article.
RHEL 8.6 et 9.0 ont introduit Ansible Core (fourni en tant que paquetage ansible-core ), qui contient les utilitaires de ligne de commande Ansible, les commandes et un petit ensemble de plugins Ansible intégrés. RHEL fournit ce paquetage par l'intermédiaire du dépôt AppStream, et sa prise en charge est limitée. Pour plus d'informations, consultez l'article de la base de connaissances intitulé Scope of support for the Ansible Core package included in the RHEL 9 and RHEL 8.6 and later AppStream repositories (Portée de la prise en charge du package Ansible Core inclus dans les dépôts AppStream RHEL 9 et RHEL 8.6 et versions ultérieures ).
- Un fichier d'inventaire qui répertorie les nœuds gérés.
Procédure
Créez un nouveau fichier
playbook.ymlavec le contenu suivant :--- - hosts: all tasks: - name: Configure crypto policies include_role: name: rhel-system-roles.crypto_policies vars: - crypto_policies_policy: FUTURE - crypto_policies_reboot_ok: trueVous pouvez remplacer la valeur FUTURE par votre politique cryptographique préférée, par exemple :
DEFAULT,LEGACY, etFIPS:OSPP.La variable
crypto_policies_reboot_ok: trueprovoque le redémarrage du système après que le rôle système a modifié la stratégie cryptographique.Pour plus de détails, voir crypto_policies Variables et faits relatifs au rôle du système.
Facultatif : Vérifier la syntaxe du playbook.
# ansible-playbook --syntax-check playbook.ymlExécutez le playbook sur votre fichier d'inventaire :
# ansible-playbook -i inventory_file playbook.yml
Vérification
Sur le nœud de contrôle, créez un autre playbook nommé, par exemple,
verify_playbook.yml:- hosts: all tasks: - name: Verify active crypto policy include_role: name: rhel-system-roles.crypto_policies - debug: var: crypto_policies_activeCe playbook ne modifie aucune configuration sur le système, mais signale uniquement la politique active sur les nœuds gérés.
Exécutez le playbook sur le même fichier d'inventaire :
# ansible-playbook -i inventory_file verify_playbook.yml

TASK [debug] **************************
ok: [host] => {
    "crypto_policies_active": "FUTURE"
}
La variable
"crypto_policies_active":indique la politique active sur le nœud géré.
4.3. Ressources supplémentaires
-
/usr/share/ansible/roles/rhel-system-roles.crypto_policies/README.mdfichier. -
ansible-playbook(1)page de manuel. - Préparation d'un nœud de contrôle et de nœuds gérés à l'utilisation des rôles système RHEL.
Chapitre 5. Configuring applications to use cryptographic hardware through PKCS #11
Separating parts of your secret information about dedicated cryptographic devices, such as smart cards and cryptographic tokens for end-user authentication and hardware security modules (HSM) for server applications, provides an additional layer of security. In RHEL, support for cryptographic hardware through the PKCS #11 API is consistent across different applications, and the isolation of secrets on cryptographic hardware is not a complicated task.
5.1. Cryptographic hardware support through PKCS #11
PKCS #11 (Public-Key Cryptography Standard) defines an application programming interface (API) to cryptographic devices that hold cryptographic information and perform cryptographic functions. These devices are called tokens, and they can be implemented in a hardware or software form.
A PKCS #11 token can store various object types including a certificate; a data object; and a public, private, or secret key. These objects are uniquely identifiable through the PKCS #11 URI scheme.
A PKCS #11 URI is a standard way to identify a specific object in a PKCS #11 module according to the object attributes. This enables you to configure all libraries and applications with the same configuration string in the form of a URI.
RHEL provides the OpenSC PKCS #11 driver for smart cards by default. However, hardware tokens and HSMs can have their own PKCS #11 modules that do not have their counterpart in the system. You can register such PKCS #11 modules with the p11-kit tool, which acts as a wrapper over the registered smart-card drivers in the system.
To make your own PKCS #11 module work on the system, add a new text file to the /etc/pkcs11/modules/ directory
You can add your own PKCS #11 module into the system by creating a new text file in the /etc/pkcs11/modules/ directory. For example, the OpenSC configuration file in p11-kit looks as follows:
$ cat /usr/share/p11-kit/modules/opensc.module
module: opensc-pkcs11.so
Ressources supplémentaires
5.2. Utilisation de clés SSH stockées sur une carte à puce
Red Hat Enterprise Linux vous permet d'utiliser les clés RSA et ECDSA stockées sur une carte à puce sur les clients OpenSSH. Utilisez cette procédure pour activer l'authentification à l'aide d'une carte à puce au lieu d'un mot de passe.
Conditions préalables
-
Côté client, le paquet
openscest installé et le servicepcscdest en cours d'exécution.
Procédure
Dresser la liste de toutes les clés fournies par le module PKCS #11 d'OpenSC, y compris leurs URI PKCS #11, et enregistrer le résultat dans le fichier keys.pub:
$ ssh-keygen -D pkcs11: > keys.pub
$ ssh-keygen -D pkcs11:
ssh-rsa AAAAB3NzaC1yc2E...KKZMzcQZzx pkcs11:id=%02;object=SIGN%20pubkey;token=SSH%20key;manufacturer=piv_II?module-path=/usr/lib64/pkcs11/opensc-pkcs11.so
ecdsa-sha2-nistp256 AAA...J0hkYnnsM= pkcs11:id=%01;object=PIV%20AUTH%20pubkey;token=SSH%20key;manufacturer=piv_II?module-path=/usr/lib64/pkcs11/opensc-pkcs11.so
Pour permettre l'authentification à l'aide d'une carte à puce sur un serveur distant (example.com), transférez la clé publique sur le serveur distant. Utilisez la commande
ssh-copy-idavec keys.pub créé à l'étape précédente :$ ssh-copy-id -f -i keys.pub username@example.comPour vous connecter à example.com à l'aide de la clé ECDSA issue de la commande
ssh-keygen -Dà l'étape 1, vous pouvez utiliser uniquement un sous-ensemble de l'URI, qui fait référence de manière unique à votre clé, par exemple :$ ssh -i "pkcs11:id=%01?module-path=/usr/lib64/pkcs11/opensc-pkcs11.so" example.com Enter PIN for 'SSH key': [example.com] $Vous pouvez utiliser la même chaîne URI dans le fichier
~/.ssh/configpour rendre la configuration permanente :$ cat ~/.ssh/config IdentityFile "pkcs11:id=%01?module-path=/usr/lib64/pkcs11/opensc-pkcs11.so" $ ssh example.com Enter PIN for 'SSH key': [example.com] $
Comme OpenSSH utilise le wrapper
p11-kit-proxyet que le module OpenSC PKCS #11 est enregistré dans le kit PKCS#11, vous pouvez simplifier les commandes précédentes :$ ssh -i "pkcs11:id=%01" example.com Enter PIN for 'SSH key': [example.com] $
Si vous omettez la partie id= d'un URI PKCS #11, OpenSSH charge toutes les clés disponibles dans le module proxy. Cela peut réduire la quantité de données à saisir :
$ ssh -i pkcs11: example.com
Enter PIN for 'SSH key':
[example.com] $
Ressources supplémentaires
- Fedora 28 : Meilleur support des cartes à puce dans OpenSSH
-
p11-kit(8),opensc.conf(5),pcscd(8),ssh(1), etssh-keygen(1)pages de manuel
5.3. Configuring applications to authenticate using certificates from smart cards
Authentication using smart cards in applications may increase security and simplify automation.
The
wgetnetwork downloader enables you to specify PKCS #11 URIs instead of paths to locally stored private keys, and thus simplifies creating scripts for tasks that require safely stored private keys and certificates. For example:$ wget --private-key 'pkcs11:token=softhsm;id=%01;type=private?pin-value=111111' --certificate 'pkcs11:token=softhsm;id=%01;type=cert' https://example.com/See the
wget(1)man page for more information.Specifying PKCS #11 URI for use by the
curltool is analogous:$ curl --key 'pkcs11:token=softhsm;id=%01;type=private?pin-value=111111' --cert 'pkcs11:token=softhsm;id=%01;type=cert' https://example.com/See the
curl(1)man page for more information.NoteBecause a PIN is a security measure that controls access to keys stored on a smart card and the configuration file contains the PIN in the plain-text form, consider additional protection to prevent an attacker from reading the PIN. For example, you can use the
pin-sourceattribute and provide afile:URI for reading the PIN from a file. See RFC 7512: PKCS #11 URI Scheme Query Attribute Semantics for more information. Note that using a command path as a value of thepin-sourceattribute is not supported.-
The
Firefoxweb browser automatically loads thep11-kit-proxymodule. This means that every supported smart card in the system is automatically detected. For using TLS client authentication, no additional setup is required and keys from a smart card are automatically used when a server requests them.
Using PKCS #11 URIs in custom applications
If your application uses the GnuTLS or NSS library, support for PKCS #11 URIs is ensured by their built-in support for PKCS #11. Also, applications relying on the OpenSSL library can access cryptographic hardware modules thanks to the openssl-pkcs11 engine.
With applications that require working with private keys on smart cards and that do not use NSS, GnuTLS, and OpenSSL, use p11-kit to implement registering PKCS #11 modules.
Ressources supplémentaires
-
p11-kit(8)man page.
5.4. Using HSMs protecting private keys in Apache
The Apache HTTP server can work with private keys stored on hardware security modules (HSMs), which helps to prevent the keys' disclosure and man-in-the-middle attacks. Note that this usually requires high-performance HSMs for busy servers.
For secure communication in the form of the HTTPS protocol, the Apache HTTP server (httpd) uses the OpenSSL library. OpenSSL does not support PKCS #11 natively. To use HSMs, you have to install the openssl-pkcs11 package, which provides access to PKCS #11 modules through the engine interface. You can use a PKCS #11 URI instead of a regular file name to specify a server key and a certificate in the /etc/httpd/conf.d/ssl.conf configuration file, for example:
SSLCertificateFile    "pkcs11:id=%01;token=softhsm;type=cert"
SSLCertificateKeyFile "pkcs11:id=%01;token=softhsm;type=private?pin-value=111111"
Install the httpd-manual package to obtain complete documentation for the Apache HTTP Server, including TLS configuration. The directives available in the /etc/httpd/conf.d/ssl.conf configuration file are described in detail in the /usr/share/httpd/manual/mod/mod_ssl.html file.
5.5. Using HSMs protecting private keys in Nginx
The Nginx HTTP server can work with private keys stored on hardware security modules (HSMs), which helps to prevent the keys' disclosure and man-in-the-middle attacks. Note that this usually requires high-performance HSMs for busy servers.
Because Nginx also uses the OpenSSL for cryptographic operations, support for PKCS #11 must go through the openssl-pkcs11 engine. Nginx currently supports only loading private keys from an HSM, and a certificate must be provided separately as a regular file. Modify the ssl_certificate and ssl_certificate_key options in the server section of the /etc/nginx/nginx.conf configuration file:
ssl_certificate     /path/to/cert.pem
ssl_certificate_key "engine:pkcs11:pkcs11:token=softhsm;id=%01;type=private?pin-value=111111";
Note that the engine:pkcs11: prefix is needed for the PKCS #11 URI in the Nginx configuration file. This is because the other pkcs11 prefix refers to the engine name.
Chapitre 6. Controlling access to smart cards using polkit
To cover possible threats that cannot be prevented by mechanisms built into smart cards, such as PINs, PIN pads, and biometrics, and for more fine-grained control, RHEL uses the polkit framework for controlling access control to smart cards.
System administrators can configure polkit to fit specific scenarios, such as smart-card access for non-privileged or non-local users or services.
6.1. Smart-card access control through polkit
The Personal Computer/Smart Card (PC/SC) protocol specifies a standard for integrating smart cards and their readers into computing systems. In RHEL, the pcsc-lite package provides middleware to access smart cards that use the PC/SC API. A part of this package, the pcscd (PC/SC Smart Card) daemon, ensures that the system can access a smart card using the PC/SC protocol.
Because access-control mechanisms built into smart cards, such as PINs, PIN pads, and biometrics, do not cover all possible threats, RHEL uses the polkit framework for more robust access control. The polkit authorization manager can grant access to privileged operations. In addition to granting access to disks, you can use polkit also to specify policies for securing smart cards. For example, you can define which users can perform which operations with a smart card.
After installing the pcsc-lite package and starting the pcscd daemon, the system enforces policies defined in the /usr/share/polkit-1/actions/ directory. The default system-wide policy is in the /usr/share/polkit-1/actions/org.debian.pcsc-lite.policy file. Polkit policy files use the XML format and the syntax is described in the polkit(8) man page.
The polkitd service monitors the /etc/polkit-1/rules.d/ and /usr/share/polkit-1/rules.d/ directories for any changes in rule files stored in these directories. The files contain authorization rules in JavaScript format. System administrators can add custom rule files in both directories, and polkitd reads them in lexical order based on their file name. If two files have the same names, then the file in /etc/polkit-1/rules.d/ is read first.
Ressources supplémentaires
-
polkit(8),polkitd(8), andpcscd(8)man pages.
6.3. Displaying more detailed information about polkit authorization to PC/SC
In the default configuration, the polkit authorization framework sends only limited information to the Journal log. You can extend polkit log entries related to the PC/SC protocol by adding new rules.
Conditions préalables
-
You have installed the
pcsc-litepackage on your system. -
The
pcscddaemon is running.
Procédure
Create a new file in the
/etc/polkit-1/rules.d/directory:# touch /etc/polkit-1/rules.d/00-test.rulesEdit the file in an editor of your choice, for example:
# vi /etc/polkit-1/rules.d/00-test.rulesInsert the following lines:
polkit.addRule(function(action, subject) {
  if (action.id == "org.debian.pcsc-lite.access_pcsc" ||
  	action.id == "org.debian.pcsc-lite.access_card") {
	polkit.log("action=" + action);
	polkit.log("subject=" + subject);
  }
});
Save the file, and exit the editor.
Restart the
pcscdandpolkitservices:# systemctl restart pcscd.service pcscd.socket polkit.service
Vérification
-
Make an authorization request for
pcscd. For example, open the Firefox web browser or use thepkcs11-tool -Lcommand provided by theopenscpackage. Display the extended log entries, for example:
# journalctl -u polkit --since "1 hour ago"
polkitd[1224]: <no filename>:4: action=[Action id='org.debian.pcsc-lite.access_pcsc']
polkitd[1224]: <no filename>:5: subject=[Subject pid=2020481 user=user' groups=user,wheel,mock,wireshark seat=null session=null local=true active=true]
Ressources supplémentaires
-
polkit(8)andpolkitd(8)man pages.
6.4. Ressources supplémentaires
- Controlling access to smart cards Red Hat Blog article.
Chapitre 7. Scanning the system for configuration compliance and vulnerabilities
A compliance audit is a process of determining whether a given object follows all the rules specified in a compliance policy. The compliance policy is defined by security professionals who specify the required settings, often in the form of a checklist, that a computing environment should use.
Compliance policies can vary substantially across organizations and even across different systems within the same organization. Differences among these policies are based on the purpose of each system and its importance for the organization. Custom software settings and deployment characteristics also raise a need for custom policy checklists.
7.1. Configuration compliance tools in RHEL
Red Hat Enterprise Linux provides tools that enable you to perform a fully automated compliance audit. These tools are based on the Security Content Automation Protocol (SCAP) standard and are designed for automated tailoring of compliance policies.
-
SCAP Workbench - The
scap-workbenchgraphical utility is designed to perform configuration and vulnerability scans on a single local or remote system. You can also use it to generate security reports based on these scans and evaluations. -
OpenSCAP - The
OpenSCAPlibrary, with the accompanyingoscapcommand-line utility, is designed to perform configuration and vulnerability scans on a local system, to validate configuration compliance content, and to generate reports and guides based on these scans and evaluations.
You can experience memory-consumption problems while using OpenSCAP, which can cause stopping the program prematurely and prevent generating any result files. See the OpenSCAP memory-consumption problems Knowledgebase article for details.
-
SCAP Security Guide (SSG) - The
scap-security-guidepackage provides the latest collection of security policies for Linux systems. The guidance consists of a catalog of practical hardening advice, linked to government requirements where applicable. The project bridges the gap between generalized policy requirements and specific implementation guidelines. -
Script Check Engine (SCE) - SCE is an extension to the SCAP protocol that enables administrators to write their security content using a scripting language, such as Bash, Python, and Ruby. The SCE extension is provided in the
openscap-engine-scepackage. The SCE itself is not part of the SCAP standard.
To perform automated compliance audits on multiple systems remotely, you can use the OpenSCAP solution for Red Hat Satellite.
Ressources supplémentaires
-
oscap(8),scap-workbench(8), andscap-security-guide(8)man pages - Red Hat Security Demos: Creating Customized Security Policy Content to Automate Security Compliance
- Red Hat Security Demos: Defend Yourself with RHEL Security Technologies
- Security Compliance Management in the Administering Red Hat Satellite Guide.
7.2. Analyse de la vulnérabilité
7.2.1. Red Hat Security Advisories OVAL feed
Red Hat Enterprise Linux security auditing capabilities are based on the Security Content Automation Protocol (SCAP) standard. SCAP is a multi-purpose framework of specifications that supports automated configuration, vulnerability and patch checking, technical control compliance activities, and security measurement.
SCAP specifications create an ecosystem where the format of security content is well-known and standardized although the implementation of the scanner or policy editor is not mandated. This enables organizations to build their security policy (SCAP content) once, no matter how many security vendors they employ.
The Open Vulnerability Assessment Language (OVAL) is the essential and oldest component of SCAP. Unlike other tools and custom scripts, OVAL describes a required state of resources in a declarative manner. OVAL code is never executed directly but using an OVAL interpreter tool called scanner. The declarative nature of OVAL ensures that the state of the assessed system is not accidentally modified.
Like all other SCAP components, OVAL is based on XML. The SCAP standard defines several document formats. Each of them includes a different kind of information and serves a different purpose.
Red Hat Product Security helps customers evaluate and manage risk by tracking and investigating all security issues affecting Red Hat customers. It provides timely and concise patches and security advisories on the Red Hat Customer Portal. Red Hat creates and supports OVAL patch definitions, providing machine-readable versions of our security advisories.
Because of differences between platforms, versions, and other factors, Red Hat Product Security qualitative severity ratings of vulnerabilities do not directly align with the Common Vulnerability Scoring System (CVSS) baseline ratings provided by third parties. Therefore, we recommend that you use the RHSA OVAL definitions instead of those provided by third parties.
The RHSA OVAL definitions are available individually and as a complete package, and are updated within an hour of a new security advisory being made available on the Red Hat Customer Portal.
Each OVAL patch definition maps one-to-one to a Red Hat Security Advisory (RHSA). Because an RHSA can contain fixes for multiple vulnerabilities, each vulnerability is listed separately by its Common Vulnerabilities and Exposures (CVE) name and has a link to its entry in our public bug database.
The RHSA OVAL definitions are designed to check for vulnerable versions of RPM packages installed on a system. It is possible to extend these definitions to include further checks, for example, to find out if the packages are being used in a vulnerable configuration. These definitions are designed to cover software and updates shipped by Red Hat. Additional definitions are required to detect the patch status of third-party software.
The Red Hat Insights for Red Hat Enterprise Linux compliance service helps IT security and compliance administrators to assess, monitor, and report on the security policy compliance of Red Hat Enterprise Linux systems. You can also create and manage your SCAP security policies entirely within the compliance service UI.
Ressources supplémentaires
7.2.2. Scanning the system for vulnerabilities
The oscap command-line utility enables you to scan local systems, validate configuration compliance content, and generate reports and guides based on these scans and evaluations. This utility serves as a front end to the OpenSCAP library and groups its functionalities to modules (sub-commands) based on the type of SCAP content it processes.
Conditions préalables
-
The
openscap-scannerandbzip2packages are installed.
Procédure
Download the latest RHSA OVAL definitions for your system:
# wget -O - https://www.redhat.com/security/data/oval/v2/RHEL9/rhel-9.oval.xml.bz2 | bzip2 --decompress > rhel-9.oval.xmlScan the system for vulnerabilities and save results to the vulnerability.html file:
# oscap oval eval --report vulnerability.html rhel-9.oval.xml
Vérification
Check the results in a browser of your choice, for example:
$ firefox vulnerability.html &
Ressources supplémentaires
-
oscap(8)man page - Red Hat OVAL definitions
- OpenSCAP memory consumption problems
7.2.3. Scanning remote systems for vulnerabilities
You can check also remote systems for vulnerabilities with the OpenSCAP scanner using the oscap-ssh tool over the SSH protocol.
Conditions préalables
-
The
openscap-utilsandbzip2packages are installed on the system you use for scanning. -
The
openscap-scannerpackage is installed on the remote systems. - The SSH server is running on the remote systems.
Procédure
Download the latest RHSA OVAL definitions for your system:
# wget -O - https://www.redhat.com/security/data/oval/v2/RHEL9/rhel-9.oval.xml.bz2 | bzip2 --decompress > rhel-9.oval.xmlScan a remote system with the machine1 host name, SSH running on port 22, and the joesec user name for vulnerabilities and save results to the remote-vulnerability.html file:
# oscap-ssh joesec@machine1 22 oval eval --report remote-vulnerability.html rhel-9.oval.xml
Ressources supplémentaires
7.3. Configuration compliance scanning
7.3.1. Configuration compliance in RHEL
You can use configuration compliance scanning to conform to a baseline defined by a specific organization. For example, if you work with the US government, you might have to align your systems with the Operating System Protection Profile (OSPP), and if you are a payment processor, you might have to align your systems with the Payment Card Industry Data Security Standard (PCI-DSS). You can also perform configuration compliance scanning to harden your system security.
Red Hat recommends you follow the Security Content Automation Protocol (SCAP) content provided in the SCAP Security Guide package because it is in line with Red Hat best practices for affected components.
The SCAP Security Guide package provides content which conforms to the SCAP 1.2 and SCAP 1.3 standards. The openscap scanner utility is compatible with both SCAP 1.2 and SCAP 1.3 content provided in the SCAP Security Guide package.
Performing a configuration compliance scanning does not guarantee the system is compliant.
The SCAP Security Guide suite provides profiles for several platforms in a form of data stream documents. A data stream is a file that contains definitions, benchmarks, profiles, and individual rules. Each rule specifies the applicability and requirements for compliance. RHEL provides several profiles for compliance with security policies. In addition to the industry standard, Red Hat data streams also contain information for remediation of failed rules.
Structure of compliance scanning resources
Data stream
   ├── xccdf
   |      ├── benchmark
   |            ├── profile
   |            |    ├──rule reference
   |            |    └──variable
   |            ├── rule
   |                 ├── human readable data
   |                 ├── oval reference
   ├── oval          ├── ocil reference
   ├── ocil          ├── cpe reference
   └── cpe           └── remediation
A profile is a set of rules based on a security policy, such as OSPP, PCI-DSS, and Health Insurance Portability and Accountability Act (HIPAA). This enables you to audit the system in an automated way for compliance with security standards.
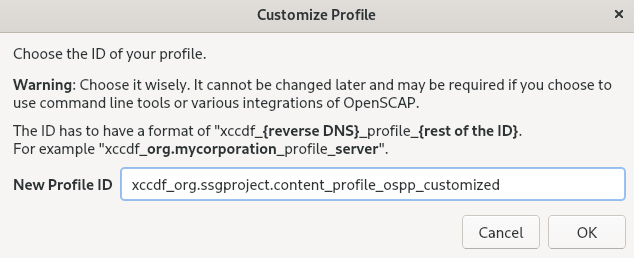
You can modify (tailor) a profile to customize certain rules, for example, password length. For more information about profile tailoring, see Customizing a security profile with SCAP Workbench.
7.3.2. Possible results of an OpenSCAP scan
Depending on various properties of your system and the data stream and profile applied to an OpenSCAP scan, each rule may produce a specific result. This is a list of possible results with brief explanations of what they mean.
Tableau 7.1. Possible results of an OpenSCAP scan
| Résultat | Explication |
|---|---|
| Pass | The scan did not find any conflicts with this rule. |
| Fail | The scan found a conflict with this rule. |
| Not checked | OpenSCAP does not perform an automatic evaluation of this rule. Check whether your system conforms to this rule manually. |
| Sans objet | This rule does not apply to the current configuration. |
| Not selected | This rule is not part of the profile. OpenSCAP does not evaluate this rule and does not display these rules in the results. |
| Error |
The scan encountered an error. For additional information, you can enter the |
| Inconnu |
The scan encountered an unexpected situation. For additional information, you can enter the |
7.3.3. Viewing profiles for configuration compliance
Before you decide to use profiles for scanning or remediation, you can list them and check their detailed descriptions using the oscap info subcommand.
Conditions préalables
-
The
openscap-scannerandscap-security-guidepackages are installed.
Procédure
List all available files with security compliance profiles provided by the SCAP Security Guide project:
$ ls /usr/share/xml/scap/ssg/content/
ssg-rhel9-ds.xml
Display detailed information about a selected data stream using the
oscap infosubcommand. XML files containing data streams are indicated by the-dsstring in their names. In theProfilessection, you can find a list of available profiles and their IDs:$ oscap info /usr/share/xml/scap/ssg/content/ssg-rhel9-ds.xml Profiles: ... Title: Australian Cyber Security Centre (ACSC) Essential Eight Id: xccdf_org.ssgproject.content_profile_e8 Title: Health Insurance Portability and Accountability Act (HIPAA) Id: xccdf_org.ssgproject.content_profile_hipaa Title: PCI-DSS v3.2.1 Control Baseline for Red Hat Enterprise Linux 9 Id: xccdf_org.ssgproject.content_profile_pci-dss ...Select a profile from the data-stream file and display additional details about the selected profile. To do so, use
oscap infowith the--profileoption followed by the last section of the ID displayed in the output of the previous command. For example, the ID of the HIPPA profile is:xccdf_org.ssgproject.content_profile_hipaa, and the value for the--profileoption ishipaa:$ oscap info --profile hipaa /usr/share/xml/scap/ssg/content/ssg-rhel9-ds.xml ... Profile Title: [RHEL9 DRAFT] Health Insurance Portability and Accountability Act (HIPAA) Id: xccdf_org.ssgproject.content_profile_hipaa Description: The HIPAA Security Rule establishes U.S. national standards to protect individuals’ electronic personal health information that is created, received, used, or maintained by a covered entity. The Security Rule requires appropriate administrative, physical and technical safeguards to ensure the confidentiality, integrity, and security of electronic protected health information. This profile configures Red Hat Enterprise Linux 9 to the HIPAA Security Rule identified for securing of electronic protected health information. Use of this profile in no way guarantees or makes claims against legal compliance against the HIPAA Security Rule(s).
Ressources supplémentaires
-
scap-security-guide(8)man page - OpenSCAP memory consumption problems
7.3.4. Assessing configuration compliance with a specific baseline
To determine whether your system conforms to a specific baseline, follow these steps.
Conditions préalables
-
The
openscap-scannerandscap-security-guidepackages are installed - You know the ID of the profile within the baseline with which the system should comply. To find the ID, see Viewing Profiles for Configuration Compliance.
Procédure
Evaluate the compliance of the system with the selected profile and save the scan results in the report.html HTML file, for example:
$ oscap xccdf eval --report report.html --profile hipaa /usr/share/xml/scap/ssg/content/ssg-rhel9-ds.xmlOptional: Scan a remote system with the
machine1host name, SSH running on port22, and thejoesecuser name for compliance and save results to theremote-report.htmlfile:$ oscap-ssh joesec@machine1 22 xccdf eval --report remote_report.html --profile hipaa /usr/share/xml/scap/ssg/content/ssg-rhel9-ds.xml
Ressources supplémentaires
-
scap-security-guide(8)man page -
SCAP Security Guidedocumentation in the/usr/share/doc/scap-security-guide/directory -
/usr/share/doc/scap-security-guide/guides/ssg-rhel9-guide-index.html- [Guide to the Secure Configuration of Red Hat Enterprise Linux 9] installed with thescap-security-guide-docpackage - OpenSCAP memory consumption problems
7.4. Remediating the system to align with a specific baseline
Use this procedure to remediate the RHEL system to align with a specific baseline. This example uses the Health Insurance Portability and Accountability Act (HIPAA) profile.
If not used carefully, running the system evaluation with the Remediate option enabled might render the system non-functional. Red Hat does not provide any automated method to revert changes made by security-hardening remediations. Remediations are supported on RHEL systems in the default configuration. If your system has been altered after the installation, running remediation might not make it compliant with the required security profile.
Conditions préalables
-
The
scap-security-guidepackage is installed on your RHEL system.
Procédure
Use the
oscapcommand with the--remediateoption:# oscap xccdf eval --profile hipaa --remediate /usr/share/xml/scap/ssg/content/ssg-rhel9-ds.xml- Restart your system.
Vérification
Evaluate compliance of the system with the HIPAA profile, and save scan results in the
hipaa_report.htmlfile:$ oscap xccdf eval --report hipaa_report.html --profile hipaa /usr/share/xml/scap/ssg/content/ssg-rhel9-ds.xml
Ressources supplémentaires
-
scap-security-guide(8)andoscap(8)man pages
7.5. Remediating the system to align with a specific baseline using an SSG Ansible playbook
Use this procedure to remediate your system with a specific baseline using an Ansible playbook file from the SCAP Security Guide project. This example uses the Health Insurance Portability and Accountability Act (HIPAA) profile.
If not used carefully, running the system evaluation with the Remediate option enabled might render the system non-functional. Red Hat does not provide any automated method to revert changes made by security-hardening remediations. Remediations are supported on RHEL systems in the default configuration. If your system has been altered after the installation, running remediation might not make it compliant with the required security profile.
Conditions préalables
-
The
scap-security-guidepackage is installed. -
The
ansible-corepackage is installed. See the Ansible Installation Guide for more information.
In RHEL 8.6 and later versions, Ansible Engine is replaced by the ansible-core package, which contains only built-in modules. Note that many Ansible remediations use modules from the community and Portable Operating System Interface (POSIX) collections, which are not included in the built-in modules. In this case, you can use Bash remediations as a substitute to Ansible remediations. The Red Hat Connector in RHEL 9 includes the necessary Ansible modules to enable the remediation playbooks to function with Ansible Core.
Procédure
Remediate your system to align with HIPAA using Ansible:
# ansible-playbook -i localhost, -c local /usr/share/scap-security-guide/ansible/rhel9-playbook-hipaa.yml- Restart the system.
Vérification
Evaluate compliance of the system with the HIPAA profile, and save scan results in the
hipaa_report.htmlfile:# oscap xccdf eval --profile hipaa --report hipaa_report.html /usr/share/xml/scap/ssg/content/ssg-rhel9-ds.xml
Ressources supplémentaires
-
scap-security-guide(8)andoscap(8)man pages - Ansible Documentation
7.6. Creating a remediation Ansible playbook to align the system with a specific baseline
You can create an Ansible playbook containing only the remediations that are required to align your system with a specific baseline. This example uses the Health Insurance Portability and Accountability Act (HIPAA) profile. With this procedure, you create a smaller playbook that does not cover already satisfied requirements. By following these steps, you do not modify your system in any way, you only prepare a file for later application.
In RHEL 9, Ansible Engine is replaced by the ansible-core package, which contains only built-in modules. Note that many Ansible remediations use modules from the community and Portable Operating System Interface (POSIX) collections, which are not included in the built-in modules. In this case, you can use Bash remediations as a substitute for Ansible remediations. The Red Hat Connector in RHEL 9.0 includes the necessary Ansible modules to enable the remediation playbooks to function with Ansible Core.
Conditions préalables
-
The
scap-security-guidepackage is installed.
Procédure
Scan the system and save the results:
# oscap xccdf eval --profile hipaa --results hipaa-results.xml /usr/share/xml/scap/ssg/content/ssg-rhel9-ds.xmlGenerate an Ansible playbook based on the file generated in the previous step:
# oscap xccdf generate fix --fix-type ansible --profile hipaa --output hipaa-remediations.yml hipaa-results.xml-
The
hipaa-remediations.ymlfile contains Ansible remediations for rules that failed during the scan performed in step 1. After reviewing this generated file, you can apply it with theansible-playbook hipaa-remediations.ymlcommand.
Vérification
-
In a text editor of your choice, review that the
hipaa-remediations.ymlfile contains rules that failed in the scan performed in step 1.
Ressources supplémentaires
-
scap-security-guide(8)andoscap(8)man pages - Ansible Documentation
7.7. Creating a remediation Bash script for a later application
Use this procedure to create a Bash script containing remediations that align your system with a security profile such as HIPAA. Using the following steps, you do not do any modifications to your system, you only prepare a file for later application.
Conditions préalables
-
The
scap-security-guidepackage is installed on your RHEL system.
Procédure
Use the
oscapcommand to scan the system and to save the results to an XML file. In the following example,oscapevaluates the system against thehipaaprofile:# oscap xccdf eval --profile hipaa --results hipaa-results.xml /usr/share/xml/scap/ssg/content/ssg-rhel9-ds.xmlGenerate a Bash script based on the results file generated in the previous step:
# oscap xccdf generate fix --profile hipaa --fix-type bash --output hipaa-remediations.sh hipaa-results.xml-
The
hipaa-remediations.shfile contains remediations for rules that failed during the scan performed in step 1. After reviewing this generated file, you can apply it with the./hipaa-remediations.shcommand when you are in the same directory as this file.
Vérification
-
In a text editor of your choice, review that the
hipaa-remediations.shfile contains rules that failed in the scan performed in step 1.
Ressources supplémentaires
-
scap-security-guide(8),oscap(8), andbash(1)man pages
7.8. Scanning the system with a customized profile using SCAP Workbench
SCAP Workbench, which is contained in the scap-workbench package, is a graphical utility that enables users to perform configuration and vulnerability scans on a single local or a remote system, perform remediation of the system, and generate reports based on scan evaluations. Note that SCAP Workbench has limited functionality compared with the oscap command-line utility. SCAP Workbench processes security content in the form of data-stream files.
7.8.1. Using SCAP Workbench to scan and remediate the system
To evaluate your system against the selected security policy, use the following procedure.
Conditions préalables
-
The
scap-workbenchpackage is installed on your system.
Procédure
To run
SCAP Workbenchfrom theGNOME Classicdesktop environment, press the Super key to enter theActivities Overview, typescap-workbench, and then press Enter. Alternatively, use:$ scap-workbench &Select a security policy using either of the following options:
-
Load Contentbutton on the starting window -
Open content from SCAP Security Guide Open Other Contentin theFilemenu, and search the respective XCCDF, SCAP RPM, or data stream file.
-
You can allow automatic correction of the system configuration by selecting the check box. With this option enabled,
SCAP Workbenchattempts to change the system configuration in accordance with the security rules applied by the policy. This process should fix the related checks that fail during the system scan.AvertissementIf not used carefully, running the system evaluation with the
Remediateoption enabled might render the system non-functional. Red Hat does not provide any automated method to revert changes made by security-hardening remediations. Remediations are supported on RHEL systems in the default configuration. If your system has been altered after the installation, running remediation might not make it compliant with the required security profile.Scan your system with the selected profile by clicking the button.

-
To store the scan results in form of an XCCDF, ARF, or HTML file, click the combo box. Choose the
HTML Reportoption to generate the scan report in human-readable format. The XCCDF and ARF (data stream) formats are suitable for further automatic processing. You can repeatedly choose all three options. - To export results-based remediations to a file, use the pop-up menu.
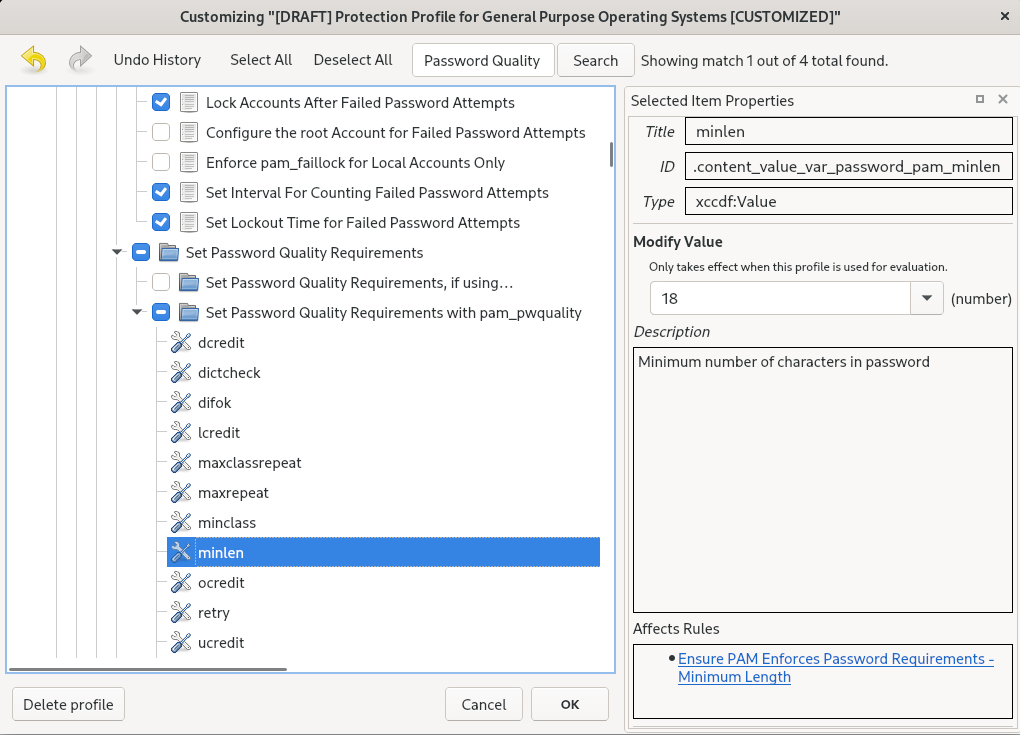
7.8.2. Customizing a security profile with SCAP Workbench
You can customize a security profile by changing parameters in certain rules (for example, minimum password length), removing rules that you cover in a different way, and selecting additional rules, to implement internal policies. You cannot define new rules by customizing a profile.
The following procedure demonstrates the use of SCAP Workbench for customizing (tailoring) a profile. You can also save the tailored profile for use with the oscap command-line utility.
Conditions préalables
-
The
scap-workbenchpackage is installed on your system.
Procédure
-
Run
SCAP Workbench, and select the profile to customize by using eitherOpen content from SCAP Security GuideorOpen Other Contentin theFilemenu. To adjust the selected security profile according to your needs, click the button.
This opens the new Customization window that enables you to modify the currently selected profile without changing the original data stream file. Choose a new profile ID.
- Find a rule to modify using either the tree structure with rules organized into logical groups or the field.
Include or exclude rules using check boxes in the tree structure, or modify values in rules where applicable.
- Confirm the changes by clicking the button.
To store your changes permanently, use one of the following options:
-
Save a customization file separately by using
Save Customization Onlyin theFilemenu. Save all security content at once by
Save Allin theFilemenu.If you select the
Into a directoryoption,SCAP Workbenchsaves both the data stream file and the customization file to the specified location. You can use this as a backup solution.By selecting the
As RPMoption, you can instructSCAP Workbenchto create an RPM package containing the data stream file and the customization file. This is useful for distributing the security content to systems that cannot be scanned remotely, and for delivering the content for further processing.
-
Save a customization file separately by using
Because SCAP Workbench does not support results-based remediations for tailored profiles, use the exported remediations with the oscap command-line utility.
7.9. Déployer des systèmes conformes à un profil de sécurité immédiatement après l'installation
Vous pouvez utiliser la suite OpenSCAP pour déployer des systèmes RHEL conformes à un profil de sécurité, tel que le profil OSPP, PCI-DSS et HIPAA, immédiatement après le processus d'installation. Grâce à cette méthode de déploiement, vous pouvez appliquer des règles spécifiques qui ne peuvent pas être appliquées ultérieurement à l'aide de scripts de remédiation, par exemple, une règle pour la force des mots de passe et le partitionnement.
7.9.1. Profils non compatibles avec le serveur avec interface graphique
Certains profils de sécurité fournis dans le cadre de SCAP Security Guide ne sont pas compatibles avec l'ensemble de paquets étendu inclus dans l'environnement de base Server with GUI. Par conséquent, ne sélectionnez pas Server with GUI lorsque vous installez des systèmes conformes à l'un des profils suivants :
Tableau 7.2. Profils non compatibles avec le serveur avec interface graphique
| Nom du profil | ID du profil | Justification | Notes |
|---|---|---|---|
| [PROJET] CIS Red Hat Enterprise Linux 9 Benchmark pour le niveau 2 - Serveur |
|
Les paquets | |
| [PROJET] CIS Red Hat Enterprise Linux 9 Benchmark pour le niveau 1 - Serveur |
|
Les paquets | |
| [PROJET] STIG DISA pour Red Hat Enterprise Linux 9 |
|
Les paquets | Pour installer un système RHEL en tant que Server with GUI aligné sur DISA STIG, vous pouvez utiliser le profil DISA STIG with GUI BZ#1648162 |
7.9.2. Déploiement de systèmes RHEL conformes aux normes de base à l'aide de l'installation graphique
Cette procédure permet de déployer un système RHEL conforme à une ligne de base spécifique. Cet exemple utilise le profil de protection pour le système d'exploitation général (OSPP).
Certains profils de sécurité fournis dans le cadre de SCAP Security Guide ne sont pas compatibles avec l'ensemble de paquets étendu inclus dans l'environnement de base Server with GUI. Pour plus de détails, voir Profils non compatibles avec un serveur GUI.
Conditions préalables
-
Vous avez démarré le programme d'installation
graphical. Notez que le site OSCAP Anaconda Add-on ne prend pas en charge l'installation interactive en mode texte. -
Vous avez accédé à la fenêtre
Installation Summary.
Procédure
-
Dans la fenêtre
Installation Summary, cliquez surSoftware Selection. La fenêtreSoftware Selections'ouvre. -
Dans le volet
Base Environment, sélectionnez l'environnementServer. Vous ne pouvez sélectionner qu'un seul environnement de base. -
Cliquez sur
Donepour appliquer le réglage et revenir à la fenêtreInstallation Summary. -
L'OSPP ayant des exigences strictes en matière de partitionnement, créez des partitions distinctes pour
/boot,/home,/var,/tmp,/var/log,/var/tmp, et/var/log/audit. -
Cliquez sur
Security Policy. La fenêtreSecurity Policys'ouvre. -
Pour activer les politiques de sécurité sur le système, basculez le commutateur
Apply security policysurON. -
Sélectionnez
Protection Profile for General Purpose Operating Systemsdans le volet des profils. -
Cliquez sur
Select Profilepour confirmer la sélection. -
Confirmez les modifications dans le volet
Changes that were done or need to be donequi s'affiche en bas de la fenêtre. Effectuez les modifications manuelles restantes. Terminez la procédure d'installation graphique.
NoteLe programme d'installation graphique crée automatiquement un fichier Kickstart correspondant après une installation réussie. Vous pouvez utiliser le fichier
/root/anaconda-ks.cfgpour installer automatiquement des systèmes compatibles OSPP.
Vérification
Pour vérifier l'état actuel du système une fois l'installation terminée, redémarrez le système et lancez une nouvelle analyse :
# oscap xccdf eval --profile ospp --report eval_postinstall_report.html /usr/share/xml/scap/ssg/content/ssg-rhel9-ds.xml
Ressources supplémentaires
7.9.3. Déploiement de systèmes RHEL conformes aux normes de base à l'aide de Kickstart
Cette procédure permet de déployer des systèmes RHEL alignés sur une ligne de base spécifique. Cet exemple utilise le profil de protection pour le système d'exploitation général (OSPP).
Conditions préalables
-
Le paquetage
scap-security-guideest installé sur votre système RHEL 9.
Procédure
-
Ouvrez le fichier
/usr/share/scap-security-guide/kickstart/ssg-rhel9-ospp-ks.cfgKickstart dans un éditeur de votre choix. -
Mettez à jour le schéma de partitionnement pour qu'il corresponde aux exigences de votre configuration. Pour la conformité OSPP, les partitions séparées pour
/boot,/home,/var,/tmp,/var/log,/var/tmp, et/var/log/auditdoivent être préservées, et vous ne pouvez modifier que la taille des partitions. - Lancez une installation Kickstart comme décrit dans la section Effectuer une installation automatisée à l'aide de Kickstart.
Les mots de passe dans les fichiers Kickstart ne sont pas vérifiés pour les exigences de l'OSPP.
Vérification
Pour vérifier l'état actuel du système une fois l'installation terminée, redémarrez le système et lancez une nouvelle analyse :
# oscap xccdf eval --profile ospp --report eval_postinstall_report.html /usr/share/xml/scap/ssg/content/ssg-rhel9-ds.xml
Ressources supplémentaires
7.10. Scanning container and container images for vulnerabilities
Use this procedure to find security vulnerabilities in a container or a container image.
Conditions préalables
-
The
openscap-utilsandbzip2packages are installed.
Procédure
Download the latest RHSA OVAL definitions for your system:
# wget -O - https://www.redhat.com/security/data/oval/v2/RHEL9/rhel-9.oval.xml.bz2 | bzip2 --decompress > rhel-9.oval.xmlGet the ID of a container or a container image, for example:
# podman images
REPOSITORY                            TAG      IMAGE ID       CREATED       SIZE
registry.access.redhat.com/ubi9/ubi   latest   096cae65a207   7 weeks ago   239 MB
Scan the container or the container image for vulnerabilities and save results to the vulnerability.html file:
# oscap-podman 096cae65a207 oval eval --report vulnerability.html rhel-9.oval.xmlNote that the
oscap-podmancommand requires root privileges, and the ID of a container is the first argument.
Vérification
Check the results in a browser of your choice, for example:
$ firefox vulnerability.html &
Ressources supplémentaires
-
For more information, see the
oscap-podman(8)andoscap(8)man pages.
7.11. Assessing security compliance of a container or a container image with a specific baseline
Follow these steps to assess compliance of your container or a container image with a specific security baseline, such as Operating System Protection Profile (OSPP), Payment Card Industry Data Security Standard (PCI-DSS), and Health Insurance Portability and Accountability Act (HIPAA).
Conditions préalables
-
The
openscap-utilsandscap-security-guidepackages are installed.
Procédure
Get the ID of a container or a container image, for example:
# podman images
REPOSITORY                            TAG      IMAGE ID       CREATED       SIZE
registry.access.redhat.com/ubi9/ubi   latest   096cae65a207   7 weeks ago   239 MB
Evaluate the compliance of the container image with the HIPAA profile and save scan results into the report.html HTML file
# oscap-podman 096cae65a207 xccdf eval --report report.html --profile hipaa /usr/share/xml/scap/ssg/content/ssg-rhel9-ds.xmlReplace 096cae65a207 with the ID of your container image and the hipaa value with ospp or pci-dss if you assess security compliance with the OSPP or PCI-DSS baseline. Note that the
oscap-podmancommand requires root privileges.
Vérification
Check the results in a browser of your choice, for example:
$ firefox report.html &
The rules marked as notapplicable are rules that do not apply to containerized systems. These rules apply only to bare-metal and virtualized systems.
Ressources supplémentaires
-
oscap-podman(8)andscap-security-guide(8)man pages. -
/usr/share/doc/scap-security-guide/directory.
7.12. SCAP Security Guide profiles supported in RHEL 9
Use only the SCAP content provided in the particular minor release of RHEL. This is because components that participate in hardening are sometimes updated with new capabilities. SCAP content changes to reflect these updates, but it is not always backward compatible.
In the following tables, you can find the profiles provided in RHEL 9, together with the version of the policy with which the profile aligns.
Tableau 7.3. SCAP Security Guide profiles supported in RHEL 9.2
| Nom du profil | ID du profil | Version de la politique |
|---|---|---|
| Agence nationale de la sécurité des systèmes d'information (ANSSI) BP-028 niveau renforcé |
| 1.2 |
| Agence nationale de la sécurité des systèmes d'information (ANSSI) BP-028 Haut niveau |
| 1.2 |
| Agence nationale de la sécurité des systèmes d'information (ANSSI) BP-028 Niveau intermédiaire |
| 1.2 |
| Agence nationale de la sécurité des systèmes d'information (ANSSI) BP-028 Niveau minimal |
| 1.2 |
| CIS Red Hat Enterprise Linux 9 Benchmark for Level 2 - Server |
| 1.0.0 |
| CIS Red Hat Enterprise Linux 9 Benchmark for Level 1 - Server |
| 1.0.0 |
| CIS Red Hat Enterprise Linux 9 Benchmark for Level 1 - Workstation |
| 1.0.0 |
| CIS Red Hat Enterprise Linux 9 Benchmark for Level 2 - Workstation |
| 1.0.0 |
| [Informations non classifiées dans les systèmes d'information et les organisations non fédérales (NIST 800-171) |
| r2 |
| Centre australien de cybersécurité (ACSC) Huit éléments essentiels |
| non versionné |
| Loi sur la portabilité et la responsabilité en matière d'assurance maladie (HIPAA) |
| non versionné |
| Centre australien de cybersécurité (ACSC) ISM Official |
| non versionné |
| Protection Profile for General Purpose Operating Systems |
| 4.2.1 |
| Base de contrôle PCI-DSS v3.2.1 pour Red Hat Enterprise Linux 9 |
| 3.2.1 |
| [PROJET] STIG DISA pour Red Hat Enterprise Linux 9 |
| PROJET[a] |
| [DRAFT] DISA STIG avec GUI pour Red Hat Enterprise Linux 9 |
| PROJET[a] |
[a]
La DISA n'a pas encore publié de référence officielle pour RHEL 9
| ||
Tableau 7.4. SCAP Security Guide profiles supported in RHEL 9.1
| Nom du profil | ID du profil | Version de la politique |
|---|---|---|
| Agence nationale de la sécurité des systèmes d'information (ANSSI) BP-028 niveau renforcé |
| 1.2 |
| Agence nationale de la sécurité des systèmes d'information (ANSSI) BP-028 Haut niveau |
| 1.2 |
| Agence nationale de la sécurité des systèmes d'information (ANSSI) BP-028 Niveau intermédiaire |
| 1.2 |
| Agence nationale de la sécurité des systèmes d'information (ANSSI) BP-028 Niveau minimal |
| 1.2 |
| CIS Red Hat Enterprise Linux 9 Benchmark for Level 2 - Server |
|
RHEL 9.1.0 and RHEL 9.1.1:DRAFT[a] |
| CIS Red Hat Enterprise Linux 9 Benchmark for Level 1 - Server |
|
RHEL 9.1.0 and RHEL 9.1.1:DRAFT[a] |
| CIS Red Hat Enterprise Linux 9 Benchmark for Level 1 - Workstation |
|
RHEL 9.1.0 and RHEL 9.1.1:DRAFT[a] |
| CIS Red Hat Enterprise Linux 9 Benchmark for Level 2 - Workstation |
|
RHEL 9.1.0 and RHEL 9.1.1:DRAFT[a] |
| [Informations non classifiées dans les systèmes d'information et les organisations non fédérales (NIST 800-171) |
| r2 |
| Centre australien de cybersécurité (ACSC) Huit éléments essentiels |
| non versionné |
| Loi sur la portabilité et la responsabilité en matière d'assurance maladie (HIPAA) |
| non versionné |
| Centre australien de cybersécurité (ACSC) ISM Official |
| non versionné |
| Protection Profile for General Purpose Operating Systems |
| 4.2.1 |
| Base de contrôle PCI-DSS v3.2.1 pour Red Hat Enterprise Linux 9 |
| 3.2.1 |
| [PROJET] STIG DISA pour Red Hat Enterprise Linux 9 |
| PROJET[a] |
| [DRAFT] DISA STIG avec GUI pour Red Hat Enterprise Linux 9 |
| PROJET[a] |
[a]
CIS has not yet published an official benchmark for RHEL 9
| ||
Tableau 7.5. Profils du guide de sécurité SCAP pris en charge dans RHEL 9.0
| Nom du profil | ID du profil | Version de la politique |
|---|---|---|
| Agence nationale de la sécurité des systèmes d'information (ANSSI) BP-028 niveau renforcé |
| 1.2 |
| Agence nationale de la sécurité des systèmes d'information (ANSSI) BP-028 Haut niveau |
| 1.2 |
| Agence nationale de la sécurité des systèmes d'information (ANSSI) BP-028 Niveau intermédiaire |
| 1.2 |
| Agence nationale de la sécurité des systèmes d'information (ANSSI) BP-028 Niveau minimal |
| 1.2 |
| CIS Red Hat Enterprise Linux 9 Benchmark for Level 2 - Server |
|
RHEL 9.0.0 to RHEL 9.0.6:DRAFT[a] |
| CIS Red Hat Enterprise Linux 9 Benchmark for Level 1 - Server |
|
RHEL 9.0.0 to RHEL 9.0.6:DRAFT[a] |
| CIS Red Hat Enterprise Linux 9 Benchmark for Level 1 - Workstation |
|
RHEL 9.0.0 to RHEL 9.0.6:DRAFT[a] |
| CIS Red Hat Enterprise Linux 9 Benchmark for Level 2 - Workstation |
|
RHEL 9.0.0 to RHEL 9.0.6:DRAFT[a] |
| [Informations non classifiées dans les systèmes d'information et les organisations non fédérales (NIST 800-171) |
| r2 |
| Centre australien de cybersécurité (ACSC) Huit éléments essentiels |
| non versionné |
| Loi sur la portabilité et la responsabilité en matière d'assurance maladie (HIPAA) |
| non versionné |
| Centre australien de cybersécurité (ACSC) ISM Official |
| non versionné |
| Protection Profile for General Purpose Operating Systems |
|
RHEL 9.0.0 to RHEL 9.0.2:DRAFT |
| Base de contrôle PCI-DSS v3.2.1 pour Red Hat Enterprise Linux 9 |
| 3.2.1 |
| [PROJET] STIG DISA pour Red Hat Enterprise Linux 9 |
| PROJET[a] |
| [DRAFT] DISA STIG avec GUI pour Red Hat Enterprise Linux 9 |
| PROJET[a] |
Chapitre 8. Ensuring system integrity with Keylime
With Keylime, you can continuously monitor the integrity of remote systems and verify the state of systems at boot. You can also send encrypted files to the monitored systems, and specify automated actions triggered whenever a monitored system fails the integrity test.
8.1. How Keylime works
You can deploy Keylime agents to perform one or more of the following actions:
- Runtime integrity monitoring
- Keylime runtime integrity monitoring continuously monitors the system on which the agent is deployed and measures the integrity of the files included in the allowlist and not included in the excludelist.
- Measured boot
- Keylime measured boot verifies the system state at boot.
Keylime’s concept of trust is based on the Trusted Platform Module (TPM) technology. A TPM is a hardware, firmware, or virtual component with integrated cryptographic keys. By polling TPM quotes and comparing the hashes of objects, Keylime provides initial and runtime monitoring of remote systems.
Keylime running in a virtual machine or using a virtual TPM depends upon the integrity of the underlying host. Ensure you trust the host environment before relying upon Keylime measurements in a virtual environment.
Keylime consists of three main components:
- The verifier initially and continuously verifies the integrity of the systems that run the agent.
- The registrar contains a database of all agents and it hosts the public keys of the TPM vendors.
- The agent is the component deployed to remote systems measured by the verifier.
In addition, Keylime uses the keylime_tenant utility for many functions, including provisioning the agents on the target systems.
Figure 8.1. Connections between Keylime components through configurations

Keylime ensures the integrity of the monitored systems in a chain of trust by using keys and certificates exchanged between the components and the tenant. For a secure foundation of this chain, use a certificate authority (CA) that you can trust.
If the agent receives no key and certificate, it generates a key and a self-signed certificate with no involvement from the CA.
Figure 8.2. Connections between Keylime components certificates and keys
8.2. Configuring Keylime verifier
The verifier is the most important component in Keylime. It performs initial and periodic checks of system integrity and supports bootstrapping a cryptographic key securely with the agent. The verifier uses mutual Transport Layer Security (TLS) for its control interface.
To maintain the chain of trust, keep the system that runs the verifier secure and under your control.
You can install the verifier on a separate system or on the same system as the Keylime registrar, depending on your requirements. Running the verifier and registrar on separate systems provides better performance.
To keep the configuration files organized within the drop-in directories, use file names with a two-digit number prefix, for example /etc/keylime/verifier.conf.d/00-verifier-ip.conf. The configuration processing reads the files inside the drop-in directory in lexicographic order and sets each option to the last value it reads.
Conditions préalables
-
You have
rootpermissions and network connection to the system or systems on which you want to install Keylime components. - You have valid keys and certificates from your certificate authority.
Optional: You have access to two databases, where Keylime saves data from the registrar and from the verifier. You can use any of the following database management systems:
- SQLite (default)
- PostgreSQL
- MySQL
- MariaDB
Procédure
Install the Keylime verifier:
# dnf install keylime-verifierDefine the IP address and port of the registrar and verifier in the verifier configuration.
Create a new
.conffile in the/etc/keylime/verifier.conf.d/directory, for example,/etc/keylime/verifier.conf.d/00-verifier-ip.conf, with the following content:[verifier] ip = <verifier_IP_address>
-
Replace
<verifier_IP_address>with the verifier’s IP address. Alternatively, useip = *orip = 0.0.0.0to bind the verifier to all available IP addresses. -
Optionally, you can also change the verifier’s port from the default value
8881by using theport = <verifier_port>option.
-
Replace
Create a new
.conffile in the/etc/keylime/verifier.conf.d/directory, for example,/etc/keylime/verifier.conf.d/00-registrar-ip.conf, with the following content:[verifier] registrar_ip = <registrar_IP_address>-
Replace
<registrar_IP_address>with the registrar’s IP address. -
If the registrar uses a different port than the default value
8891, add theregistrar_port = <registrar_port>setting.
-
Replace
Optional: Configure the verifier’s database for the list of agents. The default configuration uses an SQLite database in the verifiers’s
/var/lib/keylime/cv_data.sqlite/directory. You can define a different database by creating a new.conffile in the/etc/keylime/verifier.conf.d/directory, for example,/etc/keylime/verifier.conf.d/00-db-url.conf, with the following content:[verifier] database_url = <protocol>://<name>:<password>@<ip_address_or_hostname>/<properties>Replace
<protocol>://<name>:<password>@<ip_address_or_hostname>/<properties>with the URL of the database, for example,postgresql://verifier:UQ?nRNY9g7GZzN7@198.51.100.1/verifierdb.Ensure that the credentials you use have the permissions for Keylime to create the database structure.
Add certificates and keys to the verifier. You can either let Keylime generate them, or use existing keys and certificates:
-
With the default
tls_dir = generateoption, Keylime generates new certificates for the verifier, registrar, and tenant in the/var/lib/keylime/cv_ca/directory. To load existing keys and certificates in the configuration, define their location in the verifier configuration.
NoteCertificates must be accessible by the
keylimeuser, under which the Keylime services are running.Create a new
.conffile in the/etc/keylime/verifier.conf.d/directory, for example,/etc/keylime/verifier.conf.d/00-keys-and-certs.conf, with the following content:[verifier] tls_dir = /var/lib/keylime/cv_ca server_key = </path/to/server_key> server_key_password = <passphrase1> server_cert = </path/to/server_cert> trusted_client_ca = ['</path/to/ca/cert1>', '</path/to/ca/cert2>'] client_key = </path/to/client_key> client_key_password = <passphrase2> client_cert = </path/to/client_cert> trusted_server_ca = ['</path/to/ca/cert3>', '</path/to/ca/cert4>']
NoteUse absolute paths to define key and certificate locations. Alternatively, relative paths are resolved from the directory defined in the
tls_diroption.
-
With the default
Open the port in firewall:
# firewall-cmd --add-port 8881/tcp
# firewall-cmd --runtime-to-permanent
If you use a different port, replace
8881with the port number defined in the.conffile.Start the verifier service:
# systemctl enable --now keylime_verifierNoteIn the default configuration, start the
keylime_verifierbefore starting thekeylime_registrarservice because the verifier creates the CA and certificates for the other Keylime components. This order is not necessary when you use custom certificates.
Vérification
Check that the
keylime_verifierservice is active and running:# systemctl status keylime_verifier ● keylime_verifier.service - The Keylime verifier Loaded: loaded (/usr/lib/systemd/system/keylime_verifier.service; disabled; vendor preset: disabled) Active: active (running) since Wed 2022-11-09 10:10:08 EST; 1min 45s ago
Prochaines étapes
8.3. Configuring Keylime registrar
The registrar is the Keylime component that contains a database of all agents, and it hosts the public keys of the TPM vendors. After the registrar’s HTTPS service accepts trusted platform module (TPM) public keys, it presents an interface to obtain these public keys for checking quotes.
To maintain the chain of trust, keep the system that runs the registrar secure and under your control.
You can install the registrar on a separate system or on the same system as the Keylime verifier, depending on your requirements. Running the verifier and registrar on separate systems provides better performance.
To keep the configuration files organized within the drop-in directories, use file names with a two-digit number prefix, for example /etc/keylime/registrar.conf.d/00-registrar-ip.conf. The configuration processing reads the files inside the drop-in directory in lexicographic order and sets each option to the last value it reads.
Conditions préalables
- You have network access to the systems where the Keylime verifier is installed and running. For more information, see Section 8.2, « Configuring Keylime verifier ».
-
You have
rootpermissions and network connection to the system or systems on which you want to install Keylime components. You have access to two databases, where Keylime saves data from the registrar and from the verifier
You can use any of the following database management systems:
- SQLite (default)
- PostgreSQL
- MySQL
- MariaDB
- You have valid keys and certificates from your certificate authority.
Procédure
Install the Keylime registrar:
# dnf install keylime-registrarDefine the IP address and port of the registrar:
Create a new
.conffile in the/etc/keylime/registrar.conf.d/directory, for example,/etc/keylime/registrar.conf.d/00-registrar-ip.conf, with the following content:[registrar] ip = <registrar_IP_address>-
Replace
<registrar_IP_address>with the registrar’s IP address. Alternatively, useip = *orip = 0.0.0.0to bind the registrar to all available IP addresses. -
Optionally, change the port to which the Keylime agents connect by using the
port =option. The default value is8890. -
Optionally, change the TLS port to which the Keylime verifier and tenant connect by using the
tls_port =option. The default value is8891.
-
Replace
Optional: Configure the registrar’s database for the list of agents. The default configuration uses an SQLite database in the registrar’s
/var/lib/keylime/reg_data.sqlitedirectory. You can create a new.conffile in the/etc/keylime/registrar.conf.d/directory, for example,/etc/keylime/registrar.conf.d/00-db-url.conf, with the following content:[registrar] database_url = <protocol>://<name>:<password>@<ip_address_or_hostname>/<properties>Replace
<protocol>://<name>:<password>@<ip_address_or_hostname>/<properties>with the URL of the database, for example,postgresql://registrar:EKYYX-bqY2?#raXm@198.51.100.1/registrardb.Ensure that the credentials you use have the permissions for Keylime to create the database structure.
Add certificates and keys to the registrar:
-
You can use the default configuration and load the keys and certificates to the
/var/lib/keylime/reg_ca/directory. Alternatively, you can define the location of the keys and certificates in the configuration. Create a new
.conffile in the/etc/keylime/registrar.conf.d/directory, for example,/etc/keylime/registrar.conf.d/00-keys-and-certs.conf, with the following content:ImportantDo not use the
tls_dir = defaultsetting with custom CA certificates. Instead, specify a path to the location of the certificates. For more information, see RHELPLAN-157337.[registrar] tls_dir = /var/lib/keylime/reg_ca server_key = </path/to/server_key> server_key_password = <passphrase1> server_cert = </path/to/server_cert> trusted_client_ca = ['</path/to/ca/cert1>', '</path/to/ca/cert2>']
NoteUse absolute paths to define key and certificate locations. Alternatively, you can define a directory in the
tls_diroption and use paths relative to that directory.
-
You can use the default configuration and load the keys and certificates to the
Open the ports in firewall:
# firewall-cmd --add-port 8890/tcp --add-port 8891/tcp
# firewall-cmd --runtime-to-permanent
If you use a different port, replace
8890or8891with the port number defined in the.conffile.Start the
keylime_registrarservice:# systemctl enable --now keylime_registrarNoteIn the default configuration, start the
keylime_verifierbefore starting thekeylime_registrarservice because the verifier creates the CA and certificates for the other Keylime components. This order is not necessary when you use custom certificates.
Vérification
Check that the
keylime_registrarservice is active and running:# systemctl status keylime_registrar ● keylime_registrar.service - The Keylime registrar service Loaded: loaded (/usr/lib/systemd/system/keylime_registrar.service; disabled; vendor preset: disabled) Active: active (running) since Wed 2022-11-09 10:10:17 EST; 1min 42s ago ...
Prochaines étapes
8.4. Configuring Keylime tenant
Keylime uses the keylime_tenant utility for many functions, including provisioning the agents on the target systems. You can install keylime_tenant on any system, including the systems that run other Keylime components, or on a separate system, depending on your requirements.
Conditions préalables
-
You have
rootpermissions and network connection to the system or systems on which you want to install Keylime components. You have network access to the systems where the other Keylime components are configured:
- Verifier
- For more information, see Section 8.2, « Configuring Keylime verifier ».
- Registrar
- For more information, see Section 8.3, « Configuring Keylime registrar ».
Procédure
Install the Keylime tenant:
# dnf install keylime-tenantDefine the tenant’s connection to the Keylime verifier by editing the
/etc/keylime/tenant.conf.d/00-verifier-ip.conffile:[tenant] verifier_ip = <verifier_ip>-
Replace
<verifier_ip>with the IP address to the verifier’s system. Alternatively, useip = *orip = 0.0.0.0to bind the tenant to all available IP addresses. -
If the verifier uses a different port than the default value
8881, add theverifier_port = <verifier_port>setting.
-
Replace
Define the tenant’s connection to the Keylime registrar by editing the
/etc/keylime/tenant.conf.d/00-registrar-ip.conffile:[tenant] registrar_ip = <registrar_ip> registrar_port = <registrar_port>
-
Replace
<registrar_ip>with the IP address to the registrar’s system. -
If the registrar uses a different port than the default value
8891, add theregistrar_port = <registrar_port>setting.
-
Replace
Add certificates and keys to the tenant:
-
You can use the default configuration and load the keys and certificates to the
/var/lib/keylime/cv_cadirectory. Alternatively, you can define the location of the keys and certificates in the configuration. Create a new
.conffile in the/etc/keylime/tenant.conf.d/directory, for example,/etc/keylime/tenant.conf.d/00-keys-and-certs.conf, with the following content:[tenant] tls_dir = /var/lib/keylime/cv_ca client_key = tenant-key.pem client_key_password = <passphrase1> client_cert = tenant-cert.pem trusted_server_ca = ['/var/lib/keylime/cv_ca/cacert.pem']The
trusted_server_caparameter accepts paths to the verifier and registrar server CA certificate. You can provide multiple comma-separated paths, for example if the verifier and registrar use different CAs.NoteUse absolute paths to define key and certificate locations. Alternatively, you can define a directory in the
tls_diroption and use paths relative to that directory.
-
You can use the default configuration and load the keys and certificates to the
-
Optional: If the trusted platform module (TPM) endorsement key (EK) cannot be verified by using certificates in the
/var/lib/keylime/tpm_cert_storedirectory, add the certificate to that directory. This can occur particularly when using virtual machines with emulated TPMs.
Vérification
Check the status of the verifier:
3 keylime_tenant -c cvstatus
Reading configuration from ['/etc/keylime/logging.conf']
2022-10-14 12:56:08.155 - keylime.tpm - INFO - TPM2-TOOLS Version: 5.2
Reading configuration from ['/etc/keylime/tenant.conf']
2022-10-14 12:56:08.157 - keylime.tenant - INFO - Setting up client TLS...
2022-10-14 12:56:08.158 - keylime.tenant - INFO - Using default client_cert option for tenant
2022-10-14 12:56:08.158 - keylime.tenant - INFO - Using default client_key option for tenant
2022-10-14 12:56:08.178 - keylime.tenant - INFO - TLS is enabled.
2022-10-14 12:56:08.178 - keylime.tenant - WARNING - Using default UUID d432fbb3-d2f1-4a97-9ef7-75bd81c00000
2022-10-14 12:56:08.221 - keylime.tenant - INFO - Verifier at 127.0.0.1 with Port 8881 does not have agent d432fbb3-d2f1-4a97-9ef7-75bd81c00000.
If correctly set up, and if no agent is configured, the verifier responds that it does not recognize the default agent UUID.
Check the status of the registrar:
# keylime_tenant -c regstatus
Reading configuration from ['/etc/keylime/logging.conf']
2022-10-14 12:56:02.114 - keylime.tpm - INFO - TPM2-TOOLS Version: 5.2
Reading configuration from ['/etc/keylime/tenant.conf']
2022-10-14 12:56:02.116 - keylime.tenant - INFO - Setting up client TLS...
2022-10-14 12:56:02.116 - keylime.tenant - INFO - Using default client_cert option for tenant
2022-10-14 12:56:02.116 - keylime.tenant - INFO - Using default client_key option for tenant
2022-10-14 12:56:02.137 - keylime.tenant - INFO - TLS is enabled.
2022-10-14 12:56:02.137 - keylime.tenant - WARNING - Using default UUID d432fbb3-d2f1-4a97-9ef7-75bd81c00000
2022-10-14 12:56:02.171 - keylime.registrar_client - CRITICAL - Error: could not get agent d432fbb3-d2f1-4a97-9ef7-75bd81c00000 data from Registrar Server: 404
2022-10-14 12:56:02.172 - keylime.registrar_client - CRITICAL - Response code 404: agent d432fbb3-d2f1-4a97-9ef7-75bd81c00000 not found
2022-10-14 12:56:02.172 - keylime.tenant - INFO - Agent d432fbb3-d2f1-4a97-9ef7-75bd81c00000 does not exist on the registrar. Please register the agent with the registrar.
2022-10-14 12:56:02.172 - keylime.tenant - INFO - {"code": 404, "status": "Agent d432fbb3-d2f1-4a97-9ef7-75bd81c00000 does not exist on registrar 127.0.0.1 port 8891.", "results": {}}
If correctly set up, and if no agent is configured, the registrar responds that it does not recognize the default agent UUID.
Ressources supplémentaires
-
For additional advanced options for the
keylime_tenantutility, enter thekeylime_tenant -hcommand.
8.5. Configuring Keylime agent
The Keylime agent is the component deployed to all systems to be monitored by Keylime.
By default, the Keylime agent stores all its data in the /var/lib/keylime/ directory of the monitored system.
To keep the configuration files organized within the drop-in directories, use file names with a two-digit number prefix, for example /etc/keylime/agent.conf.d/00-registrar-ip.conf. The configuration processing reads the files inside the drop-in directory in lexicographic order and sets each option to the last value it reads.
Conditions préalables
-
You have
rootpermissions to the monitored system. The monitored system has a Trusted Platform Module (TPM).
NoteTo verify, enter the
tpm2_pcrreadcommand. If the output returns several hashes, a TPM is available.You have network access to the systems where the other Keylime components are configured:
- Verifier
- For more information, see Section 8.2, « Configuring Keylime verifier ».
- Registrar
- For more information, see Section 8.3, « Configuring Keylime registrar ».
- Tenant
- For more information, see Section 8.4, « Configuring Keylime tenant ».
- Integrity measurement architecture (IMA) is enabled on the monitored system. For more information, see Enabling integrity measurement architecture and extended verification module.
Procédure
Install the Keylime agent:
# dnf install keylime-agentThis command installs the
keylime-agent-rustpackage.Define the agent’s IP address and port in the configuration files. Create a new
.conffile in the/etc/keylime/agent.conf.d/directory, for example,/etc/keylime/agent.conf.d/00-agent-ip.conf, with the following content:[agent] ip = '<agent_ip>'NoteBecause the Keylime agent configuration uses the TOML format, which is different from the INI format used for configuration of the other components, the values must be in single quotation marks.
-
Replace
<agent_IP_address>with the agent’s IP address. Alternatively, useip = '*'orip = '0.0.0.0'to bind the agent to all available IP addresses. -
Optionally, you can also change the agent’s port from the default value
9002by using theport = '<agent_port>'option.
-
Replace
Define the registrar’s IP address and port in the configuration files. Create a new
.conffile in the/etc/keylime/agent.conf.d/directory, for example,/etc/keylime/agent.conf.d/00-registrar-ip.conf, with the following content:[agent] registrar_ip = '<registrar_IP_address>'-
Replace
<registrar_IP_address>with the registrar’s IP address. -
Optionally, you can also change the registrar’s port from the default value
8890by using theregistrar_port = '<registrar_port>'option.
-
Replace
Optional: Define the agent’s universally unique identifier (UUID). If it is not defined, the default UUID is used. Create a new
.conffile in the/etc/keylime/agent.conf.d/directory, for example,/etc/keylime/agent.conf.d/00-agent-uuid.conf, with the following content:[agent] uuid = '<agent_UUID>'-
Replace
<agent_UUID>with the agent’s UUID, for exampled432fbb3-d2f1-4a97-9ef7-abcdef012345. You can use theuuidgenutility to generate a UUID.
-
Replace
Optional: Load existing keys and certificates for the agent. If the agent receives no
server_keyandserver_cert, it generates its own key and a self-signed certificate.ImportantDo not use certificate chains. Keylime currently does not correctly use all the provided certificates during signature verification, which results in a TLS handshake failure. For more information, see RHEL-396.
Define the location of the keys and certificates in the configuration. Create a new
.conffile in the/etc/keylime/agent.conf.d/directory, for example,/etc/keylime/agent.conf.d/00-keys-and-certs.conf, with the following content:[agent] server_key = '</path/to/server_key>' server_key_password = '<passphrase1>' server_cert = '</path/to/server_cert>' trusted_client_ca = '</path/to/ca/cert>'
NoteUse absolute paths to define key and certificate locations. The Keylime agent does not accept relative paths.
Open the port in firewall:
# firewall-cmd --add-port 9002/tcp
# firewall-cmd --runtime-to-permanent
If you use a different port, replace
9002with the port number defined in the.conffile.Enable and start the
keylime_agentservice:# systemctl enable --now keylime_agentOptional: From the system where the Keylime tenant is configured, verify that the agent is correctly configured and can connect to the registrar.
# keylime_tenant -c regstatus --uuid <agent_uuid>
Reading configuration from ['/etc/keylime/logging.conf']
...
==\n-----END CERTIFICATE-----\n", "ip": "127.0.0.1", "port": 9002, "regcount": 1, "operational_state": "Registered"}}}
Replace
<agent_uuid>with the agent’s UUID.If the registrar and agent are correctly configured, the output displays the agent’s IP address and port, followed by
"operational_state": "Registered".
Create a new IMA policy by entering the following content into the
/etc/ima/ima-policyfile:# PROC_SUPER_MAGIC dont_measure fsmagic=0x9fa0 # SYSFS_MAGIC dont_measure fsmagic=0x62656572 # DEBUGFS_MAGIC dont_measure fsmagic=0x64626720 # TMPFS_MAGIC dont_measure fsmagic=0x01021994 # RAMFS_MAGIC dont_measure fsmagic=0x858458f6 # SECURITYFS_MAGIC dont_measure fsmagic=0x73636673 # SELINUX_MAGIC dont_measure fsmagic=0xf97cff8c # CGROUP_SUPER_MAGIC dont_measure fsmagic=0x27e0eb # OVERLAYFS_MAGIC dont_measure fsmagic=0x794c7630 # Don't measure log, audit or tmp files dont_measure obj_type=var_log_t dont_measure obj_type=auditd_log_t dont_measure obj_type=tmp_t # MEASUREMENTS measure func=BPRM_CHECK measure func=FILE_MMAP mask=MAY_EXEC measure func=MODULE_CHECK uid=0
- Reboot the system to apply the new IMA policy.
Vérification
Verify that the agent is running:
# systemctl status keylime_agent
● keylime_agent.service - The Keylime compute agent
     Loaded: loaded (/usr/lib/systemd/system/keylime_agent.service; enabled; preset: disabled)
     Active: active (running) since ...
Prochaines étapes
After the agent is configured on all systems you want to monitor, you can deploy Keylime to perform one or both of the following functions:
Ressources supplémentaires
8.6. Deploying Keylime for runtime monitoring
To verify that the state of monitored systems is correct, the Keylime agent must be running on the monitored systems.
Because Keylime runtime monitoring uses integrity measurement architecture (IMA) to measure large numbers of files, it might have a significant impact on the performance of your system.
When provisioning the agent, you can also define a file that Keylime sends to the monitored system. Keylime encrypts the file sent to the agent, and decrypts it only if the agent’s system complies with the TPM policy and with the IMA allowlist.
You can make Keylime ignore changes of specific files or within specific directories by configuring a Keylime excludelist.
Conditions préalables
You have network access to the systems where the Keylime components are configured:
- Verifier
- For more information, see Section 8.2, « Configuring Keylime verifier ».
- Registrar
- For more information, see Section 8.3, « Configuring Keylime registrar ».
- Tenant
- For more information, see Section 8.4, « Configuring Keylime tenant ».
- Agent
- For more information, see Section 8.5, « Configuring Keylime agent ».
Procédure
On the monitored system where the Keylime agent is configured and running, generate an allowlist from the current state of the system:
# /usr/share/keylime/scripts/create_allowlist.sh -o <allowlist.txt> -h sha256sumReplace
<allowlist.txt>with the file name of the allowlist.ImportantUse the SHA-256 hash function. SHA-1 is not secure and has been deprecated in RHEL 9. For additional information, see SHA-1 deprecation in Red Hat Enterprise Linux 9.
Copy the generated allowlist to the system where the
keylime_tenantutility is configured, for example:# scp allowlist.txt root@<tenant_._ip>:/root/allowlist.txtOptional: You can define a list of files or directories excluded from Keylime measurements by creating a file on the tenant system and entering the files and directories to exclude. The excludelist accepts Python regular expressions with one regular expression per line. For more information, see Regular expression operations at docs.python.org. For example, to exclude all files in the
/tmp/directory from Keylime measurements, create a/root/excludelist.txtfile with the following content:/tmp/.*
Save the excludelist on the tenant system.
On the system where the Keylime tenant is configured, provision the agent by using the
keylime_tenantutility:# keylime_tenant -c add -t <agent_ip> -u <agent_uuid> --allowlist <allowlist.txt> --exclude <excludelist> --cert default-
Replace
<agent_ip>with the agent’s IP address. -
Replace
<agent_uuid>with the agent’s UUID. -
Replace
<allowlist.txt>with the path to the allowlist file. -
Replace
<excludelist>with the path to the excludelist file. The--excludeoption is optional; provisioning the agent works even without delivering a file. With the
--certoption, the tenant generates and signs a certificate for the agent by using the CA certificates and keys located in the specified directory, or the default/var/lib/keylime/ca/directory. If the directory contains no CA certificates and keys, the tenant will generate them automatically according to the configuration in the/etc/keylime/ca.conffile and save them to the specified directory. The tenant then sends these keys and certificates to the agent.When generating CA certificates or signing agent certificates, you may be prompted for the password to access the CA private key:
Please enter the password to decrypt your keystore:.If you do not want to use a certificate, use the
-foption instead for delivering a file to the agent. Provisioning an agent requires sending any file, even an empty file.NoteKeylime encrypts the file sent to the agent, and decrypts it only if the agent’s system complies with the TPM policy and the IMA allowlist. By default, Keylime decompresses
.zipfiles.
As an example, with the following command,
keylime_tenantprovisions a new Keylime agent at127.0.0.1with UUIDd432fbb3-d2f1-4a97-9ef7-75bd81c00000and loads an allowlist namedallowlist.txt. It also generates a certificate into the default directory and sends it to the agent. Keylime decrypts the file only if the TPM policy configured in/etc/keylime/verifier.confis satisfied:# keylime_tenant -c add -t 127.0.0.1 -u d432fbb3-d2f1-4a97-9ef7-75bd81c00000 -cert default --allowlist allowlist.txt --exclude excludelist.txtNoteYou can stop Keylime from monitoring a node by using the
# keylime_tenant -c delete -u <agent_uuid>command.You can modify the configuration of an already registered agent by using the
keylime_tenant -c updatecommand.-
Replace
Vérification
- Optional: Reboot the monitored system before verification to verify that the settings are persistent.
Verify a successful attestation of the agent:
# keylime_tenant -c cvstatus -u <agent.uuid>
...
{"<agent.uuid>": {"operational_state": "Get Quote"..."attestation_count": 5
...
Replace
<agent.uuid>with the agent’s UUID.If the value of
operational_stateisGet Quoteandattestation_countis non-zero, the attestation of this agent is successful.If the value of
operational_stateisInvalid QuoteorFailedattestation fails, the command displays output similar to the following:{"<agent.uuid>": {"operational_state": "Invalid Quote", ... "ima.validation.ima-ng.not_in_allowlist", "attestation_count": 5, "last_received_quote": 1684150329, "last_successful_attestation": 1684150327}}If the attestation fails, display more details in the verifier log:
# journalctl -u keylime_verifier
keylime.tpm - INFO - Checking IMA measurement list...
keylime.ima - WARNING - File not found in allowlist: /root/bad-script.sh
keylime.ima - ERROR - IMA ERRORS: template-hash 0 fnf 1 hash 0 good 781
keylime.cloudverifier - WARNING - agent D432FBB3-D2F1-4A97-9EF7-75BD81C00000 failed, stopping polling
Ressources supplémentaires
- For more information about IMA, see Enhancing security with the kernel integrity subsystem.
8.7. Deploying Keylime for measured boot attestation
When you configure Keylime for measured boot attestation, Keylime checks that the boot process on the measured system corresponds to the state you defined.
Conditions préalables
You have network access to the systems where the Keylime components are configured:
- Verifier
- For more information, see Section 8.2, « Configuring Keylime verifier ».
- Registrar
- For more information, see Section 8.3, « Configuring Keylime registrar ».
- Tenant
- For more information, see Section 8.4, « Configuring Keylime tenant ».
- Agent
- For more information, see Section 8.5, « Configuring Keylime agent ».
- Unified Extensible Firmware Interface (UEFI) is enabled on the agent system.
Procédure
On the monitored system where the Keylime agent is configured and running, install the
python3-keylime, which containscreate_mb_refstateutility:# dnf -y install python3-keylime
On the monitored system, generate a policy from the measured boot log of the current state of the system by using the
create_mb_refstatescript:# /usr/share/keylime/scripts/create_mb_refstate /sys/kernel/security/tpm0/binary_bios_measurements <./measured_boot_reference_state.json>Replace
<./measured_boot_reference_state.json>with the path where the script saves the generated policy.ImportantThe policy generated with the
create_mb_refstatescript is based on the current state of the system and is very strict. Any modifications of the system including kernel updates and system updates will change the boot process and the system will fail the attestation.Copy the generated policy to the system where the
keylime_tenantutility is configured, for example:# scp root@<agent_ip>:/root/measured_boot_reference_state.json /root/measured_boot_reference_state.jsonOn the system where the Keylime tenant is configured, provision the agent by using the
keylime_tenantutility:# keylime_tenant -c add -t <agent_ip> -u <agent_uuid> --mb_refstate <./measured_boot_reference_state.json>-
Replace
<agent_ip>with the agent’s IP address. -
Replace
<agent_uuid>with the agent’s UUID. -
Replace
<./measured_boot_reference_state.json>with the path to the measured boot policy.
If you configure measured boot in combination with runtime monitoring, provide all the options from both use cases when entering the
keylime_tenant -c addcommand.NoteYou can stop Keylime from monitoring a node by using the
# keylime_tenant -c delete -t <agent_ip> -u <agent_uuid>command.You can modify the configuration of an already registered agent by using the
keylime_tenant -c updatecommand.-
Replace
Vérification
Reboot the monitored system and verify a successful attestation of the agent:
# keylime_tenant -c cvstatus -u <agent_uuid>
...
{"<agent.uuid>": {"operational_state": "Get Quote"..."attestation_count": 5
...
Replace
<agent_uuid>with the agent’s UUID.If the value of
operational_stateisGet Quoteandattestation_countis non-zero, the attestation of this agent is successful.If the value of
operational_stateisInvalid QuoteorFailedattestation fails, the command displays output similar to the following:{"<agent.uuid>": {"operational_state": "Invalid Quote", ... "ima.validation.ima-ng.not_in_allowlist", "attestation_count": 5, "last_received_quote": 1684150329, "last_successful_attestation": 1684150327}}If the attestation fails, display more details in the verifier log:
# journalctl -u keylime_verifier
{"d432fbb3-d2f1-4a97-9ef7-75bd81c00000": {"operational_state": "Tenant Quote Failed", ... "last_event_id": "measured_boot.invalid_pcr_0", "attestation_count": 0, "last_received_quote": 1684487093, "last_successful_attestation": 0}}
Chapitre 9. Checking integrity with AIDE
Advanced Intrusion Detection Environment (AIDE) is a utility that creates a database of files on the system, and then uses that database to ensure file integrity and detect system intrusions.
9.1. Installing AIDE
The following steps are necessary to install AIDE and to initiate its database.
Conditions préalables
-
Le référentiel
AppStreamest activé.
Procédure
To install the aide package:
# dnf install aideTo generate an initial database:
# aide --initNoteIn the default configuration, the
aide --initcommand checks just a set of directories and files defined in the/etc/aide.conffile. To include additional directories or files in theAIDEdatabase, and to change their watched parameters, edit/etc/aide.confaccordingly.To start using the database, remove the
.newsubstring from the initial database file name:# mv /var/lib/aide/aide.db.new.gz /var/lib/aide/aide.db.gz-
To change the location of the
AIDEdatabase, edit the/etc/aide.conffile and modify theDBDIRvalue. For additional security, store the database, configuration, and the/usr/sbin/aidebinary file in a secure location such as a read-only media.
9.2. Performing integrity checks with AIDE
Conditions préalables
-
AIDEis properly installed and its database is initialized. See Installing AIDE
Procédure
To initiate a manual check:
# aide --check
Start timestamp: 2018-07-11 12:41:20 +0200 (AIDE 0.16)
AIDE found differences between database and filesystem!!
...
[trimmed for clarity]
At a minimum, configure the system to run
AIDEweekly. Optimally, runAIDEdaily. For example, to schedule a daily execution ofAIDEat 04:05 a.m. using thecroncommand, add the following line to the/etc/crontabfile:05 4 * * * root /usr/sbin/aide --check
9.3. Updating an AIDE database
After verifying the changes of your system such as, package updates or configuration files adjustments, Red Hat recommends updating your baseline AIDE database.
Conditions préalables
-
AIDEis properly installed and its database is initialized. See Installing AIDE
Procédure
Update your baseline AIDE database:
# aide --updateThe
aide --updatecommand creates the/var/lib/aide/aide.db.new.gzdatabase file.-
To start using the updated database for integrity checks, remove the
.newsubstring from the file name.
9.4. File-integrity tools: AIDE and IMA
Red Hat Enterprise Linux provides several tools for checking and preserving the integrity of files and directories on your system. The following table helps you decide which tool better fits your scenario.
Tableau 9.1. Comparison between AIDE and IMA
| Question | Advanced Intrusion Detection Environment (AIDE) | Architecture de mesure de l'intégrité (IMA) |
|---|---|---|
| What | AIDE is a utility that creates a database of files and directories on the system. This database serves for checking file integrity and detect intrusion detection. | IMA detects if a file is altered by checking file measurement (hash values) compared to previously stored extended attributes. |
| How | AIDE uses rules to compare the integrity state of the files and directories. | IMA uses file hash values to detect the intrusion. |
| Why | Detection - AIDE detects if a file is modified by verifying the rules. | Detection and Prevention - IMA detects and prevents an attack by replacing the extended attribute of a file. |
| Utilisation | AIDE detects a threat when the file or directory is modified. | IMA detects a threat when someone tries to alter the entire file. |
| Extension | AIDE checks the integrity of files and directories on the local system. | IMA ensures security on the local and remote systems. |
Chapitre 10. Chiffrement des blocs de données à l'aide de LUKS
Le chiffrement de disque permet de protéger les données d'un bloc en les chiffrant. Pour accéder au contenu décrypté du périphérique, il faut entrer une phrase de passe ou une clé en guise d'authentification. Cette fonction est importante pour les ordinateurs mobiles et les supports amovibles, car elle permet de protéger le contenu du périphérique même s'il a été physiquement retiré du système. Le format LUKS est une implémentation par défaut du chiffrement par bloc des périphériques dans Red Hat Enterprise Linux.
10.1. Cryptage de disque LUKS
Linux Unified Key Setup-on-disk-format (LUKS) fournit un ensemble d'outils qui simplifie la gestion des périphériques cryptés. Avec LUKS, vous pouvez chiffrer des périphériques en bloc et permettre à plusieurs clés d'utilisateur de déchiffrer une clé principale. Pour le chiffrement en bloc de la partition, utilisez cette clé principale.
Red Hat Enterprise Linux utilise LUKS pour effectuer le chiffrement du périphérique de bloc. Par défaut, l'option de chiffrement du périphérique de bloc n'est pas cochée lors de l'installation. Si vous sélectionnez l'option de chiffrer votre disque, le système vous demande une phrase de passe à chaque fois que vous démarrez l'ordinateur. Cette phrase de passe déverrouille la clé de chiffrement en bloc qui décrypte votre partition. Si vous souhaitez modifier la table de partition par défaut, vous pouvez sélectionner les partitions que vous souhaitez crypter. Cette option est définie dans les paramètres de la table de partitions.
- Chiffres
Le chiffrement par défaut utilisé pour LUKS est
aes-xts-plain64. La taille de clé par défaut de LUKS est de 512 bits. La taille de clé par défaut pour LUKS avec le mode Anaconda XTS est de 512 bits. Les codes disponibles sont les suivants :- Norme de chiffrement avancée (AES)
- Twofish
- Serpent
- LUKS effectue les opérations suivantes
- LUKS crypte des blocs entiers et est donc bien adapté à la protection du contenu des appareils mobiles tels que les supports de stockage amovibles ou les lecteurs de disques d'ordinateurs portables.
- Le contenu sous-jacent du bloc crypté est arbitraire, ce qui le rend utile pour crypter les périphériques d'échange. Cela peut également être utile pour certaines bases de données qui utilisent des périphériques de bloc spécialement formatés pour le stockage des données.
- LUKS utilise le sous-système de noyau existant pour le mappage de périphériques.
- LUKS permet de renforcer la phrase de passe, ce qui protège contre les attaques par dictionnaire.
- Les dispositifs LUKS contiennent plusieurs emplacements de clé, ce qui permet aux utilisateurs d'ajouter des clés de sauvegarde ou des phrases de passe.
- LUKS n'est pas recommandé dans les cas suivants
- Les solutions de chiffrement de disque telles que LUKS ne protègent les données que lorsque le système est éteint. Une fois que le système est en marche et que LUKS a décrypté le disque, les fichiers qui s'y trouvent sont accessibles à tous ceux qui y ont accès.
- Scénarios nécessitant que plusieurs utilisateurs disposent de clés d'accès distinctes au même appareil. Le format LUKS1 offre huit emplacements de clé et le format LUKS2 en offre jusqu'à 32.
- Applications nécessitant un cryptage au niveau du fichier.
Ressources supplémentaires
10.2. Versions de LUKS dans RHEL
Dans Red Hat Enterprise Linux, le format par défaut pour le chiffrement LUKS est LUKS2. L'ancien format LUKS1 reste entièrement pris en charge et est fourni en tant que format compatible avec les versions antérieures de Red Hat Enterprise Linux. Le recryptage LUKS2 est considéré comme plus robuste et plus sûr que le recryptage LUKS1.
Le format LUKS2 permet des mises à jour futures des différentes parties sans qu'il soit nécessaire de modifier les structures binaires. En interne, il utilise le format de texte JSON pour les métadonnées, assure la redondance des métadonnées, détecte la corruption des métadonnées et répare automatiquement à partir d'une copie des métadonnées.
N'utilisez pas LUKS2 dans les systèmes qui ne prennent en charge que LUKS1. Red Hat Enterprise Linux 7 prend en charge le format LUKS2 depuis la version 7.6.
Depuis Red Hat Enterprise Linux 9.2, vous pouvez utiliser la commande cryptsetup reencrypt pour les deux versions de LUKS afin de chiffrer le disque.
- Recryptage en ligne
Le format LUKS2 permet de recrypter les périphériques cryptés pendant qu'ils sont utilisés. Par exemple, il n'est pas nécessaire de démonter le système de fichiers sur le périphérique pour effectuer les tâches suivantes :
- Modifier la touche de volume
Modifier l'algorithme de cryptage
Lorsque vous cryptez un périphérique non crypté, vous devez toujours démonter le système de fichiers. Vous pouvez remonter le système de fichiers après une brève initialisation du chiffrement.
Le format LUKS1 ne prend pas en charge le rechiffrement en ligne.
- Conversion
Dans certaines situations, vous pouvez convertir LUKS1 en LUKS2. La conversion n'est pas possible dans les cas suivants :
-
Un périphérique LUKS1 est marqué comme étant utilisé par une solution Clevis de décryptage basé sur des règles (PBD). L'outil
cryptsetupne convertit pas le périphérique lorsque certaines métadonnéesluksmetasont détectées. - Un appareil est actif. L'appareil doit être dans un état inactif avant qu'une conversion ne soit possible.
-
Un périphérique LUKS1 est marqué comme étant utilisé par une solution Clevis de décryptage basé sur des règles (PBD). L'outil
10.3. Options de protection des données pendant le recryptage LUKS2
LUKS2 propose plusieurs options qui donnent la priorité aux performances ou à la protection des données pendant le processus de recryptage. Il propose les modes suivants pour l'option resilience, et vous pouvez sélectionner n'importe lequel de ces modes à l'aide de la commande cryptsetup reencrypt --resilience resilience-mode /dev/sdx pour sélectionner l'un de ces modes :
checksumLe mode par défaut. Il permet d'équilibrer la protection des données et les performances.
Ce mode stocke les sommes de contrôle individuelles des secteurs dans la zone de rechiffrement, que le processus de récupération peut détecter pour les secteurs qui ont été rechiffrés par LUKS2. Ce mode exige que l'écriture du secteur du dispositif de bloc soit atomique.
journal- C'est le mode le plus sûr, mais aussi le plus lent. Étant donné que ce mode journalise la zone de rechiffrement dans la zone binaire, le LUKS2 écrit les données deux fois.
none-
Le mode
nonedonne la priorité aux performances et ne fournit aucune protection des données. Il protège les données uniquement en cas d'arrêt sûr du processus, comme le signalSIGTERMou l'appui de l'utilisateur sur la touche Ctrl+C par l'utilisateur. Toute défaillance inattendue du système ou de l'application peut entraîner une corruption des données.
Si un processus de rechiffrement LUKS2 se termine inopinément par la force, LUKS2 peut effectuer la récupération de l'une des manières suivantes :
- Automatiquement
L'exécution de l'une des actions suivantes déclenche l'action de récupération automatique lors de la prochaine action d'ouverture du périphérique LUKS2 :
-
Exécution de la commande
cryptsetup open. -
Attacher l'appareil avec la commande
systemd-cryptsetup.
-
Exécution de la commande
- Manuellement
-
En utilisant la commande
cryptsetup repair /dev/sdxsur le périphérique LUKS2.
Ressources supplémentaires
-
cryptsetup-reencrypt(8)etcryptsetup-repair(8)pages de manuel
10.4. Chiffrement des données existantes sur un dispositif de blocage à l'aide de LUKS2
Vous pouvez crypter les données existantes sur un dispositif non encore crypté en utilisant le format LUKS2. Un nouvel en-tête LUKS est stocké dans la tête du dispositif.
Conditions préalables
- L'unité de bloc dispose d'un système de fichiers.
Vous avez sauvegardé vos données.
AvertissementVous pouvez perdre vos données au cours du processus de cryptage en raison d'une défaillance matérielle, du noyau ou d'une défaillance humaine. Assurez-vous de disposer d'une sauvegarde fiable avant de commencer à chiffrer les données.
Procédure
Démontez tous les systèmes de fichiers sur le périphérique que vous prévoyez de chiffrer, par exemple :
# umount /dev/mapper/vg00-lv00Libérez de l'espace pour stocker un en-tête LUKS. Utilisez l'une des options suivantes en fonction de votre scénario :
Dans le cas du chiffrement d'un volume logique, vous pouvez étendre le volume logique sans redimensionner le système de fichiers. Par exemple, il est possible d'étendre un volume logique sans redimensionner le système de fichiers :
# lvextend -L 32M /dev/mapper/vg00-lv00-
Étendez la partition en utilisant des outils de gestion de partition, tels que
parted. -
Réduisez le système de fichiers sur le périphérique. Vous pouvez utiliser l'utilitaire
resize2fspour les systèmes de fichiers ext2, ext3 ou ext4. Notez que vous ne pouvez pas réduire le système de fichiers XFS.
Initialiser le cryptage :
# cryptsetup reencrypt --encrypt --init-only --reduce-device-size 32M /dev/mapper/vg00-lv00 lv00_encrypted

/dev/mapper/lv00_encrypted is now active and ready for online encryption.
Monter l'appareil :
# mount /dev/mapper/lv00_encrypted /mnt/lv00_encryptedAjouter une entrée pour un mappage persistant au fichier
/etc/crypttab:Trouver le site
luksUUID:# cryptsetup luksUUID /dev/mapper/vg00-lv00 a52e2cc9-a5be-47b8-a95d-6bdf4f2d9325Ouvrez
/etc/crypttabdans un éditeur de texte de votre choix et ajoutez un dispositif dans ce fichier :$ vi /etc/crypttab lv00_encrypted UUID=a52e2cc9-a5be-47b8-a95d-6bdf4f2d9325 none
Remplacez a52e2cc9-a5be-47b8-a95d-6bdf4f2d9325 par le site
luksUUIDde votre appareil.Rafraîchir les initramfs avec
dracut:$ dracut -f --regenerate-all
Ajouter une entrée pour un montage persistant au fichier
/etc/fstab:Recherchez l'UUID du système de fichiers du périphérique bloc LUKS actif :
$ blkid -p /dev/mapper/lv00_encrypted

/dev/mapper/lv00-encrypted: UUID="37bc2492-d8fa-4969-9d9b-bb64d3685aa9" BLOCK_SIZE="4096" TYPE="xfs" USAGE="filesystem"
Ouvrez
/etc/fstabdans un éditeur de texte de votre choix et ajoutez un dispositif dans ce fichier, par exemple :$ vi /etc/fstab UUID=37bc2492-d8fa-4969-9d9b-bb64d3685aa9 /home auto rw,user,auto 0
Remplacez 37bc2492-d8fa-4969-9d9b-bb64d3685aa9 par l'UUID de votre système de fichiers.
Reprendre le cryptage en ligne :
# cryptsetup reencrypt --resume-only /dev/mapper/vg00-lv00

Enter passphrase for /dev/mapper/vg00-lv00:
Auto-detected active dm device 'lv00_encrypted' for data device /dev/mapper/vg00-lv00.
Finished, time 00:31.130, 10272 MiB written, speed 330.0 MiB/s
Vérification
Vérifier si les données existantes ont été cryptées :
# cryptsetup luksDump /dev/mapper/vg00-lv00

LUKS header information
Version: 2
Epoch: 4
Metadata area: 16384 [bytes]
Keyslots area: 16744448 [bytes]
UUID: a52e2cc9-a5be-47b8-a95d-6bdf4f2d9325
Label: (no label)
Subsystem: (no subsystem)
Flags: (no flags)

Data segments:
  0: crypt
	offset: 33554432 [bytes]
	length: (whole device)
	cipher: aes-xts-plain64
[...]
Affichez l'état du dispositif de bloc vierge crypté :
# cryptsetup status lv00_encrypted

/dev/mapper/lv00_encrypted is active and is in use.
  type:    LUKS2
  cipher:  aes-xts-plain64
  keysize: 512 bits
  key location: keyring
  device:  /dev/mapper/vg00-lv00
Ressources supplémentaires
-
cryptsetup(8),cryptsetup-reencrypt(8),lvextend(8),resize2fs(8), etparted(8)pages de manuel
10.5. Chiffrement des données existantes sur un périphérique de bloc à l'aide de LUKS2 avec un en-tête détaché
Vous pouvez chiffrer des données existantes sur un bloc sans créer d'espace libre pour le stockage d'un en-tête LUKS. L'en-tête est stocké dans un emplacement détaché, ce qui constitue également une couche de sécurité supplémentaire. La procédure utilise le format de cryptage LUKS2.
Conditions préalables
- L'unité de bloc dispose d'un système de fichiers.
Vous avez sauvegardé vos données.
AvertissementVous pouvez perdre vos données au cours du processus de cryptage en raison d'une défaillance matérielle, du noyau ou d'une défaillance humaine. Assurez-vous de disposer d'une sauvegarde fiable avant de commencer à chiffrer les données.
Procédure
Démonter tous les systèmes de fichiers sur l'appareil, par exemple :
# umount /dev/nvme0n1p1Initialiser le cryptage :
# cryptsetup reencrypt --encrypt --init-only --header /home/header /dev/nvme0n1p1 nvme_encrypted

WARNING!
========
Header file does not exist, do you want to create it?

Are you sure? (Type 'yes' in capital letters): YES
Enter passphrase for /home/header:
Verify passphrase:
/dev/mapper/nvme_encrypted is now active and ready for online encryption.
Remplacez /home/header par un chemin d'accès au fichier contenant un en-tête LUKS détaché. L'en-tête LUKS détaché doit être accessible pour déverrouiller ultérieurement le dispositif crypté.
Monter l'appareil :
# mount /dev/mapper/nvme_encrypted /mnt/nvme_encryptedReprendre le cryptage en ligne :
# cryptsetup reencrypt --resume-only --header /home/header /dev/nvme0n1p1

Enter passphrase for /dev/nvme0n1p1:
Auto-detected active dm device 'nvme_encrypted' for data device /dev/nvme0n1p1.
Finished, time 00m51s,   10 GiB written, speed 198.2 MiB/s
Vérification
Vérifiez si les données existantes sur un périphérique de bloc utilisant LUKS2 avec un en-tête détaché sont chiffrées :
# cryptsetup luksDump /home/header

LUKS header information
Version:       	2
Epoch:         	88
Metadata area: 	16384 [bytes]
Keyslots area: 	16744448 [bytes]
UUID:          	c4f5d274-f4c0-41e3-ac36-22a917ab0386
Label:         	(no label)
Subsystem:     	(no subsystem)
Flags:       	(no flags)

Data segments:
  0: crypt
	offset: 0 [bytes]
	length: (whole device)
	cipher: aes-xts-plain64
	sector: 512 [bytes]
[...]
Affichez l'état du dispositif de bloc vierge crypté :
# cryptsetup status nvme_encrypted

/dev/mapper/nvme_encrypted is active and is in use.
  type:    LUKS2
  cipher:  aes-xts-plain64
  keysize: 512 bits
  key location: keyring
  device:  /dev/nvme0n1p1
Ressources supplémentaires
-
cryptsetup(8)etcryptsetup-reencrypt(8)pages de manuel
10.6. Chiffrement d'un bloc vierge à l'aide de LUKS2
Vous pouvez crypter un périphérique bloc vierge, que vous pouvez utiliser pour un stockage crypté à l'aide du format LUKS2.
Conditions préalables
-
Un périphérique bloc vide. Vous pouvez utiliser des commandes telles que
lsblkpour savoir s'il n'y a pas de données réelles sur ce périphérique, par exemple, un système de fichiers.
Procédure
Configurer une partition en tant que partition LUKS chiffrée :
# cryptsetup luksFormat /dev/nvme0n1p1

WARNING!
========
This will overwrite data on /dev/nvme0n1p1 irrevocably.
Are you sure? (Type 'yes' in capital letters): YES
Enter passphrase for /dev/nvme0n1p1:
Verify passphrase:
Ouvrez une partition LUKS chiffrée :
# cryptsetup open dev/nvme0n1p1 nvme0n1p1_encrypted

Enter passphrase for /dev/nvme0n1p1:
Cette commande déverrouille la partition et l'affecte à un nouveau périphérique en utilisant le mappeur de périphérique. Pour ne pas écraser les données chiffrées, cette commande avertit le noyau que le périphérique est un périphérique chiffré et qu'il est adressé par LUKS à l'aide de l'attribut
/dev/mapper/device_mapped_namechemin.Créez un système de fichiers pour écrire des données cryptées sur la partition, à laquelle il faut accéder par le nom mappé du périphérique :
# mkfs -t ext4 /dev/mapper/nvme0n1p1_encryptedMonter l'appareil :
# mount /dev/mapper/nvme0n1p1_encrypted mount-point
Vérification
Vérifiez si le périphérique de blocage vierge est crypté :
# cryptsetup luksDump /dev/nvme0n1p1

LUKS header information
Version:       	2
Epoch:         	3
Metadata area: 	16384 [bytes]
Keyslots area: 	16744448 [bytes]
UUID:          	34ce4870-ffdf-467c-9a9e-345a53ed8a25
Label:         	(no label)
Subsystem:     	(no subsystem)
Flags:       	(no flags)

Data segments:
  0: crypt
	offset: 16777216 [bytes]
	length: (whole device)
	cipher: aes-xts-plain64
	sector: 512 [bytes]
[...]
Affichez l'état du dispositif de bloc vierge crypté :
# cryptsetup status nvme0n1p1_encrypted

/dev/mapper/nvme0n1p1_encrypted is active and is in use.
  type:    LUKS2
  cipher:  aes-xts-plain64
  keysize: 512 bits
  key location: keyring
  device:  /dev/nvme0n1p1
  sector size:  512
  offset:  32768 sectors
  size:    20938752 sectors
  mode:    read/write
Ressources supplémentaires
-
cryptsetup(8),cryptsetup-open (8), etcryptsetup-lusFormat(8)pages de manuel
10.7. Création d'un volume chiffré LUKS2 à l'aide du rôle système storage RHEL
Vous pouvez utiliser le rôle storage pour créer et configurer un volume chiffré avec LUKS en exécutant un manuel de jeu Ansible.
Conditions préalables
-
Accès et autorisations à un ou plusieurs nœuds gérés, qui sont des systèmes que vous souhaitez configurer avec le rôle de système
crypto_policies. - Un fichier d'inventaire, qui répertorie les nœuds gérés.
-
Accès et permissions à un nœud de contrôle, qui est un système à partir duquel Red Hat Ansible Core configure d'autres systèmes. Sur le nœud de contrôle, les paquets
ansible-coreetrhel-system-rolessont installés.
RHEL 8.0-8.5 provided access to a separate Ansible repository that contains Ansible Engine 2.9 for automation based on Ansible. Ansible Engine contains command-line utilities such as ansible, ansible-playbook, connectors such as docker and podman, and many plugins and modules. For information about how to obtain and install Ansible Engine, see the How to download and install Red Hat Ansible Engine Knowledgebase article.
RHEL 8.6 et 9.0 ont introduit Ansible Core (fourni en tant que paquetage ansible-core ), qui contient les utilitaires de ligne de commande Ansible, les commandes et un petit ensemble de plugins Ansible intégrés. RHEL fournit ce paquetage par l'intermédiaire du dépôt AppStream, et sa prise en charge est limitée. Pour plus d'informations, consultez l'article de la base de connaissances intitulé Scope of support for the Ansible Core package included in the RHEL 9 and RHEL 8.6 and later AppStream repositories (Portée de la prise en charge du package Ansible Core inclus dans les dépôts AppStream RHEL 9 et RHEL 8.6 et versions ultérieures ).
Procédure
Créez un nouveau fichier
playbook.ymlavec le contenu suivant :- hosts: all vars: storage_volumes: - name: barefs type: disk disks: - sdb fs_type: xfs fs_label: label-name mount_point: /mnt/data encryption: true encryption_password: your-password roles: - rhel-system-roles.storageVous pouvez également ajouter les autres paramètres de cryptage tels que
encryption_key,encryption_cipher,encryption_key_size, etencryption_luksversion dans le fichier playbook.yml.Facultatif : Vérifier la syntaxe du playbook :
# ansible-playbook --syntax-check playbook.ymlExécutez le playbook sur votre fichier d'inventaire :
# ansible-playbook -i inventory.file /path/to/file/playbook.yml
Vérification
Visualiser l'état du cryptage :
# cryptsetup status sdb

/dev/mapper/sdb is active and is in use.
type: LUKS2
cipher: aes-xts-plain64
keysize: 512 bits
key location: keyring
device: /dev/sdb
[...]
Vérifiez le volume crypté LUKS créé :
# cryptsetup luksDump /dev/sdb

Version:       	2
Epoch:         	6
Metadata area: 	16384 [bytes]
Keyslots area: 	33521664 [bytes]
UUID:          	a4c6be82-7347-4a91-a8ad-9479b72c9426
Label:         	(no label)
Subsystem:     	(no subsystem)
Flags:       	allow-discards

Data segments:
  0: crypt
	offset: 33554432 [bytes]
	length: (whole device)
	cipher: aes-xts-plain64
	sector: 4096 [bytes]
[...]
Consultez les paramètres
cryptsetupdans le fichierplaybook.ymlque le rôlestorageprend en charge :# cat ~/playbook.yml - hosts: all vars: storage_volumes: - name: foo type: disk disks: - nvme0n1 fs_type: xfs fs_label: label-name mount_point: /mnt/data encryption: true #encryption_password: passwdpasswd encryption_key: /home/passwd_key encryption_cipher: aes-xts-plain64 encryption_key_size: 512 encryption_luks_version: luks2 roles: - rhel-system-roles.storage
Ressources supplémentaires
- Chiffrement des blocs de données à l'aide de LUKS
-
/usr/share/ansible/roles/rhel-system-roles.storage/README.mdfichier
Chapitre 11. Configuring automated unlocking of encrypted volumes using policy-based decryption
Policy-Based Decryption (PBD) is a collection of technologies that enable unlocking encrypted root and secondary volumes of hard drives on physical and virtual machines. PBD uses a variety of unlocking methods, such as user passwords, a Trusted Platform Module (TPM) device, a PKCS #11 device connected to a system, for example, a smart card, or a special network server.
PBD allows combining different unlocking methods into a policy, which makes it possible to unlock the same volume in different ways. The current implementation of the PBD in RHEL consists of the Clevis framework and plug-ins called pins. Each pin provides a separate unlocking capability. Currently, the following pins are available:
-
tang- allows unlocking volumes using a network server -
tpm2- allows unlocking volumes using a TPM2 policy -
sss- allows deploying high-availability systems using the Shamir’s Secret Sharing (SSS) cryptographic scheme
11.1. Network-bound disk encryption
The Network Bound Disc Encryption (NBDE) is a subcategory of Policy-Based Decryption (PBD) that allows binding encrypted volumes to a special network server. The current implementation of the NBDE includes a Clevis pin for the Tang server and the Tang server itself.
In RHEL, NBDE is implemented through the following components and technologies:
Figure 11.1. NBDE scheme when using a LUKS1-encrypted volume. The luksmeta package is not used for LUKS2 volumes.

Tang is a server for binding data to network presence. It makes a system containing your data available when the system is bound to a certain secure network. Tang is stateless and does not require TLS or authentication. Unlike escrow-based solutions, where the server stores all encryption keys and has knowledge of every key ever used, Tang never interacts with any client keys, so it never gains any identifying information from the client.
Clevis is a pluggable framework for automated decryption. In NBDE, Clevis provides automated unlocking of LUKS volumes. The clevis package provides the client side of the feature.
A Clevis pin is a plug-in into the Clevis framework. One of such pins is a plug-in that implements interactions with the NBDE server — Tang.
Clevis and Tang are generic client and server components that provide network-bound encryption. In RHEL, they are used in conjunction with LUKS to encrypt and decrypt root and non-root storage volumes to accomplish Network-Bound Disk Encryption.
Both client- and server-side components use the José library to perform encryption and decryption operations.
When you begin provisioning NBDE, the Clevis pin for Tang server gets a list of the Tang server’s advertised asymmetric keys. Alternatively, since the keys are asymmetric, a list of Tang’s public keys can be distributed out of band so that clients can operate without access to the Tang server. This mode is called offline provisioning.
The Clevis pin for Tang uses one of the public keys to generate a unique, cryptographically-strong encryption key. Once the data is encrypted using this key, the key is discarded. The Clevis client should store the state produced by this provisioning operation in a convenient location. This process of encrypting data is the provisioning step.
The LUKS version 2 (LUKS2) is the default disk-encryption format in RHEL, hence, the provisioning state for NBDE is stored as a token in a LUKS2 header. The leveraging of provisioning state for NBDE by the luksmeta package is used only for volumes encrypted with LUKS1.
The Clevis pin for Tang supports both LUKS1 and LUKS2 without specification need. Clevis can encrypt plain-text files but you have to use the cryptsetup tool for encrypting block devices. See the Encrypting block devices using LUKS for more information.
When the client is ready to access its data, it loads the metadata produced in the provisioning step and it responds to recover the encryption key. This process is the recovery step.
In NBDE, Clevis binds a LUKS volume using a pin so that it can be automatically unlocked. After successful completion of the binding process, the disk can be unlocked using the provided Dracut unlocker.
If the kdump kernel crash dumping mechanism is set to save the content of the system memory to a LUKS-encrypted device, you are prompted for entering a password during the second kernel boot.
Ressources supplémentaires
- NBDE (Network-Bound Disk Encryption) Technology Knowledgebase article
-
tang(8),clevis(1),jose(1), andclevis-luks-unlockers(7)man pages - How to set up Network-Bound Disk Encryption with multiple LUKS devices (Clevis + Tang unlocking) Knowledgebase article
11.2. Installing an encryption client - Clevis
Use this procedure to deploy and start using the Clevis pluggable framework on your system.
Procédure
To install Clevis and its pins on a system with an encrypted volume:
# dnf install clevisTo decrypt data, use a
clevis decryptcommand and provide a cipher text in the JSON Web Encryption (JWE) format, for example:$ clevis decrypt < secret.jwe
Ressources supplémentaires
-
clevis(1)man page Built-in CLI help after entering the
cleviscommand without any argument:$ clevis Usage: clevis COMMAND [OPTIONS] clevis decrypt Decrypts using the policy defined at encryption time clevis encrypt sss Encrypts using a Shamir's Secret Sharing policy clevis encrypt tang Encrypts using a Tang binding server policy clevis encrypt tpm2 Encrypts using a TPM2.0 chip binding policy clevis luks bind Binds a LUKS device using the specified policy clevis luks edit Edit a binding from a clevis-bound slot in a LUKS device clevis luks list Lists pins bound to a LUKSv1 or LUKSv2 device clevis luks pass Returns the LUKS passphrase used for binding a particular slot. clevis luks regen Regenerate clevis binding clevis luks report Report tang keys' rotations clevis luks unbind Unbinds a pin bound to a LUKS volume clevis luks unlock Unlocks a LUKS volume
11.3. Deploying a Tang server with SELinux in enforcing mode
Use this procedure to deploy a Tang server running on a custom port as a confined service in SELinux enforcing mode.
Conditions préalables
-
The
policycoreutils-python-utilspackage and its dependencies are installed. -
Le service
firewalldest en cours d'exécution.
Procédure
To install the
tangpackage and its dependencies, enter the following command asroot:# dnf install tangPick an unoccupied port, for example, 7500/tcp, and allow the
tangdservice to bind to that port:# semanage port -a -t tangd_port_t -p tcp 7500Note that a port can be used only by one service at a time, and thus an attempt to use an already occupied port implies the
ValueError: Port already definederror message.Ouvrez le port dans le pare-feu :
# firewall-cmd --add-port=7500/tcp
# firewall-cmd --runtime-to-permanent
Enable the
tangdservice:# systemctl enable tangd.socketCreate an override file:
# systemctl edit tangd.socketIn the following editor screen, which opens an empty
override.conffile located in the/etc/systemd/system/tangd.socket.d/directory, change the default port for the Tang server from 80 to the previously picked number by adding the following lines:[Socket] ListenStream= ListenStream=7500Save the file and exit the editor.
Reload the changed configuration:
# systemctl daemon-reloadCheck that your configuration is working:
# systemctl show tangd.socket -p Listen
Listen=[::]:7500 (Stream)
Start the
tangdservice:# systemctl restart tangd.socketBecause
tangduses thesystemdsocket activation mechanism, the server starts as soon as the first connection comes in. A new set of cryptographic keys is automatically generated at the first start. To perform cryptographic operations such as manual key generation, use thejoseutility.
Ressources supplémentaires
-
tang(8),semanage(8),firewall-cmd(1),jose(1),systemd.unit(5), andsystemd.socket(5)man pages
11.4. Rotating Tang server keys and updating bindings on clients
Use the following steps to rotate your Tang server keys and update existing bindings on clients. The precise interval at which you should rotate them depends on your application, key sizes, and institutional policy.
Alternatively, you can rotate Tang keys by using the nbde_server RHEL system role. See Using the nbde_server system role for setting up multiple Tang servers for more information.
Conditions préalables
- A Tang server is running.
-
The
clevisandclevis-lukspackages are installed on your clients.
Procédure
Rename all keys in the
/var/db/tangkey database directory to have a leading.to hide them from advertisement. Note that the file names in the following example differs from unique file names in the key database directory of your Tang server:# cd /var/db/tang # ls -l -rw-r--r--. 1 root root 349 Feb 7 14:55 UV6dqXSwe1bRKG3KbJmdiR020hY.jwk -rw-r--r--. 1 root root 354 Feb 7 14:55 y9hxLTQSiSB5jSEGWnjhY8fDTJU.jwk # mv UV6dqXSwe1bRKG3KbJmdiR020hY.jwk .UV6dqXSwe1bRKG3KbJmdiR020hY.jwk # mv y9hxLTQSiSB5jSEGWnjhY8fDTJU.jwk .y9hxLTQSiSB5jSEGWnjhY8fDTJU.jwk
Check that you renamed and therefore hid all keys from the Tang server advertisement:
# ls -l
total 0
Generate new keys using the
/usr/libexec/tangd-keygencommand in/var/db/tangon the Tang server:# /usr/libexec/tangd-keygen /var/db/tang # ls /var/db/tang 3ZWS6-cDrCG61UPJS2BMmPU4I54.jwk zyLuX6hijUy_PSeUEFDi7hi38.jwk
Check that your Tang server advertises the signing key from the new key pair, for example:
# tang-show-keys 7500
3ZWS6-cDrCG61UPJS2BMmPU4I54
On your NBDE clients, use the
clevis luks reportcommand to check if the keys advertised by the Tang server remains the same. You can identify slots with the relevant binding using theclevis luks listcommand, for example:# clevis luks list -d /dev/sda2 1: tang '{"url":"http://tang.srv"}' # clevis luks report -d /dev/sda2 -s 1 ... Report detected that some keys were rotated. Do you want to regenerate luks metadata with "clevis luks regen -d /dev/sda2 -s 1"? [ynYN]
To regenerate LUKS metadata for the new keys either press
yto the prompt of the previous command, or use theclevis luks regencommand:# clevis luks regen -d /dev/sda2 -s 1When you are sure that all old clients use the new keys, you can remove the old keys from the Tang server, for example:
# cd /var/db/tang
# rm .*.jwk
Removing the old keys while clients are still using them can result in data loss. If you accidentally remove such keys, use the clevis luks regen command on the clients, and provide your LUKS password manually.
Ressources supplémentaires
-
tang-show-keys(1),clevis-luks-list(1),clevis-luks-report(1), andclevis-luks-regen(1)man pages
11.5. Configuring automated unlocking using a Tang key in the web console
Configure automated unlocking of a LUKS-encrypted storage device using a key provided by a Tang server.
Conditions préalables
La console web RHEL 9 a été installée.
Pour plus de détails, voir Installation de la console web.
-
Le paquetage
cockpit-storagedest installé sur votre système. -
The
cockpit.socketservice is running at port 9090. -
The
clevis,tang, andclevis-dracutpackages are installed. - A Tang server is running.
Procédure
Open the RHEL web console by entering the following address in a web browser:
https://localhost:9090Replace the localhost part by the remote server’s host name or IP address when you connect to a remote system.
- Provide your credentials and click . Click to expand details of the encrypted device you want to unlock using the Tang server, and click .
Click in the Keys section to add a Tang key:

Provide the address of your Tang server and a password that unlocks the LUKS-encrypted device. Click to confirm:
The following dialog window provides a command to verify that the key hash matches.
In a terminal on the Tang server, use the
tang-show-keyscommand to display the key hash for comparison. In this example, the Tang server is running on the port 7500:# tang-show-keys 7500 fM-EwYeiTxS66X3s1UAywsGKGnxnpll8ig0KOQmr9CMClick when the key hashes in the web console and in the output of previously listed commands are the same:

To enable the early boot system to process the disk binding, click at the bottom of the left navigation bar and enter the following commands:
# dnf install clevis-dracut
# grubby --update-kernel=ALL --args="rd.neednet=1"
# dracut -fv --regenerate-all
Vérification
Check that the newly added Tang key is now listed in the Keys section with the
Keyservertype:
Verify that the bindings are available for the early boot, for example:
# lsinitrd | grep clevis
clevis
clevis-pin-sss
clevis-pin-tang
clevis-pin-tpm2
-rwxr-xr-x   1 root     root         1600 Feb 11 16:30 usr/bin/clevis
-rwxr-xr-x   1 root     root         1654 Feb 11 16:30 usr/bin/clevis-decrypt
...
-rwxr-xr-x   2 root     root           45 Feb 11 16:30 usr/lib/dracut/hooks/initqueue/settled/60-clevis-hook.sh
-rwxr-xr-x   1 root     root         2257 Feb 11 16:30 usr/libexec/clevis-luks-askpass
Ressources supplémentaires
11.6. Basic NBDE and TPM2 encryption-client operations
The Clevis framework can encrypt plain-text files and decrypt both ciphertexts in the JSON Web Encryption (JWE) format and LUKS-encrypted block devices. Clevis clients can use either Tang network servers or Trusted Platform Module 2.0 (TPM 2.0) chips for cryptographic operations.
The following commands demonstrate the basic functionality provided by Clevis on examples containing plain-text files. You can also use them for troubleshooting your NBDE or Clevis+TPM deployments.
Encryption client bound to a Tang server
To check that a Clevis encryption client binds to a Tang server, use the
clevis encrypt tangsub-command:$ clevis encrypt tang '{"url":"http://tang.srv:port"}' < input-plain.txt > secret.jwe The advertisement contains the following signing keys: _OsIk0T-E2l6qjfdDiwVmidoZjA Do you wish to trust these keys? [ynYN] yChange the http://tang.srv:port URL in the previous example to match the URL of the server where
tangis installed. The secret.jwe output file contains your encrypted cipher text in the JWE format. This cipher text is read from the input-plain.txt input file.Alternatively, if your configuration requires a non-interactive communication with a Tang server without SSH access, you can download an advertisement and save it to a file:
$ curl -sfg http://tang.srv:port/adv -o adv.jwsUse the advertisement in the adv.jws file for any following tasks, such as encryption of files or messages:
$ echo 'hello' | clevis encrypt tang '{"url":"http://tang.srv:port","adv":"adv.jws"}'To decrypt data, use the
clevis decryptcommand and provide the cipher text (JWE):$ clevis decrypt < secret.jwe > output-plain.txt
Encryption client using TPM 2.0
To encrypt using a TPM 2.0 chip, use the
clevis encrypt tpm2sub-command with the only argument in form of the JSON configuration object:$ clevis encrypt tpm2 '{}' < input-plain.txt > secret.jweTo choose a different hierarchy, hash, and key algorithms, specify configuration properties, for example:
$ clevis encrypt tpm2 '{"hash":"sha256","key":"rsa"}' < input-plain.txt > secret.jweTo decrypt the data, provide the ciphertext in the JSON Web Encryption (JWE) format:
$ clevis decrypt < secret.jwe > output-plain.txt
The pin also supports sealing data to a Platform Configuration Registers (PCR) state. That way, the data can only be unsealed if the PCR hashes values match the policy used when sealing.
For example, to seal the data to the PCR with index 0 and 7 for the SHA-256 bank:
$ clevis encrypt tpm2 '{"pcr_bank":"sha256","pcr_ids":"0,7"}' < input-plain.txt > secret.jweHashes in PCRs can be rewritten, and you no longer can unlock your encrypted volume. For this reason, add a strong passphrase that enable you to unlock the encrypted volume manually even when a value in a PCR changes.
If the system cannot automatically unlock your encrypted volume after an upgrade of the shim-x64 package, follow the steps in the Clevis TPM2 no longer decrypts LUKS devices after a restart KCS article.
Ressources supplémentaires
-
clevis-encrypt-tang(1),clevis-luks-unlockers(7),clevis(1), andclevis-encrypt-tpm2(1)man pages clevis,clevis decrypt, andclevis encrypt tangcommands without any arguments show the built-in CLI help, for example:$ clevis encrypt tang Usage: clevis encrypt tang CONFIG < PLAINTEXT > JWE ...
11.7. Configuring manual enrollment of LUKS-encrypted volumes
Use the following steps to configure unlocking of LUKS-encrypted volumes with NBDE.
Conditions préalables
- A Tang server is running and available.
Procédure
To automatically unlock an existing LUKS-encrypted volume, install the
clevis-lukssubpackage:# dnf install clevis-luksIdentify the LUKS-encrypted volume for PBD. In the following example, the block device is referred as /dev/sda2:
# lsblk
NAME                                          MAJ:MIN RM   SIZE RO TYPE  MOUNTPOINT
sda                                             8:0    0    12G  0 disk
├─sda1                                          8:1    0     1G  0 part  /boot
└─sda2                                          8:2    0    11G  0 part
  └─luks-40e20552-2ade-4954-9d56-565aa7994fb6 253:0    0    11G  0 crypt
    ├─rhel-root                               253:0    0   9.8G  0 lvm   /
    └─rhel-swap                               253:1    0   1.2G  0 lvm   [SWAP]
Bind the volume to a Tang server using the
clevis luks bindcommand:# clevis luks bind -d /dev/sda2 tang '{"url":"http://tang.srv"}' The advertisement contains the following signing keys: _OsIk0T-E2l6qjfdDiwVmidoZjA Do you wish to trust these keys? [ynYN] y You are about to initialize a LUKS device for metadata storage. Attempting to initialize it may result in data loss if data was already written into the LUKS header gap in a different format. A backup is advised before initialization is performed. Do you wish to initialize /dev/sda2? [yn] y Enter existing LUKS password:This command performs four steps:
- Creates a new key with the same entropy as the LUKS master key.
- Encrypts the new key with Clevis.
- Stores the Clevis JWE object in the LUKS2 header token or uses LUKSMeta if the non-default LUKS1 header is used.
- Enables the new key for use with LUKS.
NoteThe binding procedure assumes that there is at least one free LUKS password slot. The
clevis luks bindcommand takes one of the slots.The volume can now be unlocked with your existing password as well as with the Clevis policy.
To enable the early boot system to process the disk binding, use the
dracuttool on an already installed system:# dnf install clevis-dracutIn RHEL, Clevis produces a generic
initrd(initial ramdisk) without host-specific configuration options and does not automatically add parameters such asrd.neednet=1to the kernel command line. If your configuration relies on a Tang pin that requires network during early boot, use the--hostonly-cmdlineargument anddracutaddsrd.neednet=1when it detects a Tang binding:# dracut -fv --regenerate-all --hostonly-cmdlineAlternatively, create a .conf file in the
/etc/dracut.conf.d/, and add thehostonly_cmdline=yesoption to the file, for example:# echo "hostonly_cmdline=yes" > /etc/dracut.conf.d/clevis.confNoteYou can also ensure that networking for a Tang pin is available during early boot by using the
grubbytool on the system where Clevis is installed:# grubby --update-kernel=ALL --args="rd.neednet=1"Then you can use
dracutwithout--hostonly-cmdline:# dracut -fv --regenerate-all
Vérification
To verify that the Clevis JWE object is successfully placed in a LUKS header, use the
clevis luks listcommand:# clevis luks list -d /dev/sda2 1: tang '{"url":"http://tang.srv:port"}'
To use NBDE for clients with static IP configuration (without DHCP), pass your network configuration to the dracut tool manually, for example:
# dracut -fv --regenerate-all --kernel-cmdline "ip=192.0.2.10::192.0.2.1:255.255.255.0::ens3:none"
Alternatively, create a .conf file in the /etc/dracut.conf.d/ directory with the static network information. For example:
# cat /etc/dracut.conf.d/static_ip.conf
kernel_cmdline="ip=192.0.2.10::192.0.2.1:255.255.255.0::ens3:none"
Regenerate the initial RAM disk image:
# dracut -fv --regenerate-allRessources supplémentaires
-
clevis-luks-bind(1)anddracut.cmdline(7)man pages. - Kickstart commands for network configuration
11.8. Configuring manual enrollment of LUKS-encrypted volumes using a TPM 2.0 policy
Use the following steps to configure unlocking of LUKS-encrypted volumes by using a Trusted Platform Module 2.0 (TPM 2.0) policy.
Conditions préalables
- An accessible TPM 2.0-compatible device.
- A system with the 64-bit Intel or 64-bit AMD architecture.
Procédure
To automatically unlock an existing LUKS-encrypted volume, install the
clevis-lukssubpackage:# dnf install clevis-luksIdentify the LUKS-encrypted volume for PBD. In the following example, the block device is referred as /dev/sda2:
# lsblk
NAME                                          MAJ:MIN RM   SIZE RO TYPE  MOUNTPOINT
sda                                             8:0    0    12G  0 disk
├─sda1                                          8:1    0     1G  0 part  /boot
└─sda2                                          8:2    0    11G  0 part
  └─luks-40e20552-2ade-4954-9d56-565aa7994fb6 253:0    0    11G  0 crypt
    ├─rhel-root                               253:0    0   9.8G  0 lvm   /
    └─rhel-swap                               253:1    0   1.2G  0 lvm   [SWAP]
Bind the volume to a TPM 2.0 device using the
clevis luks bindcommand, for example:# clevis luks bind -d /dev/sda2 tpm2 '{"hash":"sha256","key":"rsa"}' ... Do you wish to initialize /dev/sda2? [yn] y Enter existing LUKS password:This command performs four steps:
- Creates a new key with the same entropy as the LUKS master key.
- Encrypts the new key with Clevis.
- Stores the Clevis JWE object in the LUKS2 header token or uses LUKSMeta if the non-default LUKS1 header is used.
Enables the new key for use with LUKS.
NoteThe binding procedure assumes that there is at least one free LUKS password slot. The
clevis luks bindcommand takes one of the slots.Alternatively, if you want to seal data to specific Platform Configuration Registers (PCR) states, add the
pcr_bankandpcr_idsvalues to theclevis luks bindcommand, for example:# clevis luks bind -d /dev/sda2 tpm2 '{"hash":"sha256","key":"rsa","pcr_bank":"sha256","pcr_ids":"0,1"}'AvertissementBecause the data can only be unsealed if PCR hashes values match the policy used when sealing and the hashes can be rewritten, add a strong passphrase that enable you to unlock the encrypted volume manually when a value in a PCR changes.
If the system cannot automatically unlock your encrypted volume after an upgrade of the
shim-x64package, follow the steps in the Clevis TPM2 no longer decrypts LUKS devices after a restart KCS article.
- The volume can now be unlocked with your existing password as well as with the Clevis policy.
To enable the early boot system to process the disk binding, use the
dracuttool on an already installed system:# dnf install clevis-dracut # dracut -fv --regenerate-all
Vérification
To verify that the Clevis JWE object is successfully placed in a LUKS header, use the
clevis luks listcommand:# clevis luks list -d /dev/sda2 1: tpm2 '{"hash":"sha256","key":"rsa"}'
Ressources supplémentaires
-
clevis-luks-bind(1),clevis-encrypt-tpm2(1), anddracut.cmdline(7)man pages
11.9. Removing a Clevis pin from a LUKS-encrypted volume manually
Use the following procedure for manual removing the metadata created by the clevis luks bind command and also for wiping a key slot that contains passphrase added by Clevis.
The recommended way to remove a Clevis pin from a LUKS-encrypted volume is through the clevis luks unbind command. The removal procedure using clevis luks unbind consists of only one step and works for both LUKS1 and LUKS2 volumes. The following example command removes the metadata created by the binding step and wipe the key slot 1 on the /dev/sda2 device:
# clevis luks unbind -d /dev/sda2 -s 1Conditions préalables
- A LUKS-encrypted volume with a Clevis binding.
Procédure
Check which LUKS version the volume, for example /dev/sda2, is encrypted by and identify a slot and a token that is bound to Clevis:
# cryptsetup luksDump /dev/sda2
LUKS header information
Version:        2
...
Keyslots:
  0: luks2
...
1: luks2
      Key:        512 bits
      Priority:   normal
      Cipher:     aes-xts-plain64
...
      Tokens:
        0: clevis
              Keyslot:  1
...
In the previous example, the Clevis token is identified by 0 and the associated key slot is 1.
In case of LUKS2 encryption, remove the token:
# cryptsetup token remove --token-id 0 /dev/sda2If your device is encrypted by LUKS1, which is indicated by the
Version: 1string in the output of thecryptsetup luksDumpcommand, perform this additional step with theluksmeta wipecommand:# luksmeta wipe -d /dev/sda2 -s 1Wipe the key slot containing the Clevis passphrase:
# cryptsetup luksKillSlot /dev/sda2 1
Ressources supplémentaires
-
clevis-luks-unbind(1),cryptsetup(8), andluksmeta(8)man pages
11.10. Configuring automated enrollment of LUKS-encrypted volumes using Kickstart
Follow the steps in this procedure to configure an automated installation process that uses Clevis for the enrollment of LUKS-encrypted volumes.
Procédure
Instruct Kickstart to partition the disk such that LUKS encryption has enabled for all mount points, other than
/boot, with a temporary password. The password is temporary for this step of the enrollment process.part /boot --fstype="xfs" --ondisk=vda --size=256 part / --fstype="xfs" --ondisk=vda --grow --encrypted --passphrase=temppass
Note that OSPP-compliant systems require a more complex configuration, for example:
part /boot --fstype="xfs" --ondisk=vda --size=256
part / --fstype="xfs" --ondisk=vda --size=2048 --encrypted --passphrase=temppass
part /var --fstype="xfs" --ondisk=vda --size=1024 --encrypted --passphrase=temppass
part /tmp --fstype="xfs" --ondisk=vda --size=1024 --encrypted --passphrase=temppass
part /home --fstype="xfs" --ondisk=vda --size=2048 --grow --encrypted --passphrase=temppass
part /var/log --fstype="xfs" --ondisk=vda --size=1024 --encrypted --passphrase=temppass
part /var/log/audit --fstype="xfs" --ondisk=vda --size=1024 --encrypted --passphrase=temppass
Install the related Clevis packages by listing them in the
%packagessection:%packages clevis-dracut clevis-luks clevis-systemd %end
- Optionally, to ensure that you can unlock the encrypted volume manually when required, add a strong passphrase before you remove the temporary passphrase. See the How to add a passphrase, key, or keyfile to an existing LUKS device article for more information.
Call
clevis luks bindto perform binding in the%postsection. Afterward, remove the temporary password:%post clevis luks bind -y -k - -d /dev/vda2 \ tang '{"url":"http://tang.srv"}' <<< "temppass" cryptsetup luksRemoveKey /dev/vda2 <<< "temppass" dracut -fv --regenerate-all %endIf your configuration relies on a Tang pin that requires network during early boot or you use NBDE clients with static IP configurations, you have to modify the
dracutcommand as described in Configuring manual enrollment of LUKS-encrypted volumes.Note that the
-yoption for theclevis luks bindcommand is available from RHEL 8.3. In RHEL 8.2 and older, replace-yby-fin theclevis luks bindcommand and download the advertisement from the Tang server:%post curl -sfg http://tang.srv/adv -o adv.jws clevis luks bind -f -k - -d /dev/vda2 \ tang '{"url":"http://tang.srv","adv":"adv.jws"}' <<< "temppass" cryptsetup luksRemoveKey /dev/vda2 <<< "temppass" dracut -fv --regenerate-all %endAvertissementThe
cryptsetup luksRemoveKeycommand prevents any further administration of a LUKS2 device on which you apply it. You can recover a removed master key using thedmsetupcommand only for LUKS1 devices.
You can use an analogous procedure when using a TPM 2.0 policy instead of a Tang server.
Ressources supplémentaires
-
clevis(1),clevis-luks-bind(1),cryptsetup(8), anddmsetup(8)man pages - Installing Red Hat Enterprise Linux 9 using Kickstart
11.11. Configuring automated unlocking of a LUKS-encrypted removable storage device
Use this procedure to set up an automated unlocking process of a LUKS-encrypted USB storage device.
Procédure
To automatically unlock a LUKS-encrypted removable storage device, such as a USB drive, install the
clevis-udisks2package:# dnf install clevis-udisks2Reboot the system, and then perform the binding step using the
clevis luks bindcommand as described in Configuring manual enrollment of LUKS-encrypted volumes, for example:# clevis luks bind -d /dev/sdb1 tang '{"url":"http://tang.srv"}'The LUKS-encrypted removable device can be now unlocked automatically in your GNOME desktop session. The device bound to a Clevis policy can be also unlocked by the
clevis luks unlockcommand:# clevis luks unlock -d /dev/sdb1
You can use an analogous procedure when using a TPM 2.0 policy instead of a Tang server.
Ressources supplémentaires
-
clevis-luks-unlockers(7)man page
11.12. Deploying high-availability NBDE systems
Tang provides two methods for building a high-availability deployment:
- Client redundancy (recommended)
-
Clients should be configured with the ability to bind to multiple Tang servers. In this setup, each Tang server has its own keys and clients can decrypt by contacting a subset of these servers. Clevis already supports this workflow through its
sssplug-in. Red Hat recommends this method for a high-availability deployment. - Key sharing
-
For redundancy purposes, more than one instance of Tang can be deployed. To set up a second or any subsequent instance, install the
tangpackages and copy the key directory to the new host usingrsyncoverSSH. Note that Red Hat does not recommend this method because sharing keys increases the risk of key compromise and requires additional automation infrastructure.
11.12.1. High-available NBDE using Shamir’s Secret Sharing
Shamir’s Secret Sharing (SSS) is a cryptographic scheme that divides a secret into several unique parts. To reconstruct the secret, a number of parts is required. The number is called threshold and SSS is also referred to as a thresholding scheme.
Clevis provides an implementation of SSS. It creates a key and divides it into a number of pieces. Each piece is encrypted using another pin including even SSS recursively. Additionally, you define the threshold t. If an NBDE deployment decrypts at least t pieces, then it recovers the encryption key and the decryption process succeeds. When Clevis detects a smaller number of parts than specified in the threshold, it prints an error message.
11.12.1.1. Example 1: Redundancy with two Tang servers
The following command decrypts a LUKS-encrypted device when at least one of two Tang servers is available:
# clevis luks bind -d /dev/sda1 sss '{"t":1,"pins":{"tang":[{"url":"http://tang1.srv"},{"url":"http://tang2.srv"}]}}'The previous command used the following configuration scheme:
{
    "t":1,
    "pins":{
        "tang":[
            {
                "url":"http://tang1.srv"
            },
            {
                "url":"http://tang2.srv"
            }
        ]
    }
}
In this configuration, the SSS threshold t is set to 1 and the clevis luks bind command successfully reconstructs the secret if at least one from two listed tang servers is available.
11.13. Deployment of virtual machines in a NBDE network
The clevis luks bind command does not change the LUKS master key. This implies that if you create a LUKS-encrypted image for use in a virtual machine or cloud environment, all the instances that run this image share a master key. This is extremely insecure and should be avoided at all times.
This is not a limitation of Clevis but a design principle of LUKS. If your scenario requires having encrypted root volumes in a cloud, perform the installation process (usually using Kickstart) for each instance of Red Hat Enterprise Linux in the cloud as well. The images cannot be shared without also sharing a LUKS master key.
To deploy automated unlocking in a virtualized environment, use systems such as lorax or virt-install together with a Kickstart file (see Configuring automated enrollment of LUKS-encrypted volumes using Kickstart) or another automated provisioning tool to ensure that each encrypted VM has a unique master key.
Ressources supplémentaires
-
clevis-luks-bind(1)man page
11.14. Building automatically-enrollable VM images for cloud environments using NBDE
Deploying automatically-enrollable encrypted images in a cloud environment can provide a unique set of challenges. Like other virtualization environments, it is recommended to reduce the number of instances started from a single image to avoid sharing the LUKS master key.
Therefore, the best practice is to create customized images that are not shared in any public repository and that provide a base for the deployment of a limited amount of instances. The exact number of instances to create should be defined by deployment’s security policies and based on the risk tolerance associated with the LUKS master key attack vector.
To build LUKS-enabled automated deployments, systems such as Lorax or virt-install together with a Kickstart file should be used to ensure master key uniqueness during the image building process.
Cloud environments enable two Tang server deployment options which we consider here. First, the Tang server can be deployed within the cloud environment itself. Second, the Tang server can be deployed outside of the cloud on independent infrastructure with a VPN link between the two infrastructures.
Deploying Tang natively in the cloud does allow for easy deployment. However, given that it shares infrastructure with the data persistence layer of ciphertext of other systems, it may be possible for both the Tang server’s private key and the Clevis metadata to be stored on the same physical disk. Access to this physical disk permits a full compromise of the ciphertext data.
For this reason, Red Hat strongly recommends maintaining a physical separation between the location where the data is stored and the system where Tang is running. This separation between the cloud and the Tang server ensures that the Tang server’s private key cannot be accidentally combined with the Clevis metadata. It also provides local control of the Tang server if the cloud infrastructure is at risk.
11.15. Deploying Tang as a container
The tang container image provides Tang-server decryption capabilities for Clevis clients that run either in OpenShift Container Platform (OCP) clusters or in separate virtual machines.
Conditions préalables
-
The
podmanpackage and its dependencies are installed on the system. -
You have logged in on the
registry.redhat.iocontainer catalog using thepodman login registry.redhat.iocommand. See Red Hat Container Registry Authentication for more information. - The Clevis client is installed on systems containing LUKS-encrypted volumes that you want to automatically unlock by using a Tang server.
Procédure
Pull the
tangcontainer image from theregistry.redhat.ioregistry:# podman pull registry.redhat.io/rhel9/tangRun the container, specify its port, and specify the path to the Tang keys. The previous example runs the
tangcontainer, specifies the port 7500, and indicates a path to the Tang keys of the/var/db/tangdirectory:# podman run -d -p 7500:7500 -v tang-keys:/var/db/tang --name tang registry.redhat.io/rhel9/tangNote that Tang uses port 80 by default but this may collide with other services such as the Apache HTTP server.
[Optional] For increased security, rotate the Tang keys periodically. You can use the
tangd-rotate-keysscript, for example:# podman run --rm -v tang-keys:/var/db/tang registry.redhat.io/rhel9/tang tangd-rotate-keys -v -d /var/db/tang Rotated key 'rZAMKAseaXBe0rcKXL1hCCIq-DY.jwk' -> .'rZAMKAseaXBe0rcKXL1hCCIq-DY.jwk' Rotated key 'x1AIpc6WmnCU-CabD8_4q18vDuw.jwk' -> .'x1AIpc6WmnCU-CabD8_4q18vDuw.jwk' Created new key GrMMX_WfdqomIU_4RyjpcdlXb0E.jwk Created new key _dTTfn17sZZqVAp80u3ygFDHtjk.jwk Keys rotated successfully.
Vérification
On a system that contains LUKS-encrypted volumes for automated unlocking by the presence of the Tang server, check that the Clevis client can encrypt and decrypt a plain-text message using Tang:
# echo test | clevis encrypt tang '{"url":"http://localhost:7500"}' | clevis decrypt
The advertisement contains the following signing keys:

x1AIpc6WmnCU-CabD8_4q18vDuw

Do you wish to trust these keys? [ynYN] y
test
The previous example command shows the
teststring at the end of its output when a Tang server is available on the localhost URL and communicates through port 7500.
Ressources supplémentaires
-
podman(1),clevis(1), andtang(8)man pages
11.16. Introduction aux rôles des systèmes nbde_client et nbde_server (Clevis et Tang)
RHEL System Roles est une collection de rôles et de modules Ansible qui fournissent une interface de configuration cohérente pour gérer à distance plusieurs systèmes RHEL.
Vous pouvez utiliser les rôles Ansible pour les déploiements automatisés de solutions de décryptage basé sur des politiques (PBD) à l'aide de Clevis et Tang. Le paquetage rhel-system-roles contient ces rôles système, les exemples associés ainsi que la documentation de référence.
Le rôle de système nbde_client vous permet de déployer plusieurs clients Clevis de manière automatisée. Notez que le rôle nbde_client ne prend en charge que les liaisons Tang, et que vous ne pouvez pas l'utiliser pour les liaisons TPM2 pour le moment.
Le rôle nbde_client nécessite des volumes qui sont déjà chiffrés à l'aide de LUKS. Ce rôle permet de lier un volume chiffré à l'aide de LUKS à un ou plusieurs serveurs liés au réseau (NBDE) - serveurs Tang. Vous pouvez soit préserver le chiffrement existant du volume à l'aide d'une phrase d'authentification, soit le supprimer. Après avoir supprimé la phrase d'authentification, vous pouvez déverrouiller le volume uniquement à l'aide de l'EDNB. Cette option est utile lorsqu'un volume est initialement crypté à l'aide d'une clé ou d'un mot de passe temporaire que vous devez supprimer après avoir approvisionné le système.
Si vous fournissez à la fois une phrase d'authentification et un fichier clé, le rôle utilise d'abord ce que vous avez fourni. S'il ne trouve aucun fichier valide, il tente de récupérer une phrase d'authentification à partir d'une liaison existante.
La PBD définit une liaison comme une correspondance entre un appareil et un emplacement. Cela signifie que vous pouvez avoir plusieurs liaisons pour le même appareil. L'emplacement par défaut est l'emplacement 1.
Le rôle nbde_client fournit également la variable state. Utilisez la valeur present pour créer une nouvelle liaison ou mettre à jour une liaison existante. Contrairement à la commande clevis luks bind, vous pouvez également utiliser state: present pour écraser une liaison existante dans son emplacement. La valeur absent supprime une liaison spécifiée.
Le rôle de système nbde_client vous permet de déployer et de gérer un serveur Tang dans le cadre d'une solution de chiffrement de disque automatisée. Ce rôle prend en charge les fonctionnalités suivantes :
- Touches Tang rotatives
- Déploiement et sauvegarde des clés Tang
Ressources supplémentaires
-
Pour une référence détaillée sur les variables de rôle NBDE (Network-Bound Disk Encryption), installez le paquetage
rhel-system-roleset consultez les fichiersREADME.mdetREADME.htmldans les répertoires/usr/share/doc/rhel-system-roles/nbde_client/et/usr/share/doc/rhel-system-roles/nbde_server/. -
Par exemple, les playbooks system-roles, installez le paquetage
rhel-system-roleset consultez les répertoires/usr/share/ansible/roles/rhel-system-roles.nbde_server/examples/. - For more information about RHEL System Roles, see Preparing a control node and managed nodes to use RHEL System Roles.
11.17. Utilisation du rôle de système nbde_server pour configurer plusieurs serveurs Tang
Suivez les étapes pour préparer et appliquer un playbook Ansible contenant les paramètres de votre serveur Tang.
Conditions préalables
-
Accès et autorisations à un ou plusieurs managed nodes, qui sont des systèmes que vous souhaitez configurer avec le rôle de système
nbde_server. Accès et autorisations à un nœud de contrôle, qui est un système à partir duquel Red Hat Ansible Core configure d'autres systèmes.
Sur le nœud de contrôle :
-
Les paquets
ansible-coreetrhel-system-rolessont installés.
-
Les paquets
RHEL 8.0-8.5 provided access to a separate Ansible repository that contains Ansible Engine 2.9 for automation based on Ansible. Ansible Engine contains command-line utilities such as ansible, ansible-playbook, connectors such as docker and podman, and many plugins and modules. For information about how to obtain and install Ansible Engine, see the How to download and install Red Hat Ansible Engine Knowledgebase article.
RHEL 8.6 et 9.0 ont introduit Ansible Core (fourni en tant que paquetage ansible-core ), qui contient les utilitaires de ligne de commande Ansible, les commandes et un petit ensemble de plugins Ansible intégrés. RHEL fournit ce paquetage par l'intermédiaire du dépôt AppStream, et sa prise en charge est limitée. Pour plus d'informations, consultez l'article de la base de connaissances intitulé Scope of support for the Ansible Core package included in the RHEL 9 and RHEL 8.6 and later AppStream repositories (Portée de la prise en charge du package Ansible Core inclus dans les dépôts AppStream RHEL 9 et RHEL 8.6 et versions ultérieures ).
- Un fichier d'inventaire qui répertorie les nœuds gérés.
Procédure
Préparez votre playbook contenant les paramètres des serveurs Tang. Vous pouvez partir de zéro ou utiliser l'un des playbooks d'exemple du répertoire
/usr/share/ansible/roles/rhel-system-roles.nbde_server/examples/.# cp /usr/share/ansible/roles/rhel-system-roles.nbde_server/examples/simple_deploy.yml ./my-tang-playbook.ymlModifiez le playbook dans un éditeur de texte de votre choix, par exemple :
# vi my-tang-playbook.ymlAjoutez les paramètres requis. L'exemple de playbook suivant assure le déploiement de votre serveur Tang et une rotation des clés :
--- - hosts: all vars: nbde_server_rotate_keys: yes nbde_server_manage_firewall: true nbde_server_manage_selinux: true roles: - rhel-system-roles.nbde_serverNotePuisque
nbde_server_manage_firewalletnbde_server_manage_selinuxsont tous deux définis sur true, le rôlenbde_serverutilisera les rôlesfirewalletselinuxpour gérer les ports utilisés par le rôlenbde_server.Appliquer le manuel de jeu terminé :
# ansible-playbook -i inventory-file my-tang-playbook.ymlWhere: *
inventory-fileis the inventory file. *logging-playbook.ymlis the playbook you use.
Pour s'assurer que la mise en réseau d'une broche Tang est disponible lors du démarrage anticipé, utilisez l'outil grubby sur les systèmes où Clevis est installé :
# grubby --update-kernel=ALL --args="rd.neednet=1"Ressources supplémentaires
-
Pour plus d'informations, installez le paquetage
rhel-system-roleset consultez les répertoires/usr/share/doc/rhel-system-roles/nbde_server/etusr/share/ansible/roles/rhel-system-roles.nbde_server/.
11.18. Utilisation du rôle de système nbde_client pour configurer plusieurs clients Clevis
Suivez les étapes pour préparer et appliquer un playbook Ansible contenant les paramètres de votre client Clevis.
Le rôle de système nbde_client ne prend en charge que les liaisons Tang. Cela signifie que vous ne pouvez pas l'utiliser pour les liaisons TPM2 pour le moment.
Conditions préalables
-
Accès et autorisations à un ou plusieurs managed nodes, qui sont des systèmes que vous souhaitez configurer avec le rôle de système
nbde_client. - Accès et permissions à un control node, qui est un système à partir duquel Red Hat Ansible Core configure d'autres systèmes.
- Le paquetage Ansible Core est installé sur la machine de contrôle.
-
Le paquetage
rhel-system-rolesest installé sur le système à partir duquel vous souhaitez exécuter le guide de lecture.
Procédure
Préparez votre playbook contenant les paramètres pour les clients Clevis. Vous pouvez partir de zéro ou utiliser l'un des playbooks d'exemple du répertoire
/usr/share/ansible/roles/rhel-system-roles.nbde_client/examples/.# cp /usr/share/ansible/roles/rhel-system-roles.nbde_client/examples/high_availability.yml ./my-clevis-playbook.ymlModifiez le playbook dans un éditeur de texte de votre choix, par exemple :
# vi my-clevis-playbook.ymlAjoutez les paramètres requis. L'exemple suivant configure les clients Clevis pour le déverrouillage automatique de deux volumes cryptés LUKS lorsqu'au moins l'un des deux serveurs Tang est disponible :
---
- hosts: all

  vars:
    nbde_client_bindings:
      - device: /dev/rhel/root
        encryption_key_src: /etc/luks/keyfile
        servers:
          - http://server1.example.com
          - http://server2.example.com
      - device: /dev/rhel/swap
        encryption_key_src: /etc/luks/keyfile
        servers:
          - http://server1.example.com
          - http://server2.example.com

  roles:
    - rhel-system-roles.nbde_client
Appliquer le manuel de jeu terminé :
# ansible-playbook -i host1,host2,host3 my-clevis-playbook.yml
Pour s'assurer que la mise en réseau d'une broche Tang est disponible lors du démarrage anticipé, utilisez l'outil grubby sur le système où Clevis est installé :
# grubby --update-kernel=ALL --args="rd.neednet=1"Ressources supplémentaires
-
Pour plus de détails sur les paramètres et des informations supplémentaires sur le rôle du système client NBDE, installez le paquetage
rhel-system-roleset consultez les répertoires/usr/share/doc/rhel-system-roles/nbde_client/et/usr/share/ansible/roles/rhel-system-roles.nbde_client/.
Chapitre 12. Auditing the system
Audit does not provide additional security to your system; rather, it can be used to discover violations of security policies used on your system. These violations can further be prevented by additional security measures such as SELinux.
12.1. Linux Audit
The Linux Audit system provides a way to track security-relevant information about your system. Based on pre-configured rules, Audit generates log entries to record as much information about the events that are happening on your system as possible. This information is crucial for mission-critical environments to determine the violator of the security policy and the actions they performed.
The following list summarizes some of the information that Audit is capable of recording in its log files:
- Date and time, type, and outcome of an event.
- Sensitivity labels of subjects and objects.
- Association of an event with the identity of the user who triggered the event.
- All modifications to Audit configuration and attempts to access Audit log files.
- All uses of authentication mechanisms, such as SSH, Kerberos, and others.
-
Changes to any trusted database, such as
/etc/passwd. - Attempts to import or export information into or from the system.
- Include or exclude events based on user identity, subject and object labels, and other attributes.
The use of the Audit system is also a requirement for a number of security-related certifications. Audit is designed to meet or exceed the requirements of the following certifications or compliance guides:
- Controlled Access Protection Profile (CAPP)
- Labeled Security Protection Profile (LSPP)
- Rule Set Base Access Control (RSBAC)
- National Industrial Security Program Operating Manual (NISPOM)
- Federal Information Security Management Act (FISMA)
- Payment Card Industry — Data Security Standard (PCI-DSS)
- Security Technical Implementation Guides (STIG)
Audit has also been:
- Evaluated by National Information Assurance Partnership (NIAP) and Best Security Industries (BSI).
- Certified to LSPP/CAPP/RSBAC/EAL4+ on Red Hat Enterprise Linux 5.
- Certified to Operating System Protection Profile / Evaluation Assurance Level 4+ (OSPP/EAL4+) on Red Hat Enterprise Linux 6.
Use Cases
- Watching file access
- Audit can track whether a file or a directory has been accessed, modified, executed, or the file’s attributes have been changed. This is useful, for example, to detect access to important files and have an Audit trail available in case one of these files is corrupted.
- Monitoring system calls
-
Audit can be configured to generate a log entry every time a particular system call is used. This can be used, for example, to track changes to the system time by monitoring the
settimeofday,clock_adjtime, and other time-related system calls. - Recording commands run by a user
-
Audit can track whether a file has been executed, so rules can be defined to record every execution of a particular command. For example, a rule can be defined for every executable in the
/bindirectory. The resulting log entries can then be searched by user ID to generate an audit trail of executed commands per user. - Recording execution of system pathnames
- Aside from watching file access which translates a path to an inode at rule invocation, Audit can now watch the execution of a path even if it does not exist at rule invocation, or if the file is replaced after rule invocation. This allows rules to continue to work after upgrading a program executable or before it is even installed.
- Recording security events
-
The
pam_faillockauthentication module is capable of recording failed login attempts. Audit can be set up to record failed login attempts as well and provides additional information about the user who attempted to log in. - Searching for events
-
Audit provides the
ausearchutility, which can be used to filter the log entries and provide a complete audit trail based on several conditions. - Running summary reports
-
The
aureportutility can be used to generate, among other things, daily reports of recorded events. A system administrator can then analyze these reports and investigate suspicious activity further. - Monitoring network access
-
The
nftables,iptables, andebtablesutilities can be configured to trigger Audit events, allowing system administrators to monitor network access.
System performance may be affected depending on the amount of information that is collected by Audit.
12.2. Audit system architecture
The Audit system consists of two main parts: the user-space applications and utilities, and the kernel-side system call processing. The kernel component receives system calls from user-space applications and filters them through one of the following filters: user, task, fstype, or exit.
Once a system call passes the exclude filter, it is sent through one of the aforementioned filters, which, based on the Audit rule configuration, sends it to the Audit daemon for further processing.
The user-space Audit daemon collects the information from the kernel and creates entries in a log file. Other Audit user-space utilities interact with the Audit daemon, the kernel Audit component, or the Audit log files:
-
auditctl— the Audit control utility interacts with the kernel Audit component to manage rules and to control many settings and parameters of the event generation process. -
The remaining Audit utilities take the contents of the Audit log files as input and generate output based on user’s requirements. For example, the
aureportutility generates a report of all recorded events.
In RHEL 9, the Audit dispatcher daemon (audisp) functionality is integrated in the Audit daemon (auditd). Configuration files of plugins for the interaction of real-time analytical programs with Audit events are located in the /etc/audit/plugins.d/ directory by default.
12.3. Configuring auditd for a secure environment
The default auditd configuration should be suitable for most environments. However, if your environment must meet strict security policies, the following settings are suggested for the Audit daemon configuration in the /etc/audit/auditd.conf file:
- log_file
-
The directory that holds the Audit log files (usually
/var/log/audit/) should reside on a separate mount point. This prevents other processes from consuming space in this directory and provides accurate detection of the remaining space for the Audit daemon. - max_log_file
-
Specifies the maximum size of a single Audit log file, must be set to make full use of the available space on the partition that holds the Audit log files. The
max_log_file`parameter specifies the maximum file size in megabytes. The value given must be numeric. - max_log_file_action
-
Decides what action is taken once the limit set in
max_log_fileis reached, should be set tokeep_logsto prevent Audit log files from being overwritten. - space_left
-
Specifies the amount of free space left on the disk for which an action that is set in the
space_left_actionparameter is triggered. Must be set to a number that gives the administrator enough time to respond and free up disk space. Thespace_leftvalue depends on the rate at which the Audit log files are generated. If the value of space_left is specified as a whole number, it is interpreted as an absolute size in megabytes (MiB). If the value is specified as a number between 1 and 99 followed by a percentage sign (for example, 5%), the Audit daemon calculates the absolute size in megabytes based on the size of the file system containinglog_file. - space_left_action
-
It is recommended to set the
space_left_actionparameter toemailorexecwith an appropriate notification method. - admin_space_left
-
Specifies the absolute minimum amount of free space for which an action that is set in the
admin_space_left_actionparameter is triggered, must be set to a value that leaves enough space to log actions performed by the administrator. The numeric value for this parameter should be lower than the number for space_left. You can also append a percent sign (for example, 1%) to the number to have the audit daemon calculate the number based on the disk partition size. - admin_space_left_action
-
Should be set to
singleto put the system into single-user mode and allow the administrator to free up some disk space. - disk_full_action
-
Specifies an action that is triggered when no free space is available on the partition that holds the Audit log files, must be set to
haltorsingle. This ensures that the system is either shut down or operating in single-user mode when Audit can no longer log events. - disk_error_action
-
Specifies an action that is triggered in case an error is detected on the partition that holds the Audit log files, must be set to
syslog,single, orhalt, depending on your local security policies regarding the handling of hardware malfunctions. - flush
-
Should be set to
incremental_async. It works in combination with thefreqparameter, which determines how many records can be sent to the disk before forcing a hard synchronization with the hard drive. Thefreqparameter should be set to100. These parameters assure that Audit event data is synchronized with the log files on the disk while keeping good performance for bursts of activity.
The remaining configuration options should be set according to your local security policy.
12.4. Starting and controlling auditd
After auditd is configured, start the service to collect Audit information and store it in the log files. Use the following command as the root user to start auditd:
# service auditd start
To configure auditd to start at boot time:
# systemctl enable auditd
You can temporarily disable auditd with the # auditctl -e 0 command and re-enable it with # auditctl -e 1.
A number of other actions can be performed on auditd using the service auditd action command, where action can be one of the following:
stop-
Stops
auditd. restart-
Restarts
auditd. reloadorforce-reload-
Reloads the configuration of
auditdfrom the/etc/audit/auditd.conffile. rotate-
Rotates the log files in the
/var/log/audit/directory. resume- Resumes logging of Audit events after it has been previously suspended, for example, when there is not enough free space on the disk partition that holds the Audit log files.
condrestartortry-restart-
Restarts
auditdonly if it is already running. status-
Displays the running status of
auditd.
The service command is the only way to correctly interact with the auditd daemon. You need to use the service command so that the auid value is properly recorded. You can use the systemctl command only for two actions: enable and status.
12.5. Understanding Audit log files
By default, the Audit system stores log entries in the /var/log/audit/audit.log file; if log rotation is enabled, rotated audit.log files are stored in the same directory.
Add the following Audit rule to log every attempt to read or modify the /etc/ssh/sshd_config file:
# auditctl -w /etc/ssh/sshd_config -p warx -k sshd_config
If the auditd daemon is running, for example, using the following command creates a new event in the Audit log file:
$ cat /etc/ssh/sshd_config
This event in the audit.log file looks as follows:
type=SYSCALL msg=audit(1364481363.243:24287): arch=c000003e syscall=2 success=no exit=-13 a0=7fffd19c5592 a1=0 a2=7fffd19c4b50 a3=a items=1 ppid=2686 pid=3538 auid=1000 uid=1000 gid=1000 euid=1000 suid=1000 fsuid=1000 egid=1000 sgid=1000 fsgid=1000 tty=pts0 ses=1 comm="cat" exe="/bin/cat" subj=unconfined_u:unconfined_r:unconfined_t:s0-s0:c0.c1023 key="sshd_config"
type=CWD msg=audit(1364481363.243:24287):  cwd="/home/shadowman"
type=PATH msg=audit(1364481363.243:24287): item=0 name="/etc/ssh/sshd_config" inode=409248 dev=fd:00 mode=0100600 ouid=0 ogid=0 rdev=00:00 obj=system_u:object_r:etc_t:s0  nametype=NORMAL cap_fp=none cap_fi=none cap_fe=0 cap_fver=0
type=PROCTITLE msg=audit(1364481363.243:24287) : proctitle=636174002F6574632F7373682F737368645F636F6E666967
The above event consists of four records, which share the same time stamp and serial number. Records always start with the type= keyword. Each record consists of several name=value pairs separated by a white space or a comma. A detailed analysis of the above event follows:
First Record
type=SYSCALL-
The
typefield contains the type of the record. In this example, theSYSCALLvalue specifies that this record was triggered by a system call to the kernel.
msg=audit(1364481363.243:24287):The
msgfield records:-
a time stamp and a unique ID of the record in the form
audit(time_stamp:ID). Multiple records can share the same time stamp and ID if they were generated as part of the same Audit event. The time stamp is using the Unix time format - seconds since 00:00:00 UTC on 1 January 1970. -
various event-specific
name=valuepairs provided by the kernel or user-space applications.
-
a time stamp and a unique ID of the record in the form
arch=c000003e-
The
archfield contains information about the CPU architecture of the system. The value,c000003e, is encoded in hexadecimal notation. When searching Audit records with theausearchcommand, use the-ior--interpretoption to automatically convert hexadecimal values into their human-readable equivalents. Thec000003evalue is interpreted asx86_64. syscall=2-
The
syscallfield records the type of the system call that was sent to the kernel. The value,2, can be matched with its human-readable equivalent in the/usr/include/asm/unistd_64.hfile. In this case,2is theopensystem call. Note that theausyscallutility allows you to convert system call numbers to their human-readable equivalents. Use theausyscall --dumpcommand to display a listing of all system calls along with their numbers. For more information, see theausyscall(8) man page. success=no-
The
successfield records whether the system call recorded in that particular event succeeded or failed. In this case, the call did not succeed. exit=-13The
exitfield contains a value that specifies the exit code returned by the system call. This value varies for a different system call. You can interpret the value to its human-readable equivalent with the following command:# ausearch --interpret --exit -13Note that the previous example assumes that your Audit log contains an event that failed with exit code
-13.a0=7fffd19c5592,a1=0,a2=7fffd19c5592,a3=a-
The
a0toa3fields record the first four arguments, encoded in hexadecimal notation, of the system call in this event. These arguments depend on the system call that is used; they can be interpreted by theausearchutility. items=1-
The
itemsfield contains the number of PATH auxiliary records that follow the syscall record. ppid=2686-
The
ppidfield records the Parent Process ID (PPID). In this case,2686was the PPID of the parent process such asbash. pid=3538-
The
pidfield records the Process ID (PID). In this case,3538was the PID of thecatprocess. auid=1000-
The
auidfield records the Audit user ID, that is the loginuid. This ID is assigned to a user upon login and is inherited by every process even when the user’s identity changes, for example, by switching user accounts with thesu - johncommand. uid=1000-
The
uidfield records the user ID of the user who started the analyzed process. The user ID can be interpreted into user names with the following command:ausearch -i --uid UID. gid=1000-
The
gidfield records the group ID of the user who started the analyzed process. euid=1000-
The
euidfield records the effective user ID of the user who started the analyzed process. suid=1000-
The
suidfield records the set user ID of the user who started the analyzed process. fsuid=1000-
The
fsuidfield records the file system user ID of the user who started the analyzed process. egid=1000-
The
egidfield records the effective group ID of the user who started the analyzed process. sgid=1000-
The
sgidfield records the set group ID of the user who started the analyzed process. fsgid=1000-
The
fsgidfield records the file system group ID of the user who started the analyzed process. tty=pts0-
The
ttyfield records the terminal from which the analyzed process was invoked. ses=1-
The
sesfield records the session ID of the session from which the analyzed process was invoked. comm="cat"-
The
commfield records the command-line name of the command that was used to invoke the analyzed process. In this case, thecatcommand was used to trigger this Audit event. exe="/bin/cat"-
The
exefield records the path to the executable that was used to invoke the analyzed process. subj=unconfined_u:unconfined_r:unconfined_t:s0-s0:c0.c1023-
The
subjfield records the SELinux context with which the analyzed process was labeled at the time of execution. key="sshd_config"-
The
keyfield records the administrator-defined string associated with the rule that generated this event in the Audit log.
Second Record
type=CWDIn the second record, the
typefield value isCWD— current working directory. This type is used to record the working directory from which the process that invoked the system call specified in the first record was executed.The purpose of this record is to record the current process’s location in case a relative path winds up being captured in the associated PATH record. This way the absolute path can be reconstructed.
msg=audit(1364481363.243:24287)-
The
msgfield holds the same time stamp and ID value as the value in the first record. The time stamp is using the Unix time format - seconds since 00:00:00 UTC on 1 January 1970. cwd="/home/user_name"-
The
cwdfield contains the path to the directory in which the system call was invoked.
Third Record
type=PATH-
In the third record, the
typefield value isPATH. An Audit event contains aPATH-type record for every path that is passed to the system call as an argument. In this Audit event, only one path (/etc/ssh/sshd_config) was used as an argument. msg=audit(1364481363.243:24287):-
The
msgfield holds the same time stamp and ID value as the value in the first and second record. item=0-
The
itemfield indicates which item, of the total number of items referenced in theSYSCALLtype record, the current record is. This number is zero-based; a value of0means it is the first item. name="/etc/ssh/sshd_config"-
The
namefield records the path of the file or directory that was passed to the system call as an argument. In this case, it was the/etc/ssh/sshd_configfile. inode=409248The
inodefield contains the inode number associated with the file or directory recorded in this event. The following command displays the file or directory that is associated with the409248inode number:# find / -inum 409248 -print /etc/ssh/sshd_configdev=fd:00-
The
devfield specifies the minor and major ID of the device that contains the file or directory recorded in this event. In this case, the value represents the/dev/fd/0device. mode=0100600-
The
modefield records the file or directory permissions, encoded in numerical notation as returned by thestatcommand in thest_modefield. See thestat(2)man page for more information. In this case,0100600can be interpreted as-rw-------, meaning that only the root user has read and write permissions to the/etc/ssh/sshd_configfile. ouid=0-
The
ouidfield records the object owner’s user ID. ogid=0-
The
ogidfield records the object owner’s group ID. rdev=00:00-
The
rdevfield contains a recorded device identifier for special files only. In this case, it is not used as the recorded file is a regular file. obj=system_u:object_r:etc_t:s0-
The
objfield records the SELinux context with which the recorded file or directory was labeled at the time of execution. nametype=NORMAL-
The
nametypefield records the intent of each path record’s operation in the context of a given syscall. cap_fp=none-
The
cap_fpfield records data related to the setting of a permitted file system-based capability of the file or directory object. cap_fi=none-
The
cap_fifield records data related to the setting of an inherited file system-based capability of the file or directory object. cap_fe=0-
The
cap_fefield records the setting of the effective bit of the file system-based capability of the file or directory object. cap_fver=0-
The
cap_fverfield records the version of the file system-based capability of the file or directory object.
Fourth Record
type=PROCTITLE-
The
typefield contains the type of the record. In this example, thePROCTITLEvalue specifies that this record gives the full command-line that triggered this Audit event, triggered by a system call to the kernel. proctitle=636174002F6574632F7373682F737368645F636F6E666967-
The
proctitlefield records the full command-line of the command that was used to invoke the analyzed process. The field is encoded in hexadecimal notation to not allow the user to influence the Audit log parser. The text decodes to the command that triggered this Audit event. When searching Audit records with theausearchcommand, use the-ior--interpretoption to automatically convert hexadecimal values into their human-readable equivalents. The636174002F6574632F7373682F737368645F636F6E666967value is interpreted ascat /etc/ssh/sshd_config.
12.6. Using auditctl for defining and executing Audit rules
The Audit system operates on a set of rules that define what is captured in the log files. Audit rules can be set either on the command line using the auditctl utility or in the /etc/audit/rules.d/ directory.
The auditctl command enables you to control the basic functionality of the Audit system and to define rules that decide which Audit events are logged.
File-system rules examples
To define a rule that logs all write access to, and every attribute change of, the
/etc/passwdfile:# auditctl -w /etc/passwd -p wa -k passwd_changesTo define a rule that logs all write access to, and every attribute change of, all the files in the
/etc/selinux/directory:# auditctl -w /etc/selinux/ -p wa -k selinux_changes
System-call rules examples
To define a rule that creates a log entry every time the
adjtimexorsettimeofdaysystem calls are used by a program, and the system uses the 64-bit architecture:# auditctl -a always,exit -F arch=b64 -S adjtimex -S settimeofday -k time_changeTo define a rule that creates a log entry every time a file is deleted or renamed by a system user whose ID is 1000 or larger:
# auditctl -a always,exit -S unlink -S unlinkat -S rename -S renameat -F auid>=1000 -F auid!=4294967295 -k deleteNote that the
-F auid!=4294967295option is used to exclude users whose login UID is not set.
Executable-file rules
To define a rule that logs all execution of the /bin/id program, execute the following command:
# auditctl -a always,exit -F exe=/bin/id -F arch=b64 -S execve -k execution_bin_idRessources supplémentaires
-
auditctl(8)man page.
12.7. Defining persistent Audit rules
To define Audit rules that are persistent across reboots, you must either directly include them in the /etc/audit/rules.d/audit.rules file or use the augenrules program that reads rules located in the /etc/audit/rules.d/ directory.
Note that the /etc/audit/audit.rules file is generated whenever the auditd service starts. Files in /etc/audit/rules.d/ use the same auditctl command-line syntax to specify the rules. Empty lines and text following a hash sign (#) are ignored.
Furthermore, you can use the auditctl command to read rules from a specified file using the -R option, for example:
# auditctl -R /usr/share/audit/sample-rules/30-stig.rules12.8. Using pre-configured rules files
In the /usr/share/audit/sample-rules directory, the audit package provides a set of pre-configured rules files according to various certification standards:
- 30-nispom.rules
- Audit rule configuration that meets the requirements specified in the Information System Security chapter of the National Industrial Security Program Operating Manual.
- 30-ospp-v42*.rules
- Audit rule configuration that meets the requirements defined in the OSPP (Protection Profile for General Purpose Operating Systems) profile version 4.2.
- 30-pci-dss-v31.rules
- Audit rule configuration that meets the requirements set by Payment Card Industry Data Security Standard (PCI DSS) v3.1.
- 30-stig.rules
- Audit rule configuration that meets the requirements set by Security Technical Implementation Guides (STIG).
To use these configuration files, copy them to the /etc/audit/rules.d/ directory and use the augenrules --load command, for example:
# cd /usr/share/audit/sample-rules/
# cp 10-base-config.rules 30-stig.rules 31-privileged.rules 99-finalize.rules /etc/audit/rules.d/
# augenrules --load
You can order Audit rules using a numbering scheme. See the /usr/share/audit/sample-rules/README-rules file for more information.
Ressources supplémentaires
-
audit.rules(7)man page.
12.9. Using augenrules to define persistent rules
The augenrules script reads rules located in the /etc/audit/rules.d/ directory and compiles them into an audit.rules file. This script processes all files that end with .rules in a specific order based on their natural sort order. The files in this directory are organized into groups with the following meanings:
- 10 - Kernel and auditctl configuration
- 20 - Rules that could match general rules but you want a different match
- 30 - Main rules
- 40 - Optional rules
- 50 - Server-specific rules
- 70 - System local rules
- 90 - Finalize (immutable)
The rules are not meant to be used all at once. They are pieces of a policy that should be thought out and individual files copied to /etc/audit/rules.d/. For example, to set a system up in the STIG configuration, copy rules 10-base-config, 30-stig, 31-privileged, and 99-finalize.
Once you have the rules in the /etc/audit/rules.d/ directory, load them by running the augenrules script with the --load directive:
# augenrules --load
/sbin/augenrules: No change
No rules
enabled 1
failure 1
pid 742
rate_limit 0
...
Ressources supplémentaires
-
audit.rules(8)andaugenrules(8)man pages.
12.10. Disabling augenrules
Use the following steps to disable the augenrules utility. This switches Audit to use rules defined in the /etc/audit/audit.rules file.
Procédure
Copy the
/usr/lib/systemd/system/auditd.servicefile to the/etc/systemd/system/directory:# cp -f /usr/lib/systemd/system/auditd.service /etc/systemd/system/Edit the
/etc/systemd/system/auditd.servicefile in a text editor of your choice, for example:# vi /etc/systemd/system/auditd.serviceComment out the line containing
augenrules, and uncomment the line containing theauditctl -Rcommand:#ExecStartPost=-/sbin/augenrules --load ExecStartPost=-/sbin/auditctl -R /etc/audit/audit.rules
Reload the
systemddaemon to fetch changes in theauditd.servicefile:# systemctl daemon-reloadRestart the
auditdservice:# service auditd restart
Ressources supplémentaires
-
augenrules(8)andaudit.rules(8)man pages. - Auditd service restart overrides changes made to /etc/audit/audit.rules.
12.11. Setting up Audit to monitor software updates
You can use the pre-configured rule 44-installers.rules to configure Audit to monitor the following utilities that install software:
-
dnf[2] -
yum -
pip -
npm -
cpan -
gem -
luarocks
To monitor the rpm utility, install the rpm-plugin-audit package. Audit will then generate SOFTWARE_UPDATE events when it installs or updates a package. You can list these events by entering ausearch -m SOFTWARE_UPDATE on the command line.
Pre-configured rule files cannot be used on systems with the ppc64le and aarch64 architectures.
Conditions préalables
-
auditdis configured in accordance with the settings provided in Configuring auditd for a secure environment .
Procédure
Copy the pre-configured rule file
44-installers.rulesfrom the/usr/share/audit/sample-rules/directory to the/etc/audit/rules.d/directory:# cp /usr/share/audit/sample-rules/44-installers.rules /etc/audit/rules.d/Load the audit rules:
# augenrules --load
Vérification
List the loaded rules:
# auditctl -l
-p x-w /usr/bin/dnf-3 -k software-installer
-p x-w /usr/bin/yum -k software-installer
-p x-w /usr/bin/pip -k software-installer
-p x-w /usr/bin/npm -k software-installer
-p x-w /usr/bin/cpan -k software-installer
-p x-w /usr/bin/gem -k software-installer
-p x-w /usr/bin/luarocks -k software-installer
Perform an installation, for example:
# dnf reinstall -y vim-enhancedSearch the Audit log for recent installation events, for example:
# ausearch -ts recent -k software-installer
––––
time->Thu Dec 16 10:33:46 2021
type=PROCTITLE msg=audit(1639668826.074:298): proctitle=2F7573722F6C6962657865632F706C6174666F726D2D707974686F6E002F7573722F62696E2F646E66007265696E7374616C6C002D790076696D2D656E68616E636564
type=PATH msg=audit(1639668826.074:298): item=2 name="/lib64/ld-linux-x86-64.so.2" inode=10092 dev=fd:01 mode=0100755 ouid=0 ogid=0 rdev=00:00 obj=system_u:object_r:ld_so_t:s0 nametype=NORMAL cap_fp=0 cap_fi=0 cap_fe=0 cap_fver=0 cap_frootid=0
type=PATH msg=audit(1639668826.074:298): item=1 name="/usr/libexec/platform-python" inode=4618433 dev=fd:01 mode=0100755 ouid=0 ogid=0 rdev=00:00 obj=system_u:object_r:bin_t:s0 nametype=NORMAL cap_fp=0 cap_fi=0 cap_fe=0 cap_fver=0 cap_frootid=0
type=PATH msg=audit(1639668826.074:298): item=0 name="/usr/bin/dnf" inode=6886099 dev=fd:01 mode=0100755 ouid=0 ogid=0 rdev=00:00 obj=system_u:object_r:rpm_exec_t:s0 nametype=NORMAL cap_fp=0 cap_fi=0 cap_fe=0 cap_fver=0 cap_frootid=0
type=CWD msg=audit(1639668826.074:298): cwd="/root"
type=EXECVE msg=audit(1639668826.074:298): argc=5 a0="/usr/libexec/platform-python" a1="/usr/bin/dnf" a2="reinstall" a3="-y" a4="vim-enhanced"
type=SYSCALL msg=audit(1639668826.074:298): arch=c000003e syscall=59 success=yes exit=0 a0=55c437f22b20 a1=55c437f2c9d0 a2=55c437f2aeb0 a3=8 items=3 ppid=5256 pid=5375 auid=0 uid=0 gid=0 euid=0 suid=0 fsuid=0 egid=0 sgid=0 fsgid=0 tty=pts0 ses=3 comm="dnf" exe="/usr/libexec/platform-python3.6" subj=unconfined_u:unconfined_r:unconfined_t:s0-s0:c0.c1023 key="software-installer"
dnf is a symlink in RHEL, the path in the dnf Audit rule must include the target of the symlink. To receive correct Audit events, modify the 44-installers.rules file by changing the path=/usr/bin/dnf path to /usr/bin/dnf-3.
12.12. Monitoring user login times with Audit
To monitor which users logged in at specific times, you do not need to configure Audit in any special way. You can use the ausearch or aureport tools, which provide different ways of presenting the same information.
Conditions préalables
-
auditdis configured in accordance with the settings provided in Configuring auditd for a secure environment .
Procédure
To display user log in times, use any one of the following commands:
Search the audit log for the
USER_LOGINmessage type:# ausearch -m USER_LOGIN -ts '12/02/2020' '18:00:00' -sv no time->Mon Nov 22 07:33:22 2021 type=USER_LOGIN msg=audit(1637584402.416:92): pid=1939 uid=0 auid=4294967295 ses=4294967295 subj=system_u:system_r:sshd_t:s0-s0:c0.c1023 msg='op=login acct="(unknown)" exe="/usr/sbin/sshd" hostname=? addr=10.37.128.108 terminal=ssh res=failed'-
You can specify the date and time with the
-tsoption. If you do not use this option,ausearchprovides results from today, and if you omit time,ausearchprovides results from midnight. -
You can use the
-sv yesoption to filter out successful login attempts and-sv nofor unsuccessful login attempts.
-
You can specify the date and time with the
Pipe the raw output of the
ausearchcommand into theaulastutility, which displays the output in a format similar to the output of thelastcommand. For example:# ausearch --raw | aulast --stdin root ssh 10.37.128.108 Mon Nov 22 07:33 - 07:33 (00:00) root ssh 10.37.128.108 Mon Nov 22 07:33 - 07:33 (00:00) root ssh 10.22.16.106 Mon Nov 22 07:40 - 07:40 (00:00) reboot system boot 4.18.0-348.6.el8 Mon Nov 22 07:33Display the list of login events by using the
aureportcommand with the--login -ioptions.# aureport --login -i Login Report ============================================ # date time auid host term exe success event ============================================ 1. 11/16/2021 13:11:30 root 10.40.192.190 ssh /usr/sbin/sshd yes 6920 2. 11/16/2021 13:11:31 root 10.40.192.190 ssh /usr/sbin/sshd yes 6925 3. 11/16/2021 13:11:31 root 10.40.192.190 ssh /usr/sbin/sshd yes 6930 4. 11/16/2021 13:11:31 root 10.40.192.190 ssh /usr/sbin/sshd yes 6935 5. 11/16/2021 13:11:33 root 10.40.192.190 ssh /usr/sbin/sshd yes 6940 6. 11/16/2021 13:11:33 root 10.40.192.190 /dev/pts/0 /usr/sbin/sshd yes 6945
Ressources supplémentaires
-
The
ausearch(8)man page. -
The
aulast(8)man page. -
The
aureport(8)man page.
Chapitre 13. Blocking and allowing applications using fapolicyd
Setting and enforcing a policy that either allows or denies application execution based on a rule set efficiently prevents the execution of unknown and potentially malicious software.
13.1. Introduction to fapolicyd
The fapolicyd software framework controls the execution of applications based on a user-defined policy. This is one of the most efficient ways to prevent running untrusted and possibly malicious applications on the system.
The fapolicyd framework provides the following components:
-
fapolicydservice -
fapolicydcommand-line utilities -
fapolicydRPM plugin -
fapolicydrule language -
fagenrulesscript
The administrator can define the allow and deny execution rules for any application with the possibility of auditing based on a path, hash, MIME type, or trust.
The fapolicyd framework introduces the concept of trust. An application is trusted when it is properly installed by the system package manager, and therefore it is registered in the system RPM database. The fapolicyd daemon uses the RPM database as a list of trusted binaries and scripts. The fapolicyd RPM plugin registers any system update that is handled by either the DNF package manager or the RPM Package Manager. The plugin notifies the fapolicyd daemon about changes in this database. Other ways of adding applications require the creation of custom rules and restarting the fapolicyd service.
The fapolicyd service configuration is located in the /etc/fapolicyd/ directory with the following structure:
-
The
/etc/fapolicyd/fapolicyd.trustfile contains a list of trusted files. You can also use multiple trust files in the/etc/fapolicyd/trust.d/directory. -
The
/etc/fapolicyd/rules.d/directory for files containingallowanddenyexecution rules. Thefagenrulesscript merges these component rules files to the/etc/fapolicyd/compiled.rulesfile. -
The
fapolicyd.conffile contains the daemon’s configuration options. This file is useful primarily for performance-tuning purposes.
Rules in /etc/fapolicyd/rules.d/ are organized in several files, each representing a different policy goal. The numbers at the beginning of the corresponding file names determine the order in /etc/fapolicyd/compiled.rules:
- 10 - language rules
- 20 - Dracut-related Rules
- 21 - rules for updaters
- 30 - patterns
- 40 - ELF rules
- 41 - shared objects rules
- 42 - trusted ELF rules
- 70 - trusted language rules
- 72 - shell rules
- 90 - deny execute rules
- 95 - allow open rules
You can use one of the ways for fapolicyd integrity checking:
- file-size checking
- comparing SHA-256 hashes
- Integrity Measurement Architecture (IMA) subsystem
By default, fapolicyd does no integrity checking. Integrity checking based on the file size is fast, but an attacker can replace the content of the file and preserve its byte size. Computing and checking SHA-256 checksums is more secure, but it affects the performance of the system. The integrity = ima option in fapolicyd.conf requires support for files extended attributes (also known as xattr) on all file systems containing executable files.
Ressources supplémentaires
-
fapolicyd(8),fapolicyd.rules(5),fapolicyd.conf(5),fapolicyd.trust(13),fagenrules(8), andfapolicyd-cli(1)man pages. - The Enhancing security with the kernel integrity subsystem chapter in the Managing, monitoring, and updating the kernel document.
-
The documentation installed with the
fapolicydpackage in the/usr/share/doc/fapolicyd/directory and the/usr/share/fapolicyd/sample-rules/README-rulesfile.
13.2. Deploying fapolicyd
To deploy the fapolicyd framework in RHEL:
Procédure
Install the
fapolicydpackage:# dnf install fapolicydEnable and start the
fapolicydservice:# systemctl enable --now fapolicyd
Vérification
Verify that the
fapolicydservice is running correctly:# systemctl status fapolicyd ● fapolicyd.service - File Access Policy Daemon Loaded: loaded (/usr/lib/systemd/system/fapolicyd.service; enabled; vendor p> Active: active (running) since Tue 2019-10-15 18:02:35 CEST; 55s ago Process: 8818 ExecStart=/usr/sbin/fapolicyd (code=exited, status=0/SUCCESS) Main PID: 8819 (fapolicyd) Tasks: 4 (limit: 11500) Memory: 78.2M CGroup: /system.slice/fapolicyd.service └─8819 /usr/sbin/fapolicyd Oct 15 18:02:35 localhost.localdomain systemd[1]: Starting File Access Policy D> Oct 15 18:02:35 localhost.localdomain fapolicyd[8819]: Initialization of the da> Oct 15 18:02:35 localhost.localdomain fapolicyd[8819]: Reading RPMDB into memory Oct 15 18:02:35 localhost.localdomain systemd[1]: Started File Access Policy Da> Oct 15 18:02:36 localhost.localdomain fapolicyd[8819]: Creating databaseLog in as a user without root privileges, and check that
fapolicydis working, for example:$ cp /bin/ls /tmp $ /tmp/ls bash: /tmp/ls: Operation not permitted
13.3. Marking files as trusted using an additional source of trust
The fapolicyd framework trusts files contained in the RPM database. You can mark additional files as trusted by adding the corresponding entries to the /etc/fapolicyd/fapolicyd.trust plain-text file or the /etc/fapolicyd/trust.d/ directory, which supports separating a list of trusted files into more files. You can modify fapolicyd.trust or the files in /etc/fapolicyd/trust.d either directly using a text editor or through fapolicyd-cli commands.
Marking files as trusted using fapolicyd.trust or trust.d/ is better than writing custom fapolicyd rules due to performance reasons.
Conditions préalables
-
The
fapolicydframework is deployed on your system.
Procédure
Copy your custom binary to the required directory, for example:
$ cp /bin/ls /tmp
$ /tmp/ls
bash: /tmp/ls: Operation not permitted
Mark your custom binary as trusted, and store the corresponding entry to the
myappfile in/etc/fapolicyd/trust.d/:# fapolicyd-cli --file add /tmp/ls --trust-file myapp-
If you skip the
--trust-fileoption, then the previous command adds the corresponding line to/etc/fapolicyd/fapolicyd.trust. -
To mark all existing files in a directory as trusted, provide the directory path as an argument of the
--fileoption, for example:fapolicyd-cli --file add /tmp/my_bin_dir/ --trust-file myapp.
-
If you skip the
Update the
fapolicyddatabase:# fapolicyd-cli --update
Changing the content of a trusted file or directory changes their checksum, and therefore fapolicyd no longer considers them trusted.
To make the new content trusted again, refresh the file trust database by using the fapolicyd-cli --file update command. If you do not provide any argument, the entire database refreshes. Alternatively, you can specify a path to a specific file or directory. Then, update the database by using fapolicyd-cli --update.
Vérification
Check that your custom binary can be now executed, for example:
$ /tmp/ls ls
Ressources supplémentaires
-
fapolicyd.trust(13)man page.
13.4. Adding custom allow and deny rules for fapolicyd
The default set of rules in the fapolicyd package does not affect system functions. For custom scenarios, such as storing binaries and scripts in a non-standard directory or adding applications without the dnf or rpm installers, you must either mark additional files as trusted or add new custom rules.
For basic scenarios, prefer Marking files as trusted using an additional source of trust. In more advanced scenarios such as allowing to execute a custom binary only for specific user and group identifiers, add new custom rules to the /etc/fapolicyd/rules.d/ directory.
The following steps demonstrate adding a new rule to allow a custom binary.
Conditions préalables
-
The
fapolicydframework is deployed on your system.
Procédure
Copy your custom binary to the required directory, for example:
$ cp /bin/ls /tmp
$ /tmp/ls
bash: /tmp/ls: Operation not permitted
Stop the
fapolicydservice:# systemctl stop fapolicydUse debug mode to identify a corresponding rule. Because the output of the
fapolicyd --debugcommand is verbose and you can stop it only by pressing Ctrl+C or killing the corresponding process, redirect the error output to a file. In this case, you can limit the output only to access denials by using the--debug-denyoption instead of--debug:# fapolicyd --debug-deny 2> fapolicy.output & [1] 51341
Alternatively, you can run
fapolicyddebug mode in another terminal.Repeat the command that
fapolicyddenied:$ /tmp/ls bash: /tmp/ls: Operation not permittedStop debug mode by resuming it in the foreground and pressing Ctrl+C:
# fg fapolicyd --debug 2> fapolicy.output ^C ...Alternatively, kill the process of
fapolicyddebug mode:# kill 51341Find a rule that denies the execution of your application:
# cat fapolicy.output | grep 'deny_audit' ... rule=13 dec=deny_audit perm=execute auid=0 pid=6855 exe=/usr/bin/bash : path=/tmp/ls ftype=application/x-executable trust=0Locate the file that contains a rule that prevented the execution of your custom binary. In this case, the
deny_audit perm=executerule belongs to the90-deny-execute.rulesfile:# ls /etc/fapolicyd/rules.d/ 10-languages.rules 40-bad-elf.rules 72-shell.rules 20-dracut.rules 41-shared-obj.rules 90-deny-execute.rules 21-updaters.rules 42-trusted-elf.rules 95-allow-open.rules 30-patterns.rules 70-trusted-lang.rules # cat /etc/fapolicyd/rules.d/90-deny-execute.rules # Deny execution for anything untrusted deny_audit perm=execute all : all
Add a new
allowrule to the file that lexically precedes the rule file that contains the rule that denied the execution of your custom binary in the/etc/fapolicyd/rules.d/directory:# touch /etc/fapolicyd/rules.d/80-myapps.rules # vi /etc/fapolicyd/rules.d/80-myapps.rules
Insert the following rule to the
80-myapps.rulesfile:allow perm=execute exe=/usr/bin/bash trust=1 : path=/tmp/ls ftype=application/x-executable trust=0
Alternatively, you can allow executions of all binaries in the
/tmpdirectory by adding the following rule to the rule file in/etc/fapolicyd/rules.d/:allow perm=execute exe=/usr/bin/bash trust=1 : dir=/tmp/ trust=0
To prevent changes in the content of your custom binary, define the required rule using an SHA-256 checksum:
$ sha256sum /tmp/ls 780b75c90b2d41ea41679fcb358c892b1251b68d1927c80fbc0d9d148b25e836 lsChange the rule to the following definition:
allow perm=execute exe=/usr/bin/bash trust=1 : sha256hash=780b75c90b2d41ea41679fcb358c892b1251b68d1927c80fbc0d9d148b25e836Check that the list of compiled differs from the rule set in
/etc/fapolicyd/rules.d/, and update the list, which is stored in the/etc/fapolicyd/compiled.rulesfile:# fagenrules --check /usr/sbin/fagenrules: Rules have changed and should be updated # fagenrules --load
Check that your custom rule is in the list of
fapolicydrules before the rule that prevented the execution:# fapolicyd-cli --list ... 13. allow perm=execute exe=/usr/bin/bash trust=1 : path=/tmp/ls ftype=application/x-executable trust=0 14. deny_audit perm=execute all : all ...Start the
fapolicydservice:# systemctl start fapolicyd
Vérification
Check that your custom binary can be now executed, for example:
$ /tmp/ls
ls
Ressources supplémentaires
-
fapolicyd.rules(5)andfapolicyd-cli(1)man pages. -
The documentation installed with the
fapolicydpackage in the/usr/share/fapolicyd/sample-rules/README-rulesfile.
13.5. Enabling fapolicyd integrity checks
By default, fapolicyd does not perform integrity checking. You can configure fapolicyd to perform integrity checks by comparing either file sizes or SHA-256 hashes. You can also set integrity checks by using the Integrity Measurement Architecture (IMA) subsystem.
Conditions préalables
-
The
fapolicydframework is deployed on your system.
Procédure
Open the
/etc/fapolicyd/fapolicyd.conffile in a text editor of your choice, for example:# vi /etc/fapolicyd/fapolicyd.confChange the value of the
integrityoption fromnonetosha256, save the file, and exit the editor:integrity = sha256
Restart the
fapolicydservice:# systemctl restart fapolicyd
Vérification
Back up the file used for the verification:
# cp /bin/more /bin/more.bakChange the content of the
/bin/morebinary:# cat /bin/less > /bin/moreUse the changed binary as a regular user:
# su example.user
$ /bin/more /etc/redhat-release
bash: /bin/more: Operation not permitted
Revert the changes:
# mv -f /bin/more.bak /bin/more
13.7. Ressources supplémentaires
-
fapolicyd-related man pages listed by using theman -k fapolicydcommand. - The FOSDEM 2020 fapolicyd presentation.
Chapitre 14. Protecting systems against intrusive USB devices
USB devices can be loaded with spyware, malware, or trojans, which can steal your data or damage your system. As a Red Hat Enterprise Linux administrator, you can prevent such USB attacks with USBGuard.
14.1. USBGuard
With the USBGuard software framework, you can protect your systems against intrusive USB devices by using basic lists of permitted and forbidden devices based on the USB device authorization feature in the kernel.
The USBGuard framework provides the following components:
- The system service component with an inter-process communication (IPC) interface for dynamic interaction and policy enforcement
-
The command-line interface to interact with a running
usbguardsystem service - The rule language for writing USB device authorization policies
- The C++ API for interacting with the system service component implemented in a shared library
The usbguard system service configuration file (/etc/usbguard/usbguard-daemon.conf) includes the options to authorize the users and groups to use the IPC interface.
The system service provides the USBGuard public IPC interface. In Red Hat Enterprise Linux, the access to this interface is limited to the root user only by default.
Consider setting either the IPCAccessControlFiles option (recommended) or the IPCAllowedUsers and IPCAllowedGroups options to limit access to the IPC interface.
Ensure that you do not leave the Access Control List (ACL) unconfigured as this exposes the IPC interface to all local users and allows them to manipulate the authorization state of USB devices and modify the USBGuard policy.
14.2. Installing USBGuard
Use this procedure to install and initiate the USBGuard framework.
Procédure
Install the
usbguardpackage:# dnf install usbguardCreate an initial rule set:
# usbguard generate-policy > /etc/usbguard/rules.confStart the
usbguarddaemon and ensure that it starts automatically on boot:# systemctl enable --now usbguard
Vérification
Verify that the
usbguardservice is running:# systemctl status usbguard ● usbguard.service - USBGuard daemon Loaded: loaded (/usr/lib/systemd/system/usbguard.service; enabled; vendor preset: disabled) Active: active (running) since Thu 2019-11-07 09:44:07 CET; 3min 16s ago Docs: man:usbguard-daemon(8) Main PID: 6122 (usbguard-daemon) Tasks: 3 (limit: 11493) Memory: 1.2M CGroup: /system.slice/usbguard.service └─6122 /usr/sbin/usbguard-daemon -f -s -c /etc/usbguard/usbguard-daemon.conf Nov 07 09:44:06 localhost.localdomain systemd[1]: Starting USBGuard daemon... Nov 07 09:44:07 localhost.localdomain systemd[1]: Started USBGuard daemon.List USB devices recognized by
USBGuard:# usbguard list-devices 4: allow id 1d6b:0002 serial "0000:02:00.0" name "xHCI Host Controller" hash...
Ressources supplémentaires
-
usbguard(1)andusbguard-daemon.conf(5)man pages.
14.3. Blocking and authorizing a USB device using CLI
This procedure outlines how to authorize and block a USB device using the usbguard command.
Conditions préalables
-
The
usbguardservice is installed and running.
Procédure
List USB devices recognized by
USBGuard:# usbguard list-devices 1: allow id 1d6b:0002 serial "0000:00:06.7" name "EHCI Host Controller" hash "JDOb0BiktYs2ct3mSQKopnOOV2h9MGYADwhT+oUtF2s=" parent-hash "4PHGcaDKWtPjKDwYpIRG722cB9SlGz9l9Iea93+Gt9c=" via-port "usb1" with-interface 09:00:00 ... 6: block id 1b1c:1ab1 serial "000024937962" name "Voyager" hash "CrXgiaWIf2bZAU+5WkzOE7y0rdSO82XMzubn7HDb95Q=" parent-hash "JDOb0BiktYs2ct3mSQKopnOOV2h9MGYADwhT+oUtF2s=" via-port "1-3" with-interface 08:06:50
Authorize the device 6 to interact with the system:
# usbguard allow-device 6Deauthorize and remove the device 6:
# usbguard reject-device 6Deauthorize and retain the device 6:
# usbguard block-device 6
USBGuard uses the block and reject terms with the following meanings:
- block: do not interact with this device for now.
- reject: ignore this device as if it does not exist.
Ressources supplémentaires
-
usbguard(1)man page. -
Built-in help listed by using the
usbguard --helpcommand.
14.4. Permanently blocking and authorizing a USB device
You can permanently block and authorize a USB device using the -p option. This adds a device-specific rule to the current policy.
Conditions préalables
-
The
usbguardservice is installed and running.
Procédure
Configure SELinux to allow the
usbguarddaemon to write rules.Display the
semanageBooleans relevant tousbguard.# semanage boolean -l | grep usbguard usbguard_daemon_write_conf (off , off) Allow usbguard to daemon write conf usbguard_daemon_write_rules (on , on) Allow usbguard to daemon write rulesOptional: If the
usbguard_daemon_write_rulesBoolean is turned off, turn it on.# semanage boolean -m --on usbguard_daemon_write_rules
List USB devices recognized by USBGuard:
# usbguard list-devices
1: allow id 1d6b:0002 serial "0000:00:06.7" name "EHCI Host Controller" hash "JDOb0BiktYs2ct3mSQKopnOOV2h9MGYADwhT+oUtF2s=" parent-hash "4PHGcaDKWtPjKDwYpIRG722cB9SlGz9l9Iea93+Gt9c=" via-port "usb1" with-interface 09:00:00
...
6: block id 1b1c:1ab1 serial "000024937962" name "Voyager" hash "CrXgiaWIf2bZAU+5WkzOE7y0rdSO82XMzubn7HDb95Q=" parent-hash "JDOb0BiktYs2ct3mSQKopnOOV2h9MGYADwhT+oUtF2s=" via-port "1-3" with-interface 08:06:50
Permanently authorize the device 6 to interact with the system:
# usbguard allow-device 6 -pPermanently deauthorize and remove the device 6:
# usbguard reject-device 6 -pPermanently deauthorize and retain the device 6:
# usbguard block-device 6 -p
USBGuard uses the terms block and reject with the following meanings:
- block: do not interact with this device for now.
- reject: ignore this device as if it does not exist.
Vérification
Check that
USBGuardrules include the changes you made.# usbguard list-rules
Ressources supplémentaires
-
usbguard(1)man page. -
Built-in help listed by using the
usbguard --helpcommand.
14.5. Creating a custom policy for USB devices
The following procedure contains steps for creating a rule set for USB devices that reflects the requirements of your scenario.
Conditions préalables
-
The
usbguardservice is installed and running. -
The
/etc/usbguard/rules.conffile contains an initial rule set generated by theusbguard generate-policycommand.
Procédure
Create a policy which authorizes the currently connected USB devices, and store the generated rules to the
rules.conffile:# usbguard generate-policy --no-hashes > ./rules.confThe
--no-hashesoption does not generate hash attributes for devices. Avoid hash attributes in your configuration settings because they might not be persistent.Edit the
rules.conffile with a text editor of your choice, for example:# vi ./rules.confAdd, remove, or edit the rules as required. For example, the following rule allows only devices with a single mass storage interface to interact with the system:
allow with-interface equals { 08:*:* }See the
usbguard-rules.conf(5)man page for a detailed rule-language description and more examples.Install the updated policy:
# install -m 0600 -o root -g root rules.conf /etc/usbguard/rules.confRestart the
usbguarddaemon to apply your changes:# systemctl restart usbguard
Vérification
Check that your custom rules are in the active policy, for example:
# usbguard list-rules
...
4: allow with-interface 08:*:*
...
Ressources supplémentaires
-
usbguard-rules.conf(5)man page.
14.6. Creating a structured custom policy for USB devices
You can organize your custom USBGuard policy in several .conf files within the /etc/usbguard/rules.d/ directory. The usbguard-daemon then combines the main rules.conf file with the .conf files within the directory in alphabetical order.
Conditions préalables
-
The
usbguardservice is installed and running.
Procédure
Create a policy which authorizes the currently connected USB devices, and store the generated rules to a new
.conffile, for example,policy.conf.# usbguard generate-policy --no-hashes > ./policy.confThe
--no-hashesoption does not generate hash attributes for devices. Avoid hash attributes in your configuration settings because they might not be persistent.Display the
policy.conffile with a text editor of your choice, for example:# vi ./policy.conf ... allow id 04f2:0833 serial "" name "USB Keyboard" via-port "7-2" with-interface { 03:01:01 03:00:00 } with-connect-type "unknown" ...Move selected lines into a separate
.conffile.NoteThe two digits at the beginning of the file name specify the order in which the daemon reads the configuration files.
For example, copy the rules for your keyboards into a new
.conffile.# grep "USB Keyboard" ./policy.conf > ./10keyboards.confInstall the new policy to the
/etc/usbguard/rules.d/directory.# install -m 0600 -o root -g root 10keyboards.conf /etc/usbguard/rules.d/10keyboards.confMove the rest of the lines to a main
rules.conffile.# grep -v "USB Keyboard" ./policy.conf > ./rules.confInstall the remaining rules.
# install -m 0600 -o root -g root rules.conf /etc/usbguard/rules.confRestart the
usbguarddaemon to apply your changes.# systemctl restart usbguard
Vérification
Display all active USBGuard rules.
# usbguard list-rules
...
15: allow id 04f2:0833 serial "" name "USB Keyboard" hash "kxM/iddRe/WSCocgiuQlVs6Dn0VEza7KiHoDeTz0fyg=" parent-hash "2i6ZBJfTl5BakXF7Gba84/Cp1gslnNc1DM6vWQpie3s=" via-port "7-2" with-interface { 03:01:01 03:00:00 } with-connect-type "unknown"
...
Display the contents of the
rules.conffile and all the.conffiles in the/etc/usbguard/rules.d/directory.# cat /etc/usbguard/rules.conf /etc/usbguard/rules.d/*.conf- Verify that the active rules contain all the rules from the files and are in the correct order.
Ressources supplémentaires
-
usbguard-rules.conf(5)man page.
14.7. Authorizing users and groups to use the USBGuard IPC interface
Use this procedure to authorize a specific user or a group to use the USBGuard public IPC interface. By default, only the root user can use this interface.
Conditions préalables
-
The
usbguardservice is installed and running. -
The
/etc/usbguard/rules.conffile contains an initial rule set generated by theusbguard generate-policycommand.
Procédure
Edit the
/etc/usbguard/usbguard-daemon.conffile with a text editor of your choice:# vi /etc/usbguard/usbguard-daemon.confFor example, add a line with a rule that allows all users in the
wheelgroup to use the IPC interface, and save the file:IPCAllowGroups=wheel
You can add users or groups also with the
usbguardcommand. For example, the following command enables the joesec user to have full access to theDevicesandExceptionssections. Furthermore, joesec can list and modify the current policy:# usbguard add-user joesec --devices ALL --policy modify,list --exceptions ALLTo remove the granted permissions for the joesec user, use the
usbguard remove-user joeseccommand.Restart the
usbguarddaemon to apply your changes:# systemctl restart usbguard
Ressources supplémentaires
-
usbguard(1)andusbguard-rules.conf(5)man pages.
14.8. Logging USBguard authorization events to the Linux Audit log
Use the following steps to integrate logging of USBguard authorization events to the standard Linux Audit log. By default, the usbguard daemon logs events to the /var/log/usbguard/usbguard-audit.log file.
Conditions préalables
-
The
usbguardservice is installed and running. -
The
auditdservice is running.
Procédure
Edit the
usbguard-daemon.conffile with a text editor of your choice:# vi /etc/usbguard/usbguard-daemon.confChange the
AuditBackendoption fromFileAudittoLinuxAudit:AuditBackend=LinuxAudit
Restart the
usbguarddaemon to apply the configuration change:# systemctl restart usbguard
Vérification
Query the
auditdaemon log for a USB authorization event, for example:# ausearch -ts recent -m USER_DEVICE
Ressources supplémentaires
-
usbguard-daemon.conf(5)man page.
14.9. Ressources supplémentaires
-
usbguard(1),usbguard-rules.conf(5),usbguard-daemon(8), andusbguard-daemon.conf(5)man pages. - USBGuard Homepage.
Chapitre 15. Configuring a remote logging solution
To ensure that logs from various machines in your environment are recorded centrally on a logging server, you can configure the Rsyslog application to record logs that fit specific criteria from the client system to the server.
15.1. The Rsyslog logging service
The Rsyslog application, in combination with the systemd-journald service, provides local and remote logging support in Red Hat Enterprise Linux. The rsyslogd daemon continuously reads syslog messages received by the systemd-journald service from the Journal. rsyslogd then filters and processes these syslog events and records them to rsyslog log files or forwards them to other services according to its configuration.
The rsyslogd daemon also provides extended filtering, encryption protected relaying of messages, input and output modules, and support for transportation using the TCP and UDP protocols.
In /etc/rsyslog.conf, which is the main configuration file for rsyslog, you can specify the rules according to which rsyslogd handles the messages. Generally, you can classify messages by their source and topic (facility) and urgency (priority), and then assign an action that should be performed when a message fits these criteria.
In /etc/rsyslog.conf, you can also see a list of log files maintained by rsyslogd. Most log files are located in the /var/log/ directory. Some applications, such as httpd and samba, store their log files in a subdirectory within /var/log/.
Ressources supplémentaires
-
The
rsyslogd(8)andrsyslog.conf(5)man pages. -
Documentation installed with the
rsyslog-docpackage in the/usr/share/doc/rsyslog/html/index.htmlfile.
15.2. Installing Rsyslog documentation
The Rsyslog application has extensive online documentation that is available at https://www.rsyslog.com/doc/, but you can also install the rsyslog-doc documentation package locally.
Conditions préalables
-
You have activated the
AppStreamrepository on your system. -
You are authorized to install new packages using
sudo.
Procédure
Install the
rsyslog-docpackage:# dnf install rsyslog-doc
Vérification
Open the
/usr/share/doc/rsyslog/html/index.htmlfile in a browser of your choice, for example:$ firefox /usr/share/doc/rsyslog/html/index.html &
15.3. Configuring a server for remote logging over TCP
The Rsyslog application enables you to both run a logging server and configure individual systems to send their log files to the logging server. To use remote logging through TCP, configure both the server and the client. The server collects and analyzes the logs sent by one or more client systems.
With the Rsyslog application, you can maintain a centralized logging system where log messages are forwarded to a server over the network. To avoid message loss when the server is not available, you can configure an action queue for the forwarding action. This way, messages that failed to be sent are stored locally until the server is reachable again. Note that such queues cannot be configured for connections using the UDP protocol.
The omfwd plug-in provides forwarding over UDP or TCP. The default protocol is UDP. Because the plug-in is built in, it does not have to be loaded.
By default, rsyslog uses TCP on port 514.
Conditions préalables
- Rsyslog is installed on the server system.
-
You are logged in as
rooton the server. -
The
policycoreutils-python-utilspackage is installed for the optional step using thesemanagecommand. -
Le service
firewalldest en cours d'exécution.
Procédure
Optional: To use a different port for
rsyslogtraffic, add thesyslogd_port_tSELinux type to port. For example, enable port30514:# semanage port -a -t syslogd_port_t -p tcp 30514Optional: To use a different port for
rsyslogtraffic, configurefirewalldto allow incomingrsyslogtraffic on that port. For example, allow TCP traffic on port30514:# firewall-cmd --zone=<zone-name> --permanent --add-port=30514/tcp success # firewall-cmd --reload
Create a new file in the
/etc/rsyslog.d/directory named, for example,remotelog.conf, and insert the following content:# Define templates before the rules that use them # Per-Host templates for remote systems template(name="TmplAuthpriv" type="list") { constant(value="/var/log/remote/auth/") property(name="hostname") constant(value="/") property(name="programname" SecurePath="replace") constant(value=".log") } template(name="TmplMsg" type="list") { constant(value="/var/log/remote/msg/") property(name="hostname") constant(value="/") property(name="programname" SecurePath="replace") constant(value=".log") } # Provides TCP syslog reception module(load="imtcp") # Adding this ruleset to process remote messages ruleset(name="remote1"){ authpriv.* action(type="omfile" DynaFile="TmplAuthpriv") *.info;mail.none;authpriv.none;cron.none action(type="omfile" DynaFile="TmplMsg") } input(type="imtcp" port="30514" ruleset="remote1")-
Save the changes to the
/etc/rsyslog.d/remotelog.conffile. Tester la syntaxe du fichier
/etc/rsyslog.conf:# rsyslogd -N 1 rsyslogd: version 8.1911.0-2.el8, config validation run... rsyslogd: End of config validation run. Bye.Make sure the
rsyslogservice is running and enabled on the logging server:# systemctl status rsyslogRestart the
rsyslogservice.# systemctl restart rsyslogOptional: If
rsyslogis not enabled, ensure thersyslogservice starts automatically after reboot:# systemctl enable rsyslog
Your log server is now configured to receive and store log files from the other systems in your environment.
Ressources supplémentaires
-
rsyslogd(8),rsyslog.conf(5),semanage(8), andfirewall-cmd(1)man pages. -
Documentation installed with the
rsyslog-docpackage in the/usr/share/doc/rsyslog/html/index.htmlfile.
15.4. Configuring remote logging to a server over TCP
Follow this procedure to configure a system for forwarding log messages to a server over the TCP protocol. The omfwd plug-in provides forwarding over UDP or TCP. The default protocol is UDP. Because the plug-in is built in, you do not have to load it.
Conditions préalables
-
The
rsyslogpackage is installed on the client systems that should report to the server. - You have configured the server for remote logging.
- The specified port is permitted in SELinux and open in firewall.
-
The system contains the
policycoreutils-python-utilspackage, which provides thesemanagecommand for adding a non-standard port to the SELinux configuration.
Procédure
Create a new file in the
/etc/rsyslog.d/directory named, for example,10-remotelog.conf, and insert the following content:*.* action(type="omfwd" queue.type="linkedlist" queue.filename="example_fwd" action.resumeRetryCount="-1" queue.saveOnShutdown="on" target="example.com" port="30514" protocol="tcp" )Où ?
-
queue.type="linkedlist"enables a LinkedList in-memory queue, -
queue.filenamedefines a disk storage. The backup files are created with theexample_fwdprefix in the working directory specified by the preceding globalworkDirectorydirective, -
the
action.resumeRetryCount -1setting preventsrsyslogfrom dropping messages when retrying to connect if server is not responding, -
enabled
queue.saveOnShutdown="on"saves in-memory data ifrsyslogshuts down, the last line forwards all received messages to the logging server, port specification is optional.
With this configuration,
rsyslogsends messages to the server but keeps messages in memory if the remote server is not reachable. A file on disk is created only ifrsyslogruns out of the configured memory queue space or needs to shut down, which benefits the system performance.
NoteRsyslog processes configuration files
/etc/rsyslog.d/in the lexical order.-
Restart the
rsyslogservice.# systemctl restart rsyslog
Vérification
To verify that the client system sends messages to the server, follow these steps:
Sur le système client, envoyez un message de test :
# logger testSur le système serveur, affichez le journal
/var/log/messages, par exemple :# cat /var/log/remote/msg/hostname/root.log Feb 25 03:53:17 hostname root[6064]: test
Where hostname is the host name of the client system. Note that the log contains the user name of the user that entered the
loggercommand, in this caseroot.
Ressources supplémentaires
-
rsyslogd(8)andrsyslog.conf(5)man pages. -
Documentation installed with the
rsyslog-docpackage in the/usr/share/doc/rsyslog/html/index.htmlfile.
15.5. Configuring TLS-encrypted remote logging
By default, Rsyslog sends remote-logging communication in the plain text format. If your scenario requires to secure this communication channel, you can encrypt it using TLS.
To use encrypted transport through TLS, configure both the server and the client. The server collects and analyzes the logs sent by one or more client systems.
You can use either the ossl network stream driver (OpenSSL) or the gtls stream driver (GnuTLS).
If you have a separate system with higher security, for example, a system that is not connected to any network or has stricter authorizations, use the separate system as the certifying authority (CA).
Conditions préalables
-
You have
rootaccess to both the client and server systems. -
The
rsyslogandrsyslog-opensslpackages are installed on the server and the client systems. -
If you use the
gtlsnetwork stream driver, install thersyslog-gnutlspackage instead ofrsyslog-openssl. -
If you generate certificates using the
certtoolcommand, install thegnutls-utilspackage. On your logging server, the following certificates are in the
/etc/pki/ca-trust/source/anchors/directory and your system configuration is updated by using theupdate-ca-trustcommand:-
ca-cert.pem- a CA certificate that can verify keys and certificates on logging servers and clients. -
server-cert.pem- a public key of the logging server. -
server-key.pem- a private key of the logging server.
-
On your logging clients, the following certificates are in the
/etc/pki/ca-trust/source/anchors/directory and your system configuration is updated by usingupdate-ca-trust:-
ca-cert.pem- a CA certificate that can verify keys and certificates on logging servers and clients. -
client-cert.pem- a public key of a client. -
client-key.pem- a private key of a client.
-
Procédure
Configure the server for receiving encrypted logs from your client systems:
-
Create a new file in the
/etc/rsyslog.d/directory named, for example,securelogser.conf. To encrypt the communication, the configuration file must contain paths to certificate files on your server, a selected authentication method, and a stream driver that supports TLS encryption. Add the following lines to the
/etc/rsyslog.d/securelogser.conffile:# Set certificate files global( DefaultNetstreamDriverCAFile="/etc/pki/ca-trust/source/anchors/ca-cert.pem" DefaultNetstreamDriverCertFile="/etc/pki/ca-trust/source/anchors/server-cert.pem" DefaultNetstreamDriverKeyFile="/etc/pki/ca-trust/source/anchors/server-key.pem" ) # TCP listener module( load="imtcp" PermittedPeer=["client1.example.com", "client2.example.com"] StreamDriver.AuthMode="x509/name" StreamDriver.Mode="1" StreamDriver.Name="ossl" ) # Start up listener at port 514 input( type="imtcp" port="514" )
NoteIf you prefer the GnuTLS driver, use the
StreamDriver.Name="gtls"configuration option. See the documentation installed with thersyslog-docpackage for more information about less strict authentication modes thanx509/name.-
Save the changes to the
/etc/rsyslog.d/securelogser.conffile. Verify the syntax of the
/etc/rsyslog.conffile and any files in the/etc/rsyslog.d/directory:# rsyslogd -N 1 rsyslogd: version 8.1911.0-2.el8, config validation run (level 1)... rsyslogd: End of config validation run. Bye.Make sure the
rsyslogservice is running and enabled on the logging server:# systemctl status rsyslogRedémarrez le service
rsyslog:# systemctl restart rsyslogOptional: If Rsyslog is not enabled, ensure the
rsyslogservice starts automatically after reboot:# systemctl enable rsyslog
-
Create a new file in the
Configure clients for sending encrypted logs to the server:
-
On a client system, create a new file in the
/etc/rsyslog.d/directory named, for example,securelogcli.conf. Add the following lines to the
/etc/rsyslog.d/securelogcli.conffile:# Set certificate files global( DefaultNetstreamDriverCAFile="/etc/pki/ca-trust/source/anchors/ca-cert.pem" DefaultNetstreamDriverCertFile="/etc/pki/ca-trust/source/anchors/client-cert.pem" DefaultNetstreamDriverKeyFile="/etc/pki/ca-trust/source/anchors/client-key.pem" ) # Set up the action for all messages *.* action( type="omfwd" StreamDriver="ossl" StreamDriverMode="1" StreamDriverPermittedPeers="server.example.com" StreamDriverAuthMode="x509/name" target="server.example.com" port="514" protocol="tcp" )
NoteIf you prefer the GnuTLS driver, use the
StreamDriver.Name="gtls"configuration option.-
Save the changes to the
/etc/rsyslog.d/securelogser.conffile. Verify the syntax of the
`/etc/rsyslog.conffile and other files in the/etc/rsyslog.d/directory:# rsyslogd -N 1 rsyslogd: version 8.1911.0-2.el8, config validation run (level 1)... rsyslogd: End of config validation run. Bye.Make sure the
rsyslogservice is running and enabled on the logging server:# systemctl status rsyslogRedémarrez le service
rsyslog:# systemctl restart rsyslogOptional: If Rsyslog is not enabled, ensure the
rsyslogservice starts automatically after reboot:# systemctl enable rsyslog
-
On a client system, create a new file in the
Vérification
To verify that the client system sends messages to the server, follow these steps:
Sur le système client, envoyez un message de test :
# logger testSur le système serveur, affichez le journal
/var/log/messages, par exemple :# cat /var/log/remote/msg/hostname/root.log Feb 25 03:53:17 hostname root[6064]: test
Où
hostnameest le nom d'hôte du système client. Notez que le journal contient le nom de l'utilisateur qui a entré la commande logger, dans ce casroot.
Ressources supplémentaires
-
certtool(1),openssl(1),update-ca-trust(8),rsyslogd(8), andrsyslog.conf(5)man pages. -
Documentation installed with the
rsyslog-docpackage at/usr/share/doc/rsyslog/html/index.html. - Using the logging System Role with TLS.
15.6. Configuring a server for receiving remote logging information over UDP
The Rsyslog application enables you to configure a system to receive logging information from remote systems. To use remote logging through UDP, configure both the server and the client. The receiving server collects and analyzes the logs sent by one or more client systems. By default, rsyslog uses UDP on port 514 to receive log information from remote systems.
Follow this procedure to configure a server for collecting and analyzing logs sent by one or more client systems over the UDP protocol.
Conditions préalables
- Rsyslog is installed on the server system.
-
You are logged in as
rooton the server. -
The
policycoreutils-python-utilspackage is installed for the optional step using thesemanagecommand. -
Le service
firewalldest en cours d'exécution.
Procédure
Optional: To use a different port for
rsyslogtraffic than the default port514:Add the
syslogd_port_tSELinux type to the SELinux policy configuration, replacingportnowith the port number you wantrsyslogto use:# semanage port -a -t syslogd_port_t -p udp portnoConfigure
firewalldto allow incomingrsyslogtraffic, replacingportnowith the port number andzonewith the zone you wantrsyslogto use:# firewall-cmd --zone=zone --permanent --add-port=portno/udp success # firewall-cmd --reload
Rechargez les règles du pare-feu :
# firewall-cmd --reload
Create a new
.conffile in the/etc/rsyslog.d/directory, for example,remotelogserv.conf, and insert the following content:# Define templates before the rules that use them # Per-Host templates for remote systems template(name="TmplAuthpriv" type="list") { constant(value="/var/log/remote/auth/") property(name="hostname") constant(value="/") property(name="programname" SecurePath="replace") constant(value=".log") } template(name="TmplMsg" type="list") { constant(value="/var/log/remote/msg/") property(name="hostname") constant(value="/") property(name="programname" SecurePath="replace") constant(value=".log") } # Provides UDP syslog reception module(load="imudp") # This ruleset processes remote messages ruleset(name="remote1"){ authpriv.* action(type="omfile" DynaFile="TmplAuthpriv") *.info;mail.none;authpriv.none;cron.none action(type="omfile" DynaFile="TmplMsg") } input(type="imudp" port="514" ruleset="remote1")Where
514is the port numberrsysloguses by default. You can specify a different port instead.Verify the syntax of the
/etc/rsyslog.conffile and all.conffiles in the/etc/rsyslog.d/directory:# rsyslogd -N 1 rsyslogd: version 8.1911.0-2.el8, config validation run...Restart the
rsyslogservice.# systemctl restart rsyslogOptional: If
rsyslogis not enabled, ensure thersyslogservice starts automatically after reboot:# systemctl enable rsyslog
Ressources supplémentaires
-
rsyslogd(8),rsyslog.conf(5),semanage(8), andfirewall-cmd(1)man pages. -
Documentation installed with the
rsyslog-docpackage in the/usr/share/doc/rsyslog/html/index.htmlfile.
15.7. Configuring remote logging to a server over UDP
Follow this procedure to configure a system for forwarding log messages to a server over the UDP protocol. The omfwd plug-in provides forwarding over UDP or TCP. The default protocol is UDP. Because the plug-in is built in, you do not have to load it.
Conditions préalables
-
The
rsyslogpackage is installed on the client systems that should report to the server. - You have configured the server for remote logging as described in Configuring a server for receiving remote logging information over UDP.
Procédure
Create a new
.conffile in the/etc/rsyslog.d/directory, for example,10-remotelogcli.conf, and insert the following content:*.* action(type="omfwd" queue.type="linkedlist" queue.filename="example_fwd" action.resumeRetryCount="-1" queue.saveOnShutdown="on" target="example.com" port="portno" protocol="udp" )Où ?
-
queue.type="linkedlist"enables a LinkedList in-memory queue. -
queue.filenamedefines a disk storage. The backup files are created with theexample_fwdprefix in the working directory specified by the preceding globalworkDirectorydirective. -
The
action.resumeRetryCount -1setting preventsrsyslogfrom dropping messages when retrying to connect if the server is not responding. -
enabled queue.saveOnShutdown="on"saves in-memory data ifrsyslogshuts down. -
portnois the port number you wantrsyslogto use. The default value is514. The last line forwards all received messages to the logging server, port specification is optional.
With this configuration,
rsyslogsends messages to the server but keeps messages in memory if the remote server is not reachable. A file on disk is created only ifrsyslogruns out of the configured memory queue space or needs to shut down, which benefits the system performance.
NoteRsyslog processes configuration files
/etc/rsyslog.d/in the lexical order.-
Restart the
rsyslogservice.# systemctl restart rsyslogOptional: If
rsyslogis not enabled, ensure thersyslogservice starts automatically after reboot:# systemctl enable rsyslog
Vérification
To verify that the client system sends messages to the server, follow these steps:
Sur le système client, envoyez un message de test :
# logger testOn the server system, view the
/var/log/remote/msg/hostname/root.loglog, for example:# cat /var/log/remote/msg/hostname/root.log Feb 25 03:53:17 hostname root[6064]: testWhere
hostnameis the host name of the client system. Note that the log contains the user name of the user that entered the logger command, in this caseroot.
Ressources supplémentaires
-
rsyslogd(8)andrsyslog.conf(5)man pages. -
Documentation installed with the
rsyslog-docpackage at/usr/share/doc/rsyslog/html/index.html.
15.8. Load balancing helper in Rsyslog
The RebindInterval setting specifies an interval at which the current connection is broken and is re-established. This setting applies to TCP, UDP, and RELP traffic. The load balancers perceive it as a new connection and forward the messages to another physical target system.
The RebindInterval setting proves to be helpful in scenarios when a target system has changed its IP address. The Rsyslog application caches the IP address when the connection establishes, therefore, the messages are sent to the same server. If the IP address changes, the UDP packets will be lost until the Rsyslog service restarts. Re-establishing the connection will ensure the IP to be resolved by DNS again.
action(type=”omfwd” protocol=”tcp” RebindInterval=”250” target=”example.com” port=”514” …)

action(type=”omfwd” protocol=”udp” RebindInterval=”250” target=”example.com” port=”514” …)

action(type=”omrelp” RebindInterval=”250” target=”example.com” port=”6514” …)
15.9. Configuring reliable remote logging
With the Reliable Event Logging Protocol (RELP), you can send and receive syslog messages over TCP with a much reduced risk of message loss. RELP provides reliable delivery of event messages, which makes it useful in environments where message loss is not acceptable. To use RELP, configure the imrelp input module, which runs on the server and receives the logs, and the omrelp output module, which runs on the client and sends logs to the logging server.
Conditions préalables
-
You have installed the
rsyslog,librelp, andrsyslog-relppackages on the server and the client systems. - The specified port is permitted in SELinux and open in the firewall.
Procédure
Configure the client system for reliable remote logging:
On the client system, create a new
.conffile in the/etc/rsyslog.d/directory named, for example,relpclient.conf, and insert the following content:module(load="omrelp") *.* action(type="omrelp" target="_target_IP_" port="_target_port_")
Où ?
-
target_IPis the IP address of the logging server. -
target_portis the port of the logging server.
-
-
Save the changes to the
/etc/rsyslog.d/relpclient.conffile. Restart the
rsyslogservice.# systemctl restart rsyslogOptional: If
rsyslogis not enabled, ensure thersyslogservice starts automatically after reboot:# systemctl enable rsyslog
Configure the server system for reliable remote logging:
On the server system, create a new
.conffile in the/etc/rsyslog.d/directory named, for example,relpserv.conf, and insert the following content:ruleset(name="relp"){ *.* action(type="omfile" file="_log_path_") } module(load="imrelp") input(type="imrelp" port="_target_port_" ruleset="relp")Où ?
-
log_pathspecifies the path for storing messages. -
target_portis the port of the logging server. Use the same value as in the client configuration file.
-
-
Save the changes to the
/etc/rsyslog.d/relpserv.conffile. Restart the
rsyslogservice.# systemctl restart rsyslogOptional: If
rsyslogis not enabled, ensure thersyslogservice starts automatically after reboot:# systemctl enable rsyslog
Vérification
To verify that the client system sends messages to the server, follow these steps:
Sur le système client, envoyez un message de test :
# logger testOn the server system, view the log at the specified
log_path, for example:# cat /var/log/remote/msg/hostname/root.log Feb 25 03:53:17 hostname root[6064]: testWhere
hostnameis the host name of the client system. Note that the log contains the user name of the user that entered the logger command, in this caseroot.
Ressources supplémentaires
-
rsyslogd(8)andrsyslog.conf(5)man pages. -
Documentation installed with the
rsyslog-docpackage in the/usr/share/doc/rsyslog/html/index.htmlfile.
15.10. Supported Rsyslog modules
To expand the functionality of the Rsyslog application, you can use specific modules. Modules provide additional inputs (Input Modules), outputs (Output Modules), and other functionalities. A module can also provide additional configuration directives that become available after you load the module.
You can list the input and output modules installed on your system by entering the following command:
# ls /usr/lib64/rsyslog/{i,o}m*
You can view the list of all available rsyslog modules in the /usr/share/doc/rsyslog/html/configuration/modules/idx_output.html file after you install the rsyslog-doc package.
15.11. Configuring the netconsole service to log kernel messages to a remote host
When logging to disk or using a serial console is not possible, you can use the netconsole kernel module and the same-named service to log kernel messages over a network to a remote rsyslog service.
Conditions préalables
-
A system log service, such as
rsyslogis installed on the remote host. - The remote system log service is configured to receive incoming log entries from this host.
Procédure
Install the
netconsole-servicepackage:# dnf install netconsole-serviceEdit the
/etc/sysconfig/netconsolefile and set theSYSLOGADDRparameter to the IP address of the remote host:# SYSLOGADDR=192.0.2.1Enable and start the
netconsoleservice:# systemctl enable --now netconsole
Verification steps
-
Display the
/var/log/messagesfile on the remote system log server.
Ressources supplémentaires
15.12. Ressources supplémentaires
-
Documentation installed with the
rsyslog-docpackage in the/usr/share/doc/rsyslog/html/index.htmlfile -
rsyslog.conf(5)andrsyslogd(8)man pages - Configuring system logging without journald or with minimized journald usage Knowledgebase article
- Negative effects of the RHEL default logging setup on performance and their mitigations Knowledgebase article
- The Using the Logging System Role chapter
Chapitre 16. Utilisation du rôle de système logging
En tant qu'administrateur système, vous pouvez utiliser le rôle système logging pour configurer un hôte RHEL en tant que serveur de journalisation afin de collecter les journaux de nombreux systèmes clients.
16.1. Le rôle du système logging
Avec le rôle de système logging, vous pouvez déployer des configurations de journalisation sur des hôtes locaux et distants.
Pour appliquer un rôle de système logging à un ou plusieurs systèmes, vous définissez la configuration de la journalisation dans un fichier playbook. Un cahier de lecture est une liste d'un ou plusieurs jeux. Les carnets de lecture sont lisibles par l'homme et sont écrits au format YAML. Pour plus d'informations sur les carnets de lecture, voir Travailler avec des carnets de lecture dans la documentation Ansible.
The set of systems that you want to configure according to the playbook is defined in an inventory file. For more information about creating and using inventories, see How to build your inventory in Ansible documentation.
Les solutions de journalisation offrent plusieurs façons de lire les journaux et plusieurs sorties de journalisation.
Par exemple, un système d'enregistrement peut recevoir les données suivantes :
- les fichiers locaux,
-
systemd/journal, - un autre système d'enregistrement sur le réseau.
En outre, un système d'enregistrement peut avoir les résultats suivants :
-
les journaux stockés dans les fichiers locaux du répertoire
/var/log, - les journaux envoyés à Elasticsearch,
- les journaux transmis à un autre système de journalisation.
Avec le rôle de système logging, vous pouvez combiner les entrées et les sorties en fonction de votre scénario. Par exemple, vous pouvez configurer une solution de journalisation qui stocke les entrées provenant de journal dans un fichier local, tandis que les entrées lues dans les fichiers sont à la fois transmises à un autre système de journalisation et stockées dans les fichiers journaux locaux.
16.2. logging Paramètres du rôle du système
Dans un playbook de rôle système logging, vous définissez les entrées dans le paramètre logging_inputs, les sorties dans le paramètre logging_outputs et les relations entre les entrées et les sorties dans le paramètre logging_flows. Le rôle de système logging traite ces variables avec des options supplémentaires pour configurer le système de journalisation. Vous pouvez également activer le cryptage ou une gestion automatique des ports.
Actuellement, le seul système de journalisation disponible dans le rôle de système logging est Rsyslog.
logging_inputs: Liste des entrées pour la solution d'enregistrement.-
name: Nom unique de l'entrée. Utilisé dans la liste des entréeslogging_flows: et dans le nom du fichier généréconfig. type: Type de l'élément d'entrée. Le type spécifie un type de tâche qui correspond à un nom de répertoire dansroles/rsyslog/{tasks,vars}/inputs/.basics: Entrées configurant les entrées à partir du journalsystemdou de la priseunix.-
kernel_message: Chargerimklogsi la valeur esttrue. La valeur par défaut estfalse. -
use_imuxsock: Utilisezimuxsockau lieu deimjournal.falseest la valeur par défaut. -
ratelimit_burst: Nombre maximal de messages pouvant être émis dans le cadre deratelimit_interval. La valeur par défaut est20000siuse_imuxsockest faux. La valeur par défaut est200siuse_imuxsockest vrai. -
ratelimit_interval: Intervalle pour évaluerratelimit_burst. La valeur par défaut est de 600 secondes siuse_imuxsockest faux. La valeur par défaut est 0 siuse_imuxsockest vrai. 0 indique que la limitation de débit est désactivée. -
persist_state_interval: L'état du journal est conservé tous lesvaluemessages. La valeur par défaut est10et n'est effective que siuse_imuxsockest faux.
-
-
files: Entrées configuration des entrées à partir de fichiers locaux. -
remote: Entrées configurant les entrées de l'autre système d'enregistrement sur le réseau.
-
state: État du fichier de configuration.presentouabsent. La valeur par défaut estpresent.
-
logging_outputs: Liste des sorties pour la solution d'enregistrement.-
files: Sorties configurer les sorties vers des fichiers locaux. -
forwards: Sorties Configuration des sorties vers un autre système d'enregistrement. -
remote_files: Sorties configurer les sorties d'un autre système de journalisation vers des fichiers locaux.
-
logging_flows: Liste des flux qui définissent les relations entrelogging_inputsetlogging_outputs. La variablelogging_flowsa les clés suivantes :-
name: Nom unique du flux -
inputs: Liste des valeurs du nomlogging_inputs -
outputs: Liste des valeurs du nomlogging_outputs.
-
-
logging_manage_firewall: Si la valeur esttrue, la variable utilise le rôlefirewallpour gérer automatiquement l'accès au port à partir du rôlelogging. -
logging_manage_selinux: Si la valeur esttrue, la variable utilise le rôleselinuxpour gérer automatiquement l'accès au port à partir du rôlelogging.
Ressources supplémentaires
-
Documentation installée avec le paquetage
rhel-system-rolesdans/usr/share/ansible/roles/rhel-system-roles.logging/README.html
16.3. Application d'un rôle de système local logging
Préparer et appliquer un playbook Ansible pour configurer une solution de journalisation sur un ensemble de machines distinctes. Chaque machine enregistre les journaux localement.
Conditions préalables
-
Accès et autorisations à un ou plusieurs managed nodes, qui sont des systèmes que vous souhaitez configurer avec le rôle de système
logging. Accès et permissions à un control node, qui est un système à partir duquel Red Hat Ansible Core configure d'autres systèmes.
Sur le nœud de contrôle :
-
Les paquets
ansible-coreetrhel-system-rolessont installés.
-
Les paquets
RHEL 8.0-8.5 provided access to a separate Ansible repository that contains Ansible Engine 2.9 for automation based on Ansible. Ansible Engine contains command-line utilities such as ansible, ansible-playbook, connectors such as docker and podman, and many plugins and modules. For information about how to obtain and install Ansible Engine, see the How to download and install Red Hat Ansible Engine Knowledgebase article.
RHEL 8.6 et 9.0 ont introduit Ansible Core (fourni en tant que paquetage ansible-core ), qui contient les utilitaires de ligne de commande Ansible, les commandes et un petit ensemble de plugins Ansible intégrés. RHEL fournit ce paquetage par l'intermédiaire du dépôt AppStream, et sa prise en charge est limitée. Pour plus d'informations, consultez l'article de la base de connaissances intitulé Scope of support for the Ansible Core package included in the RHEL 9 and RHEL 8.6 and later AppStream repositories (Portée de la prise en charge du package Ansible Core inclus dans les dépôts AppStream RHEL 9 et RHEL 8.6 et versions ultérieures ).
- Un fichier d'inventaire qui répertorie les nœuds gérés.
Il n'est pas nécessaire que le paquet rsyslog soit installé, car le rôle de système installe rsyslog lorsqu'il est déployé.
Procédure
Créez un cahier de jeu qui définit le rôle requis :
Créez un nouveau fichier YAML et ouvrez-le dans un éditeur de texte, par exemple :
# vi logging-playbook.ymlInsérer le contenu suivant :
---
- name: Deploying basics input and implicit files output
  hosts: all
  roles:
    - rhel-system-roles.logging
  vars:
    logging_inputs:
      - name: system_input
        type: basics
    logging_outputs:
      - name: files_output
        type: files
    logging_flows:
      - name: flow1
        inputs: [system_input]
        outputs: [files_output]
Exécuter le manuel de jeu sur un inventaire spécifique :
# ansible-playbook -i inventory-file /path/to/file/logging-playbook.ymlOù ?
-
inventory-fileest le fichier d'inventaire. -
logging-playbook.ymlest le manuel de jeu que vous utilisez.
-
Vérification
Tester la syntaxe du fichier
/etc/rsyslog.conf:# rsyslogd -N 1 rsyslogd: version 8.1911.0-6.el8, config validation run... rsyslogd: End of config validation run. Bye.Vérifiez que le système envoie des messages au journal :
Envoyer un message test :
# logger testConsultez le journal
/var/log/messages, par exemple :# cat /var/log/messages Aug 5 13:48:31 hostname root[6778]: test
Où `hostname` est le nom d'hôte du système client. Notez que le journal contient le nom de l'utilisateur qui a entré la commande de l'enregistreur, dans ce cas
root.
16.4. Filtrage des journaux dans un système local logging Rôle du système
Vous pouvez déployer une solution de journalisation qui filtre les journaux en fonction du filtre basé sur les propriétés rsyslog.
Conditions préalables
-
Accès et autorisations à un ou plusieurs managed nodes, qui sont des systèmes que vous souhaitez configurer avec le rôle de système
logging. Accès et permissions à un control node, qui est un système à partir duquel Red Hat Ansible Core configure d'autres systèmes.
Sur le nœud de contrôle :
- Red Hat Ansible Core est installé
-
Le paquet
rhel-system-rolesest installé - Un fichier d'inventaire qui répertorie les nœuds gérés.
Il n'est pas nécessaire que le paquet rsyslog soit installé, car le rôle de système installe rsyslog lorsqu'il est déployé.
Procédure
Créez un nouveau fichier
playbook.ymlavec le contenu suivant :--- - name: Deploying files input and configured files output hosts: all roles: - linux-system-roles.logging vars: logging_inputs: - name: files_input type: basics logging_outputs: - name: files_output0 type: files property: msg property_op: contains property_value: error path: /var/log/errors.log - name: files_output1 type: files property: msg property_op: "!contains" property_value: error path: /var/log/others.log logging_flows: - name: flow0 inputs: [files_input] outputs: [files_output0, files_output1]Avec cette configuration, tous les messages contenant la chaîne
errorsont enregistrés dans/var/log/errors.log, et tous les autres messages sont enregistrés dans/var/log/others.log.Vous pouvez remplacer la valeur de la propriété
errorpar la chaîne de caractères par laquelle vous souhaitez filtrer.Vous pouvez modifier les variables selon vos préférences.
Facultatif : Vérifier la syntaxe du playbook.
# ansible-playbook --syntax-check playbook.ymlExécutez le playbook sur votre fichier d'inventaire :
# ansible-playbook -i inventory_file /path/to/file/playbook.yml
Vérification
Tester la syntaxe du fichier
/etc/rsyslog.conf:# rsyslogd -N 1 rsyslogd: version 8.1911.0-6.el8, config validation run... rsyslogd: End of config validation run. Bye.Vérifiez que le système envoie au journal les messages contenant la chaîne
error:Envoyer un message test :
# logger errorConsultez le journal
/var/log/errors.log, par exemple :# cat /var/log/errors.log Aug 5 13:48:31 hostname root[6778]: error
Où
hostnameest le nom d'hôte du système client. Notez que le journal contient le nom de l'utilisateur qui a entré la commande logger, dans ce casroot.
Ressources supplémentaires
-
Documentation installée avec le paquetage
rhel-system-rolesdans/usr/share/ansible/roles/rhel-system-roles.logging/README.html
16.5. Application d'une solution de journalisation à distance à l'aide du rôle de système logging
Suivez ces étapes pour préparer et appliquer un playbook Red Hat Ansible Core afin de configurer une solution de journalisation à distance. Dans ce livre de jeu, un ou plusieurs clients récupèrent les journaux de systemd-journal et les transmettent à un serveur distant. Le serveur reçoit des entrées distantes de remote_rsyslog et remote_files et émet les journaux vers des fichiers locaux dans des répertoires nommés par des noms d'hôtes distants.
Conditions préalables
-
Accès et autorisations à un ou plusieurs managed nodes, qui sont des systèmes que vous souhaitez configurer avec le rôle de système
logging. Accès et permissions à un control node, qui est un système à partir duquel Red Hat Ansible Core configure d'autres systèmes.
Sur le nœud de contrôle :
-
Les paquets
ansible-coreetrhel-system-rolessont installés. - Un fichier d'inventaire qui répertorie les nœuds gérés.
-
Les paquets
Il n'est pas nécessaire que le paquet rsyslog soit installé, car le rôle de système installe rsyslog lorsqu'il est déployé.
Procédure
Créez un cahier de jeu qui définit le rôle requis :
Créez un nouveau fichier YAML et ouvrez-le dans un éditeur de texte, par exemple :
# vi logging-playbook.ymlInsérez le contenu suivant dans le fichier :
---
- name: Deploying remote input and remote_files output
  hosts: server
  roles:
    - rhel-system-roles.logging
  vars:
    logging_inputs:
      - name: remote_udp_input
        type: remote
        udp_ports: [ 601 ]
      - name: remote_tcp_input
        type: remote
        tcp_ports: [ 601 ]
    logging_outputs:
      - name: remote_files_output
        type: remote_files
    logging_flows:
      - name: flow_0
        inputs: [remote_udp_input, remote_tcp_input]
        outputs: [remote_files_output]

- name: Deploying basics input and forwards output
  hosts: clients
  roles:
    - rhel-system-roles.logging
  vars:
    logging_inputs:
      - name: basic_input
        type: basics
    logging_outputs:
      - name: forward_output0
        type: forwards
        severity: info
        target: _host1.example.com_
        udp_port: 601
      - name: forward_output1
        type: forwards
        facility: mail
        target: _host1.example.com_
        tcp_port: 601
    logging_flows:
      - name: flows0
        inputs: [basic_input]
        outputs: [forward_output0, forward_output1]

[basic_input]
[forward_output0, forward_output1]
Où
host1.example.comest le serveur de journalisation.NoteVous pouvez modifier les paramètres du cahier de jeu en fonction de vos besoins.
AvertissementLa solution de journalisation ne fonctionne qu'avec les ports définis dans la politique SELinux du serveur ou du système client et ouverts dans le pare-feu. La stratégie SELinux par défaut inclut les ports 601, 514, 6514, 10514 et 20514. Pour utiliser un autre port, modifiez la stratégie SELinux sur les systèmes client et serveur.
Créez un fichier d'inventaire qui répertorie vos serveurs et vos clients :
Créez un nouveau fichier et ouvrez-le dans un éditeur de texte, par exemple :
# vi inventory.iniInsérez le contenu suivant dans le fichier d'inventaire :
[servers]
server ansible_host=host1.example.com
[clients]
client ansible_host=host2.example.com
Où ?
-
host1.example.comest le serveur de journalisation. -
host2.example.comest le client de journalisation.
-
Exécutez le manuel de jeu sur votre inventaire.
# ansible-playbook -i /path/to/file/inventory.ini /path/to/file/_logging-playbook.ymlOù ?
-
inventory.iniest le fichier d'inventaire. -
logging-playbook.ymlest le cahier de jeu que vous avez créé.
-
Vérification
Sur le système client et le système serveur, testez la syntaxe du fichier
/etc/rsyslog.conf:# rsyslogd -N 1 rsyslogd: version 8.1911.0-6.el8, config validation run (level 1), master config /etc/rsyslog.conf rsyslogd: End of config validation run. Bye.Vérifiez que le système client envoie des messages au serveur :
Sur le système client, envoyez un message de test :
# logger testSur le système serveur, affichez le journal
/var/log/messages, par exemple :# cat /var/log/messages Aug 5 13:48:31 host2.example.com root[6778]: test
Où
host2.example.comest le nom d'hôte du système client. Notez que le journal contient le nom de l'utilisateur qui a entré la commande logger, dans ce casroot.
Ressources supplémentaires
- Préparation d'un nœud de contrôle et de nœuds gérés à l'utilisation des rôles système RHEL
-
Documentation installée avec le paquetage
rhel-system-rolesdans/usr/share/ansible/roles/rhel-system-roles.logging/README.html - Article de la base de données RHEL System Roles
16.6. Utilisation du rôle de système logging avec TLS
Transport Layer Security (TLS) is a cryptographic protocol designed to allow secure communication over the computer network.
As an administrator, you can use the logging RHEL System Role to configure a secure transfer of logs using Red Hat Ansible Automation Platform.
16.6.1. Configuration de la journalisation des clients avec TLS
You can use an Ansible playbook with the logging System Role to configure logging on RHEL clients and transfer logs to a remote logging system using TLS encryption.
This procedure creates a private key and certificate, and configures TLS on all hosts in the clients group in the Ansible inventory. The TLS protocol encrypts the message transmission for secure transfer of logs over the network.
You do not have to call the certificate System Role in the playbook to create the certificate. The logging System Role calls it automatically.
In order for the CA to be able to sign the created certificate, the managed nodes must be enrolled in an IdM domain.
Conditions préalables
- Vous disposez d'autorisations pour exécuter des playbooks sur les nœuds gérés sur lesquels vous souhaitez configurer TLS.
- Les nœuds gérés sont répertoriés dans le fichier d'inventaire du nœud de contrôle.
-
Les paquets
ansibleetrhel-system-rolessont installés sur le nœud de contrôle. - The managed nodes are enrolled in an IdM domain.
Procédure
Créer un fichier
playbook.ymlavec le contenu suivant :--- - name: Deploying files input and forwards output with certs hosts: clients roles: - rhel-system-roles.logging vars: logging_certificates: - name: logging_cert dns: ['localhost', 'www.example.com'] ca: ipa logging_pki_files: - ca_cert: /local/path/to/ca_cert.pem cert: /local/path/to/logging_cert.pem private_key: /local/path/to/logging_cert.pem logging_inputs: - name: input_name type: files input_log_path: /var/log/containers/*.log logging_outputs: - name: output_name type: forwards target: your_target_host tcp_port: 514 tls: true pki_authmode: x509/name permitted_server: 'server.example.com' logging_flows: - name: flow_name inputs: [input_name] outputs: [output_name]Le playbook utilise les paramètres suivants :
logging_certificates-
The value of this parameter is passed on to
certificate_requestsin thecertificaterole and used to create a private key and certificate. logging_pki_filesUsing this parameter, you can configure the paths and other settings that logging uses to find the CA, certificate, and key files used for TLS, specified with one or more of the following sub-parameters:
ca_cert,ca_cert_src,cert,cert_src,private_key,private_key_src, andtls.NoteIf you are using
logging_certificatesto create the files on the target node, do not useca_cert_src,cert_src, andprivate_key_src, which are used to copy files not created bylogging_certificates.ca_cert-
Represents the path to the CA certificate file on the target node. Default path is
/etc/pki/tls/certs/ca.pemand the file name is set by the user. cert-
Represents the path to the certificate file on the target node. Default path is
/etc/pki/tls/certs/server-cert.pemand the file name is set by the user. private_key-
Represents the path to the private key file on the target node. Default path is
/etc/pki/tls/private/server-key.pemand the file name is set by the user. ca_cert_src-
Represents the path to the CA certificate file on the control node which is copied to the target host to the location specified by
ca_cert. Do not use this if usinglogging_certificates. cert_src-
Represents the path to a certificate file on the control node which is copied to the target host to the location specified by
cert. Do not use this if usinglogging_certificates. private_key_src-
Represents the path to a private key file on the control node which is copied to the target host to the location specified by
private_key. Do not use this if usinglogging_certificates. tls-
Setting this parameter to
trueensures secure transfer of logs over the network. If you do not want a secure wrapper, you can settls: false.
Vérifier la syntaxe du playbook :
# ansible-playbook --syntax-check playbook.ymlExécutez le playbook sur votre fichier d'inventaire :
# ansible-playbook -i inventory_file playbook.yml
Ressources supplémentaires
16.6.2. Configuration de la journalisation du serveur avec TLS
You can use an Ansible playbook with the logging System Role to configure logging on RHEL servers and set them to receive logs from a remote logging system using TLS encryption.
This procedure creates a private key and certificate, and configures TLS on all hosts in the server group in the Ansible inventory.
You do not have to call the certificate System Role in the playbook to create the certificate. The logging System Role calls it automatically.
In order for the CA to be able to sign the created certificate, the managed nodes must be enrolled in an IdM domain.
Conditions préalables
- Vous disposez d'autorisations pour exécuter des playbooks sur les nœuds gérés sur lesquels vous souhaitez configurer TLS.
- Les nœuds gérés sont répertoriés dans le fichier d'inventaire du nœud de contrôle.
-
Les paquets
ansibleetrhel-system-rolessont installés sur le nœud de contrôle. - The managed nodes are enrolled in an IdM domain.
Procédure
Créer un fichier
playbook.ymlavec le contenu suivant :--- - name: Deploying remote input and remote_files output with certs hosts: server roles: - rhel-system-roles.logging vars: logging_certificates: - name: logging_cert dns: ['localhost', 'www.example.com'] ca: ipa logging_pki_files: - ca_cert: /local/path/to/ca_cert.pem cert: /local/path/to/logging_cert.pem private_key: /local/path/to/logging_cert.pem logging_inputs: - name: input_name type: remote tcp_ports: 514 tls: true permitted_clients: ['clients.example.com'] logging_outputs: - name: output_name type: remote_files remote_log_path: /var/log/remote/%FROMHOST%/%PROGRAMNAME:::secpath-replace%.log async_writing: true client_count: 20 io_buffer_size: 8192 logging_flows: - name: flow_name inputs: [input_name] outputs: [output_name]Le playbook utilise les paramètres suivants :
logging_certificates-
The value of this parameter is passed on to
certificate_requestsin thecertificaterole and used to create a private key and certificate. logging_pki_filesUsing this parameter, you can configure the paths and other settings that logging uses to find the CA, certificate, and key files used for TLS, specified with one or more of the following sub-parameters:
ca_cert,ca_cert_src,cert,cert_src,private_key,private_key_src, andtls.NoteIf you are using
logging_certificatesto create the files on the target node, do not useca_cert_src,cert_src, andprivate_key_src, which are used to copy files not created bylogging_certificates.ca_cert-
Represents the path to the CA certificate file on the target node. Default path is
/etc/pki/tls/certs/ca.pemand the file name is set by the user. cert-
Represents the path to the certificate file on the target node. Default path is
/etc/pki/tls/certs/server-cert.pemand the file name is set by the user. private_key-
Represents the path to the private key file on the target node. Default path is
/etc/pki/tls/private/server-key.pemand the file name is set by the user. ca_cert_src-
Represents the path to the CA certificate file on the control node which is copied to the target host to the location specified by
ca_cert. Do not use this if usinglogging_certificates. cert_src-
Represents the path to a certificate file on the control node which is copied to the target host to the location specified by
cert. Do not use this if usinglogging_certificates. private_key_src-
Represents the path to a private key file on the control node which is copied to the target host to the location specified by
private_key. Do not use this if usinglogging_certificates. tls-
Setting this parameter to
trueensures secure transfer of logs over the network. If you do not want a secure wrapper, you can settls: false.
Vérifier la syntaxe du playbook :
# ansible-playbook --syntax-check playbook.ymlExécutez le playbook sur votre fichier d'inventaire :
# ansible-playbook -i inventory_file playbook.yml
Ressources supplémentaires
16.7. Utilisation des rôles du système logging avec RELP
Reliable Event Logging Protocol (RELP) est un protocole de réseau pour l'enregistrement de données et de messages sur le réseau TCP. Il garantit une livraison fiable des messages d'événements et vous pouvez l'utiliser dans des environnements qui ne tolèrent aucune perte de message.
L'émetteur de RELP transfère les entrées de journal sous forme de commandes et le récepteur les accuse réception une fois qu'elles ont été traitées. Pour garantir la cohérence, le RELP enregistre le numéro de transaction de chaque commande transférée afin de permettre la récupération de tout type de message.
Vous pouvez envisager un système de journalisation à distance entre le client RELP et le serveur RELP. Le client RELP transfère les journaux vers le système de journalisation distant et le serveur RELP reçoit tous les journaux envoyés par le système de journalisation distant.
Les administrateurs peuvent utiliser le rôle de système logging pour configurer le système de journalisation afin qu'il envoie et reçoive des entrées de journal de manière fiable.
16.7.1. Configuration de la journalisation des clients avec RELP
Vous pouvez utiliser le rôle de système logging pour configurer la journalisation dans les systèmes RHEL qui sont journalisés sur une machine locale et peuvent transférer les journaux vers le système de journalisation distant avec RELP en exécutant un livre de jeu Ansible.
Cette procédure configure RELP sur tous les hôtes du groupe clients dans l'inventaire Ansible. La configuration de RELP utilise Transport Layer Security (TLS) pour crypter la transmission des messages afin de sécuriser le transfert des journaux sur le réseau.
Conditions préalables
- Vous avez le droit d'exécuter des playbooks sur les nœuds gérés sur lesquels vous souhaitez configurer RELP.
- Les nœuds gérés sont répertoriés dans le fichier d'inventaire du nœud de contrôle.
-
Les paquets
ansibleetrhel-system-rolessont installés sur le nœud de contrôle.
Procédure
Créer un fichier
playbook.ymlavec le contenu suivant :--- - name: Deploying basic input and relp output hosts: clients roles: - rhel-system-roles.logging vars: logging_inputs: - name: basic_input type: basics logging_outputs: - name: relp_client type: relp target: _logging.server.com_ port: 20514 tls: true ca_cert: _/etc/pki/tls/certs/ca.pem_ cert: _/etc/pki/tls/certs/client-cert.pem_ private_key: _/etc/pki/tls/private/client-key.pem_ pki_authmode: name permitted_servers: - '*.server.example.com' logging_flows: - name: _example_flow_ inputs: [basic_input] outputs: [relp_client]Les playbooks utilisent les paramètres suivants :
-
target: Il s'agit d'un paramètre obligatoire qui spécifie le nom de l'hôte où le système d'enregistrement à distance est exécuté. -
port: Numéro de port que le système d'enregistrement à distance écoute. tls: Assure un transfert sécurisé des journaux sur le réseau. Si vous ne voulez pas d'enveloppe sécurisée, vous pouvez fixer la variabletlsàfalse. Par défaut, le paramètretlsest fixé à true lorsque vous travaillez avec RELP et nécessite des clés/certificats et des triplets {ca_cert,cert,private_key} et/ou {ca_cert_src,cert_src,private_key_src}.-
Si le triplet {
ca_cert_src,cert_src,private_key_src} est défini, les emplacements par défaut/etc/pki/tls/certset/etc/pki/tls/privatesont utilisés comme destination sur le nœud géré pour transférer des fichiers depuis le nœud de contrôle. Dans ce cas, les noms de fichiers sont identiques aux noms originaux dans le triplet -
Si le triplet {
ca_cert,cert,private_key} est défini, les fichiers sont censés se trouver sur le chemin par défaut avant la configuration de l'enregistrement. - Si les deux triplets sont activés, les fichiers sont transférés du chemin local du nœud de contrôle au chemin spécifique du nœud géré.
-
Si le triplet {
-
ca_cert: Représente le chemin d'accès au certificat de l'autorité de certification. Le chemin par défaut est/etc/pki/tls/certs/ca.pemet le nom du fichier est défini par l'utilisateur. -
cert: Représente le chemin d'accès au certificat. Le chemin par défaut est/etc/pki/tls/certs/server-cert.pemet le nom du fichier est défini par l'utilisateur. -
private_key: Représente le chemin d'accès à la clé privée. Le chemin par défaut est/etc/pki/tls/private/server-key.pemet le nom du fichier est défini par l'utilisateur. -
ca_cert_src: Représente le chemin d'accès au fichier CA cert local qui est copié sur l'hôte cible. Si ca_cert est spécifié, il est copié à cet emplacement. -
cert_src: Représente le chemin d'accès au fichier local cert qui est copié sur l'hôte cible. Si cert est spécifié, il est copié à l'emplacement. -
private_key_src: Représente le chemin d'accès au fichier de la clé locale qui est copié sur l'hôte cible. Si la clé privée est spécifiée, elle est copiée à cet emplacement. -
pki_authmode: Accepte le mode d'authentificationnameoufingerprint. -
permitted_servers: Liste des serveurs qui seront autorisés par le client de journalisation à se connecter et à envoyer des journaux via TLS. -
inputs: Liste des dictionnaires d'entrée de la journalisation. -
outputs: Liste des dictionnaires de sortie de la journalisation.
-
Facultatif : Vérifier la syntaxe du playbook.
# ansible-playbook --syntax-check playbook.ymlExécutez le manuel de jeu :
# ansible-playbook -i inventory_file playbook.yml
16.7.2. Configuration de la journalisation du serveur avec RELP
Vous pouvez utiliser le rôle de système logging pour configurer la journalisation dans les systèmes RHEL en tant que serveur et recevoir les journaux du système de journalisation distant avec RELP en exécutant un livre de jeu Ansible.
Cette procédure configure RELP sur tous les hôtes du groupe server dans l'inventaire Ansible. La configuration de RELP utilise TLS pour chiffrer la transmission des messages afin de sécuriser le transfert des journaux sur le réseau.
Conditions préalables
- Vous avez le droit d'exécuter des playbooks sur les nœuds gérés sur lesquels vous souhaitez configurer RELP.
- Les nœuds gérés sont répertoriés dans le fichier d'inventaire du nœud de contrôle.
-
Les paquets
ansibleetrhel-system-rolessont installés sur le nœud de contrôle.
Procédure
Créer un fichier
playbook.ymlavec le contenu suivant :--- - name: Deploying remote input and remote_files output hosts: server roles: - rhel-system-roles.logging vars: logging_inputs: - name: relp_server type: relp port: 20514 tls: true ca_cert: _/etc/pki/tls/certs/ca.pem_ cert: _/etc/pki/tls/certs/server-cert.pem_ private_key: _/etc/pki/tls/private/server-key.pem_ pki_authmode: name permitted_clients: - '_*example.client.com_' logging_outputs: - name: _remote_files_output_ type: _remote_files_ logging_flows: - name: _example_flow_ inputs: _relp_server_ outputs: _remote_files_output_Les playbooks utilisent les paramètres suivants :
-
port: Numéro de port que le système d'enregistrement à distance écoute. tls: Assure un transfert sécurisé des journaux sur le réseau. Si vous ne voulez pas d'enveloppe sécurisée, vous pouvez fixer la variabletlsàfalse. Par défaut, le paramètretlsest fixé à true lorsque vous travaillez avec RELP et nécessite des clés/certificats et des triplets {ca_cert,cert,private_key} et/ou {ca_cert_src,cert_src,private_key_src}.-
Si le triplet {
ca_cert_src,cert_src,private_key_src} est défini, les emplacements par défaut/etc/pki/tls/certset/etc/pki/tls/privatesont utilisés comme destination sur le nœud géré pour transférer des fichiers depuis le nœud de contrôle. Dans ce cas, les noms de fichiers sont identiques aux noms originaux dans le triplet -
Si le triplet {
ca_cert,cert,private_key} est défini, les fichiers sont censés se trouver sur le chemin par défaut avant la configuration de l'enregistrement. - Si les deux triplets sont activés, les fichiers sont transférés du chemin local du nœud de contrôle au chemin spécifique du nœud géré.
-
Si le triplet {
-
ca_cert: Représente le chemin d'accès au certificat de l'autorité de certification. Le chemin par défaut est/etc/pki/tls/certs/ca.pemet le nom du fichier est défini par l'utilisateur. -
cert: Représente le chemin d'accès au certificat. Le chemin par défaut est/etc/pki/tls/certs/server-cert.pemet le nom du fichier est défini par l'utilisateur. -
private_key: Représente le chemin d'accès à la clé privée. Le chemin par défaut est/etc/pki/tls/private/server-key.pemet le nom du fichier est défini par l'utilisateur. -
ca_cert_src: Représente le chemin d'accès au fichier CA cert local qui est copié sur l'hôte cible. Si ca_cert est spécifié, il est copié à cet emplacement. -
cert_src: Représente le chemin d'accès au fichier local cert qui est copié sur l'hôte cible. Si cert est spécifié, il est copié à l'emplacement. -
private_key_src: Représente le chemin d'accès au fichier de la clé locale qui est copié sur l'hôte cible. Si la clé privée est spécifiée, elle est copiée à cet emplacement. -
pki_authmode: Accepte le mode d'authentificationnameoufingerprint. -
permitted_clients: Liste des clients qui seront autorisés par le serveur de journalisation à se connecter et à envoyer des journaux via TLS. -
inputs: Liste des dictionnaires d'entrée de la journalisation. -
outputs: Liste des dictionnaires de sortie de la journalisation.
-
Facultatif : Vérifier la syntaxe du playbook.
# ansible-playbook --syntax-check playbook.ymlExécutez le manuel de jeu :
# ansible-playbook -i inventory_file playbook.yml
16.8. Ressources supplémentaires
- Préparation d'un nœud de contrôle et de nœuds gérés à l'utilisation des rôles système RHEL
-
Documentation installée avec le paquetage
rhel-system-rolesdans/usr/share/ansible/roles/rhel-system-roles.logging/README.html. - Rôles du système RHEL
-
ansible-playbook(1)page de manuel.